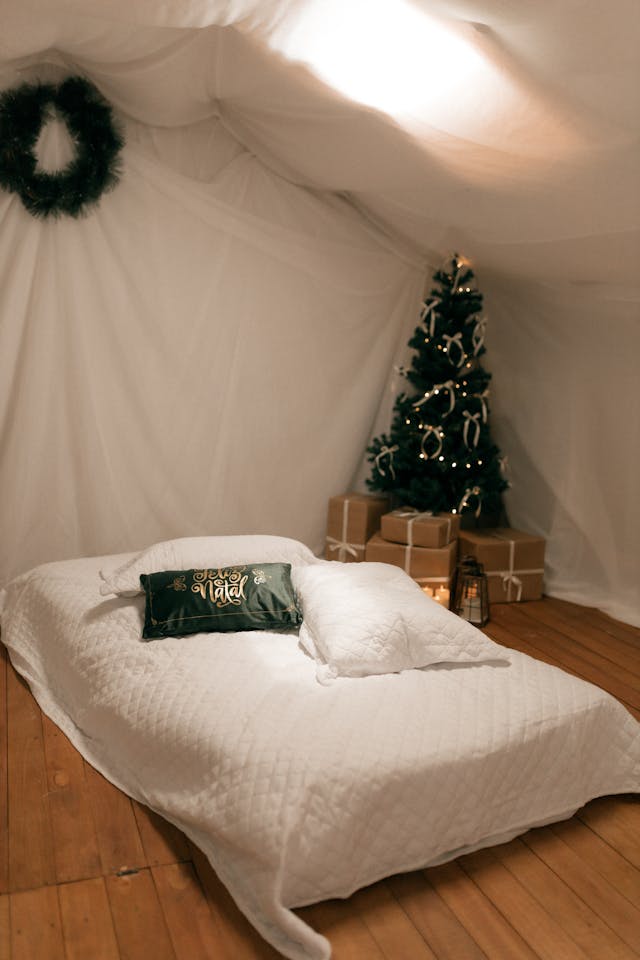
DIY Bed Frames
Want a bedroom centerpiece that reflects your personality and saves on cost? Building your own DIY Bed Frames is a fulfilling weekend project, offering customization, skill‑building, and a sense of personal pride.
Key Takeaways
- Building DIY Bed Frames can cost 30–50% less than retail options.
- You have full control over style, size, and functionality.
- Essential steps include planning, selecting lumber, joinery, assembly, finishing, and custom touches.
- Perfect for DIY beginners and seasoned woodworkers alike.
- Integrate tips from Cozy Bed Quarters’ guide on sturdy DIY bed frames for extra strength and durability.
Why Choose DIY Bed Frames?
There’s something truly special about sleeping on furniture you’ve crafted yourself. Building DIY Bed Frames not only saves money—often 30–50% compared to store‑bought options—it also allows you to:
- Customize with intention: tailor dimensions, color, storage features, or headboard style to your space and aesthetic.
- Learn new skills: mastering wood joinery, finishing techniques, and layout planning builds confidence and craftsmanship.
- Create a signature piece: your bed won’t just be furniture—it’ll be a statement.
Popular Styles & Sizes
1. Platform Bed Frame
A sleek, minimalist option that eliminates the need for a box spring. Typically uses plywood or wood slats. This design fits clean Scandinavian or modern aesthetics.
2. Raised Platform with Under‑Bed Storage
Adding height creates space for bins, baskets, or drawers underneath—perfect for small spaces or shared bedrooms.
3. Custom‑Sized Frames
Need a specific size? Build for full, queen, king—or even a custom toddler loft bed. See our post on creative DIY bed frame projects for more ideas.
Materials & Tools You’ll Need
- Lumber: Douglas fir for rustic charm or Southern Yellow Pine for affordability and ease of use.
- Plywood or bed slats: Choose 5/8″–3/4″ furniture-grade plywood.
- Connectors: Heavy‑duty brackets or pocket screws.
- Fasteners: 2.5–3″ deck screws, wood glue, wood filler/putty.
- Tools: Circular saw, drill/driver, clamps, square, tape measure, sander, chisel.
Step‑by‑Step Assembly Guide
- Design and measure according to mattress size and storage needs.
- Cut lumber to fit the layout using a circular saw or table saw.
- Join pieces with pocket holes or brackets (learn more in our DIY bed frame building tips).
- Clamp, glue, and screw everything together securely.
- Sand all surfaces thoroughly and apply your desired finish.
- Finish with custom add-ons—headboards, lighting, or drawer units.
Customizing & Finishing
Sand the entire piece, working from coarse to fine grit. Apply non-toxic stain, natural oils, or low‑VOC paint. Add fabric accents or recycled decor. For reuse ideas, check out how to upcycle and refresh your existing bed frame.
Helpful External Resources
- A Piece of Rainbow: DIY Bed Frame with Headboard
- The Spruce: Complete DIY Bed Frame Guide
- Home Depot: How to Build a Wooden Bed Frame
Final Thoughts
DIY Bed Frames combine personal creativity, functionality, and affordability. Whether you’re working with reclaimed wood or brand-new boards, your finished piece will be something to be proud of—crafted by hand and made for restful nights.
FAQ
- Where should I start with a DIY bed frame?
- Check out our beginner-friendly DIY project ideas and gather your tools and materials.
- What wood should I use?
- We recommend Douglas Fir or Southern Yellow Pine—read more in our materials guide.
- Can I reuse old bed frame parts?
- Absolutely! Our article on upcycling and refreshing your bed frame has creative reuse ideas.