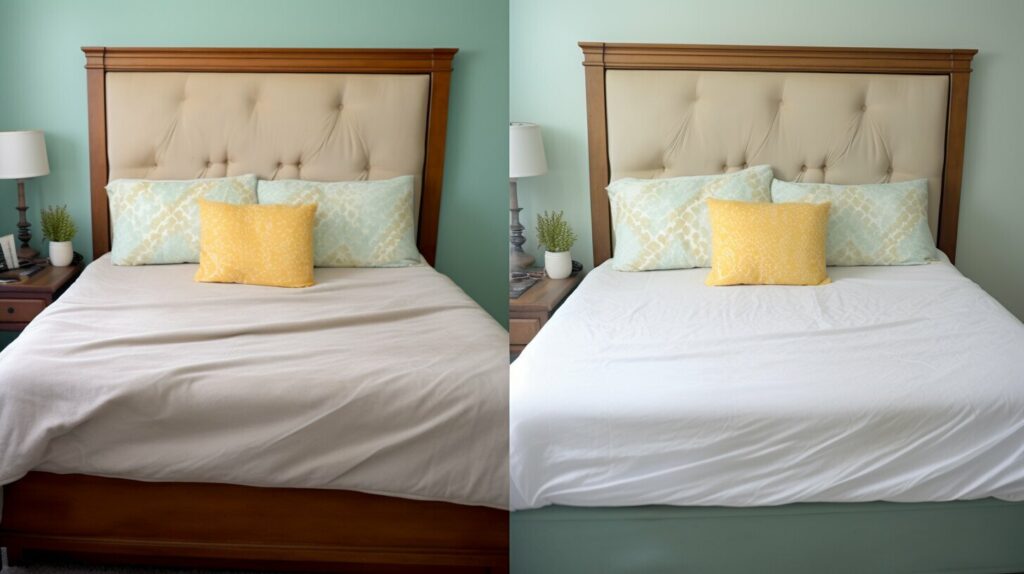
Are you looking to update your existing bed frame without breaking the bank? Upcycling and refreshing your bed frame is an excellent way to give your bedroom a new look and contribute to sustainable living. By reupholstering your bed frame with new fabric, you can completely transform its appearance and create a unique piece of furniture.
If you’re ready to embark on this DIY project, start by choosing a thick upholstery fabric that is resistant to tearing and easy to clean. This will ensure that your newly refreshed bed frame stands the test of time. Measure the dimensions of your bed frame and add extra fabric for wrapping and securing. This way, you’ll have enough material to cover the entire frame and achieve a seamless finish.
Using a pro staple gun, attach the fabric to the back of the headboard, pulling it taut to create a smooth surface. This step is crucial for achieving a polished look. You’ll then fold and staple the fabric on the sides and base of the frame, ensuring every surface is covered.
During the process, it’s helpful to take photos of the disassembled bed frame. This will assist you when it’s time to reassemble the pieces. Once you’ve wrapped and secured the fabric, rebuild your bed frame and enjoy the refreshed and updated look it brings to your bedroom.
Key Takeaways:
- Upcycling and refreshing your bed frame is a budget-friendly way to give your bedroom a new look.
- Choosing the right upholstery fabric is crucial for durability and easy maintenance.
- Measure your bed frame accurately and add extra fabric for wrapping and securing.
- Use a pro staple gun to attach the fabric, ensuring a smooth and seamless finish.
- Take photos of the disassembled bed frame to help with the reassembly process.
Choosing the Right Upholstery Fabric
Before you embark on your upcycling journey, it’s essential to choose the right upholstery fabric that complements your style and desired outcome. The fabric you select will not only determine the overall look of your upcycled bed frame but also its durability and ease of maintenance. Here are some factors to consider when choosing upholstery fabric for your project:
- Style and Aesthetic: Think about the overall style and aesthetic you want to achieve in your bedroom. Do you prefer a modern and minimalistic look or a cozy and rustic feel? Consider the color, pattern, and texture of the fabric to ensure it aligns with your vision.
- Material and Durability: Look for fabrics that are durable and resistant to wear and tear. Upholstery fabrics made from natural fibers like cotton or linen are generally a good choice. They are breathable, easy to clean, and can withstand everyday use. Alternatively, synthetic fabrics like polyester can offer greater stain resistance and durability.
- Usage and Maintenance: Consider how often you will be using your bed and the level of maintenance you are willing to put into it. If you have pets or children, you may want to choose a fabric that is stain-resistant and easy to clean. Fabrics with a high rub count (indicating durability) and a protective finish can help prolong the lifespan of your bed frame.
Remember to also take into account the existing colors and furniture in your bedroom to ensure that the fabric you choose harmonizes with the overall design. Don’t be afraid to experiment with different patterns or textures to add visual interest and personality to your bed frame.
By carefully selecting the right upholstery fabric, you can breathe new life into your bed frame and create a unique piece that reflects your personal style.
Reclaimed wood is a popular choice for repurposing bed frames due to its unique character and sustainability. Here are some benefits of using reclaimed wood for your upcycling project:
- Eco-Friendly: By using reclaimed wood, you are reducing the demand for new timber and minimizing deforestation. This helps conserve natural resources and reduce carbon emissions associated with the production of new wood furniture.
- Distinctive and Rustic Look: Reclaimed wood carries history and character, often exhibiting unique textures, colors, and imperfections. This adds a rustic charm and distinctive look to your bed frame, making it a focal point in your bedroom.
- Durability and Longevity: Reclaimed wood is typically sourced from old structures such as barns or factories, where the wood has already undergone years of exposure to the elements. This makes it durable and less susceptible to warping or cracking compared to new wood.
- Customization and Personalization: Reclaimed wood can be easily customized to fit your desired bed frame design. Whether you prefer a sleek and modern look or a vintage and weathered appearance, reclaimed wood offers versatility for your creative ideas.
When working with reclaimed wood, keep in mind that it may require some extra preparation and care due to its age and previous use. Sanding, sealing, and proper maintenance will help preserve its beauty and extend its lifespan.
Additional tip |
---|
|
Whether you choose to repurpose your bed frame with reclaimed wood or opt for a different upholstery fabric, the key is to let your creativity shine and create a unique piece that transforms your bedroom into a personalized sanctuary.
Measuring and Preparing the Bed Frame
To ensure a successful upcycling project, it’s crucial to take accurate measurements of your bed frame and prepare it properly for the transformation. Here are some steps to guide you through this process:
- Start by dismantling the bed frame, carefully removing the mattress and any existing upholstery. Take photos of each step to assist with the reassembly later.
- Using a tape measure, measure the dimensions of the headboard, footboard, and side rails of the bed frame. Make note of these measurements and add a few extra inches to account for wrapping and securing the fabric.
- Inspect the condition of the frame and make any necessary repairs or modifications. This may include tightening loose screws, sanding rough edges, or replacing worn-out parts.
- Clean the frame thoroughly to remove any dirt or dust that may interfere with the adhesion of the fabric. Use a mild cleaner and a soft cloth to avoid damaging the surface.
Once you’ve measured and prepared the bed frame, you’re ready to move on to the next steps of the upcycling process. By taking the time to ensure accurate measurements and proper preparation, you’ll be setting yourself up for a successful and satisfying DIY project.
Table: Bed Frame Measurements
Component | Dimensions |
---|---|
Headboard | ___ inches |
Footboard | ___ inches |
Side Rails | ___ inches |
“Measure twice, cut once.” – Unknown
Remember, accuracy is key when measuring your bed frame for upcycling. Taking the time to properly prepare the frame will ensure a seamless transformation and a finished product that fits perfectly in your bedroom. Now that you’ve completed this step, let’s move on to reupholstering the headboard and giving your bed frame a brand new look!
The headboard is the centerpiece of your bed frame, and reupholstering it can instantly elevate the look of your bedroom. Here’s how you can do it yourself.
To start, gather the necessary materials. You will need a thick upholstery fabric that matches your desired style and color scheme. Measure the dimensions of your headboard and add a few extra inches on each side to ensure proper coverage.
Next, remove any existing fabric or padding from the headboard. This may require using a staple remover or scissors. Once the headboard is bare, lay the new fabric on a flat surface and position the headboard on top.
Using a pro staple gun, begin attaching the fabric to the back of the headboard. Start in the center and work your way towards the edges, pulling the fabric taut as you go. Be sure to staple close to the edge of the headboard to ensure a secure hold.
Once the fabric is securely attached, trim any excess from the edges. As a final touch, consider adding decorative elements such as buttons or tufting to create a more customized look. With the reupholstering process complete, your bed frame will have a fresh, updated appearance that reflects your personal style.
Materials | Quantity |
---|---|
Thick upholstery fabric | 1 |
Staple gun | 1 |
Staples | As needed |
Scissors | 1 |
Decorative elements (optional) | As desired |
Wrapping and Securing the Fabric
Now that you have covered the headboard with your chosen fabric, it’s time to wrap and secure it to achieve a professional and polished look. Start by folding the fabric tightly around the back of the headboard, making sure to pull it taut to avoid any wrinkles or creases. Use a pro staple gun to secure the fabric in place, placing staples along the edges and corners of the headboard. Be sure to space the staples evenly for a neat and clean finish.
Next, move on to the sides and base of the bed frame. Pull the fabric tightly around the frame, folding and stapling it on the inside to keep the staples hidden. Take your time to check for any loose spots or excess fabric, making adjustments as needed. Remember, the key to a professional finish is a smooth and wrinkle-free upholstery.
As you work your way around the frame, take special care in the corners. Fold the fabric neatly and staple it securely, ensuring that the corners are crisp and well-defined. You can use a combination of folding, tucking, and stapling to achieve the desired look. Take a step back and inspect your work, making any necessary adjustments before moving on to the next step.
Key Points: |
---|
1. Fold and staple the fabric tightly around the back of the headboard. |
2. Secure the fabric along the sides and base of the bed frame, hiding the staples on the inside. |
3. Pay attention to the corners, folding and stapling the fabric neatly for a professional finish. |
“Upcycling your bed frame with new fabric is a great way to refresh your bedroom and create a sustainable and eco-friendly furniture piece.”
Pro Tip:
If you’re new to upholstery, it’s a good idea to practice on a small piece of fabric before tackling your bed frame. This will help you get a feel for the stapling technique and ensure that you’re comfortable with the process. Remember, patience and attention to detail are key to achieving a professional and polished result.
Folding and Stapling the Fabric
To complete the transformation of your bed frame, it’s crucial to fold and staple the fabric securely, creating a cohesive and aesthetically pleasing look. Following these step-by-step instructions, you’ll be able to achieve professional results that will make your bed frame stand out in your bedroom.
- Start by folding the excess fabric on the sides of the headboard towards the back. This will create a clean and neat edge. Use a staple gun to secure the fabric in place, making sure to pull it snugly for a smooth finish.
- Continue folding and stapling the fabric on both sides, working your way down until you reach the base of the bed frame. Take your time to ensure the fabric is wrinkle-free and taut.
- Once you’ve completed the sides, fold the fabric at the base of the bed frame and staple it securely. This will give your bed frame a finished and polished look.
Remember to use a pro staple gun for better results and to ensure the fabric stays in place for years to come. Take a moment to step back and admire your handiwork. You’ve successfully transformed your bed frame into a unique piece that reflects your personal style.
Expert Tip:
If you want to give your bed frame a vintage makeover, consider using reclaimed wood as a decorative accent. Measure and cut the wood pieces to size, then attach them to the headboard and sides of the frame using screws or nails. This will add a rustic and charming touch to your upcycled bed frame.
Benefits of Folding and Stapling the Fabric |
---|
Creates a smooth and polished finish. |
Secures the fabric in place for long-lasting durability. |
Allows for easy removal and cleaning of the fabric if necessary. |
Provides a professional look, even for DIY projects. |
Reassembling the Bed Frame
With the upholstery complete, it’s time to put your bed frame back together. Follow these instructions to ensure a seamless and sturdy reassembly.
1. Start by referring to the photos you took during the disassembly process. This will help you remember the exact placement of each piece and avoid any confusion. Lay out all the components in a clear and organized manner, making it easy to identify and assemble them.
2. Begin by reconnecting the side rails to the headboard and footboard. Align the holes in the rails with the corresponding holes in the boards and insert the bolts. Use a wrench or Allen key to tighten the bolts securely, ensuring a stable and strong connection.
3. Once the side rails are attached, it’s time to add the support slats. Place them evenly across the frame, ensuring they are properly aligned and centered. Depending on your bed frame design, you may need to screw or slide the slats into place. Refer to the manufacturer’s instructions for specific guidance.
4. Finally, secure the center support beam if your bed frame has one. This beam adds extra stability and prevents sagging over time. Position it in the center of the frame and attach it using the designated hardware or brackets.
Now that your bed frame is reassembled, take a moment to admire your hard work and enjoy your refreshed and updated bedroom look. With a repurposed bed frame and innovative design, your bedroom will have a unique touch that reflects your personal style.
Tool | Quantity | Function |
---|---|---|
Wrench or Allen key | 1 | To tighten bolts securely |
Screwdriver | 1 | If required for attaching support slats |
Enjoy Your Refreshed Bedroom Look
Congratulations! Your upcycled bed frame has transformed your bedroom into a beautiful and sustainable space. Take a moment to admire your work and appreciate the positive impact you’ve made.
With your newly upholstered bed frame, you’ve not only given a fresh look to your bedroom but also contributed to a more eco-friendly lifestyle. By upcycling and reusing your existing bed frame, you’ve reduced waste and minimized the need for new furniture. This sustainable approach aligns with the growing trend of conscious consumption and responsible design.
As you revel in your refreshed bedroom look, don’t forget to invite others to join you on the journey of creative bed frame ideas. Share your success story and inspire others to upcycle their own furniture. By spreading the word, you can help build a community of individuals who are committed to making a positive impact on the planet.
To further enhance your sustainable bedroom, consider incorporating other eco-friendly elements. Add natural and organic bedding materials, such as bamboo sheets or a chemical-free mattress. Opt for energy-efficient lighting and choose decor pieces made from recycled materials.
As you continue to enjoy your revamped bedroom, remember that small changes can make a big difference. Your upcycled bed frame is not only visually appealing but also a testament to your commitment to sustainable living. So, take pride in your accomplishment and revel in the positive change you’ve made.
*Table: DIY Upcycled Bed Frame Checklist*
| Task | Status |
|—————————|———|
| Choose upholstery fabric | Complete|
| Measure bed frame | Complete|
| Reupholster headboard | Complete|
| Wrap and secure fabric | Complete|
| Fold and staple fabric | Complete|
| Reassemble bed frame | Complete|
In summary, your upcycled bed frame has added a touch of creativity, sustainability, and personality to your bedroom. Through your DIY efforts, you’ve not only saved money but also contributed to reducing waste and embracing a more environmentally friendly lifestyle. Take pride in your accomplishment, and let your refreshed bedroom inspire others to explore their own creative bed frame ideas. Enjoy your newfound sanctuary and the positive impact you’ve made on the world around you.
Upcycling your bed frame is a rewarding DIY project that allows you to give your bedroom a refreshing makeover while promoting sustainability. Embrace the creativity and cost-effectiveness of upcycling and see the difference it can make in transforming your space.
If you’re looking for a budget-friendly way to update your existing bed frame, consider upcycling it with some new fabric. Reupholstering your bed frame is a simple DIY project that can completely transform the look of your bedroom.
To get started, choose a thick upholstery fabric that is resistant to tearing and easy to clean. Measure the dimensions of your bed frame and add extra fabric for wrapping and securing. Use a pro staple gun to attach the fabric to the back of the headboard, pulling it taut to ensure a smooth finish. Fold and staple the fabric on the sides and base of the frame as well.
Take photos of the disassembled bed frame to help with the reassembly process. Once you’ve covered the bed frame, rebuild it and enjoy your refreshed and updated bedroom look.
By upcycling your bed frame, not only do you save money, but you also contribute to a more sustainable lifestyle. Rather than throwing away furniture and buying new pieces, you can give your existing items a new lease on life. So why not unleash your creativity and embark on this fun and eco-friendly project?
FAQ
What materials do I need to upcycle my bed frame?
To upcycle your bed frame, you will need thick upholstery fabric, a pro staple gun, and measuring tape. Make sure to choose a fabric that is resistant to tearing and easy to clean.
How do I measure my bed frame for upholstery fabric?
Start by measuring the dimensions of your bed frame, including the headboard, sides, and base. Add extra fabric for wrapping and securing. It’s always a good idea to take photos of the disassembled bed frame to help with the reassembly process.
Can I use any type of fabric to reupholster my bed frame?
It’s best to choose thick upholstery fabric that is specifically designed for furniture. This type of fabric is durable, easy to clean, and will give your bed frame a professional finish.
How do I attach the upholstery fabric to the bed frame?
Use a pro staple gun to attach the fabric to the back of the headboard, pulling it taut to ensure a smooth finish. Fold and staple the fabric on the sides and base of the frame as well, making sure everything is secure.
Can I give my bed frame a vintage makeover?
Absolutely! If you’re looking to give your bed frame a vintage look, consider using reclaimed wood for the frame and headboard. This will add character and charm to your upcycled bed frame.
How long does it take to upcycle a bed frame?
The time it takes to upcycle a bed frame depends on the complexity of the project and your level of experience. On average, it can take a few hours to a day to complete the upholstery process and reassemble the bed frame.
Can I upcycle a bed frame without disassembling it?
While it’s possible to upcycle a bed frame without fully disassembling it, it is generally recommended to dismantle the frame to ensure a thorough and professional finish.
Is upcycling a bed frame an eco-friendly option?
Yes, upcycling your bed frame is a sustainable and eco-friendly option. By reusing an existing piece of furniture and using sustainable materials, you can reduce waste and contribute to a more environmentally-friendly lifestyle.