How to Fix a Squeaky Bed: Find the Noise Source and Silence It for Good

Most of the time, how to fix a squeaky bed comes down to three moves: find the exact spot where two surfaces rub, put something soft or slippery between them, and take the slack out of every bolt. A hex key, a pack of felt pads, a candle stub and about 20–40 minutes silences the large majority of squeaky bed frames. Diagnose first, though — lubricating a joint that isn’t the culprit just moves the noise somewhere else.

Below is the order I’d work in, from the five-minute test that pinpoints the sound, through wood joints, slats, bolts, box springs, headboards and floorboards, to the point where a frame is genuinely worn out and worth replacing.

How to fix a squeaky bed: start with the five-minute rock, press and lift test

Strip the bedding off and pull the mattress back or right off the frame if you can manage it. Squeaks are contact noise, and you cannot hear contact noise through 10 inches (25 cm) of foam.
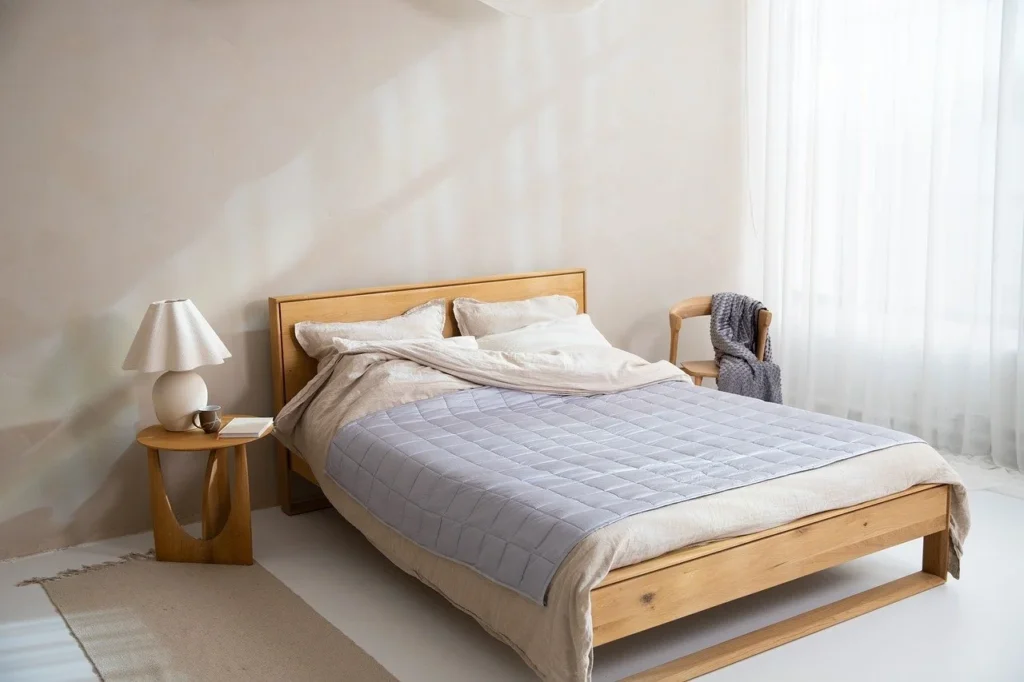
Wooden bed frame in a plain bedroom, ready to test how to fix a squeaky bed

The four-step test

  1. Rock the empty frame. Stand at one corner, grab the rail, and push and pull side to side, then head to foot. Sharp ticks or groans here mean rail-to-post joints or corner bolts.
  2. Press each slat individually. Kneel on the frame and put your full weight on one slat at a time, near the ends where it sits on the ledge. A creak that follows your hands slat by slat is friction at the ledge, not a frame problem.
  3. Lift and drop gently. Raise one corner half an inch (about 1 cm) and set it down. A clunk means a leg or caster isn’t sitting flat, or the floor under it moves.
  4. Get off the bed entirely and rock the floor. Walk and bounce on the spot where the legs stand. If the floor squeaks on its own, no amount of work on the frame will help.

Have someone else press while you put an ear near each joint. Noise travels along rails, so the place it sounds loudest from across the room is often two feet from the real source.

Match the sound to the source

What you hear When it happens Most likely source First fix to try
Dry, rhythmic creak Rolling over, changing position Slats rubbing the rail ledge Felt pads or wax on the ledge
Sharp tick or crack Sitting down, getting up Loose rail-to-post joint or bolt Re-tighten, then wax the joint faces
Metallic squeak or scrape Any movement Metal-on-metal at brackets or hooks Grease the contact face, add a washer
Twangy, springy noise Only under body weight Box spring or mattress coils Rotate or replace; coil noise rarely fixes
Knock or thud Movement toward the wall Headboard against wall or loose bolts Wall bumpers, re-torque headboard bolts
Groan from underneath Walking near the bed too Floorboards or subfloor Rug pad, shims, subfloor screws

One quick shortcut: slide the mattress onto the floor and sleep on it for a night. Silence means the frame or slats. Still noisy? It’s the mattress.

Fixing a squeaky wooden bed frame: tighten, wax, glue, shim

Wood squeaks because two dry surfaces move against each other under load. Every fix either stops the movement or makes the surfaces slide silently.

Solid dark wood bed frame with panelled headboard in a beamed attic bedroom

1. Tighten every fastener in a cross pattern

Work around the frame like you’d tighten wheel nuts — opposite corners rather than one side at a time — so the frame pulls square instead of twisting. Snug is the goal. Overtightening into bare wood strips the threads or crushes the fibres, and a stripped hole is a much bigger job than a squeak.

If a bolt spins without biting, the insert or the hole is gone. Move up one bolt diameter, or glue a hardwood dowel into the hole, let it cure, and re-drill.

2. Wax the wood-on-wood contact points

Paraffin, beeswax or a plain white candle rubbed hard into the joint faces and along slat ledges kills most wooden creaks. Work it into the crack with a plastic scraper or an old credit card, and expect to need two or three passes before the noise is fully gone.

Skip penetrating oils and general-purpose spray lubricants on bare or waxed wood. They soak into end grain, darken the timber and wander off the spot you aimed at. Save the spray for metal.

3. Re-glue joints that move visibly

If you can see a joint open and close as you rock the frame, wax is a patch, not a repair. Take that joint apart, scrape the old glue off both faces (fresh glue does not bond to old glue), apply wood glue, reassemble and clamp it. Furniture repair guidance is blunt about this step: clamp the joint firmly and leave it clamped for roughly two days until the glue is fully cured before you put weight back on it.

Honest caveat: this works on solid wood and on real dowelled joints. On particleboard or thin MDF frames, glue in a blown-out hole rarely holds — the board itself has crumbled. Those frames are better braced with a metal corner bracket and a longer screw into a solid section, or simply retired.

4. Shim the gaps

Cork wedges, thin hardwood shims or folded card tapped into a loose rail pocket take out the last bit of play. Cork has enough give to absorb movement and won’t split like a thin timber shim. Trim it flush so it can’t work its way out as the frame flexes.

Stopping slat noise: felt pads, rubber washers and a centre support leg

Slats are the single most common reason a bed squeaks, and the cheapest to fix.

  • Felt pads on the ledge. Stick furniture-grade felt squares of about 2 inches (5 cm) on the support ledge under each slat end, so the slat rests on felt instead of bare wood or metal.
  • Rubber washers under bolt heads. Where a bolt clamps straight onto wood, a rubber washer cushions small movements and helps keep the hardware from working loose.
  • Stop the slats sliding. Loose slats that drift sideways every night grind a groove into the ledge. Join them with slat tape, or screw a thin batten across the underside at both ends.
  • Non-slip liner on top. A rug underlay or non-slip mat between slats and mattress stops the mattress shuffling and quiets the last layer of contact.

Add a centre support if the span is long

A slat that flexes under you is a slat that rubs. Long unsupported spans need a centre rail with a leg to the floor — the guidance commonly given is to add centre support for slats spanning more than about 48 inches (122 cm).

Support specs also matter for your mattress warranty, not just noise. Mattress manufacturers usually require slats no more than 3 inches (7.6 cm) apart, with 2–3 inches (5–7.6 cm) preferred, and a centre support on queen and larger. Beautyrest’s warranty terms, for one, state that a queen or king frame without a metal centre support needs at least five hardwood or metal 1″ × 4″ slats with legs added to the three centre slats.

Mattress size Dimensions (in) Dimensions (cm) Typical support needed
Twin 38 × 75 96.5 × 190.5 Four legs; slats ≤3 in (7.6 cm) apart
Twin XL 38 × 80 96.5 × 203 Four legs; slats ≤3 in (7.6 cm) apart
Full 54 × 75 137 × 190.5 Four legs; centre leg helps at this width
Queen 60 × 80 152 × 203 Centre rail with at least one floor leg
King 76 × 80 193 × 203 Centre rail with two or three floor legs
California King 72 × 84 183 × 213 Centre rail with two or three floor legs

Those are also the numbers your sheets are cut to, which is why a king set never behaves on a Cal King. If you’re checking frame footprint and room clearance at the same time, our bed frame dimensions guide has the outer sizes, and will queen bedding fit a full bed covers the sizing overlap people get wrong most often.

Metal frames and bolts that keep coming loose

Metal frames don’t creak from dryness — they squeak where two metal faces slide, and clunk where a bolted joint has play in it. The fix is different from wood: lubricant rather than wax, and hardware that stops the fastener backing out.

Person using a wrench to tighten the bolts on a black metal bed frame
  • Isolate metal from metal. Plastic or rubber washers between contact faces remove the rubbing surface altogether.
  • Grease the connection, don’t just spray it. For stubborn joints, take the connection apart, clean both faces and reassemble with a thin film of petroleum jelly or plumber’s grease. It stays put far longer than a thin aerosol.
  • Use a medium-strength threadlocker on bolts that won’t stay tight. Blue 242-type threadlocker is made to stop vibration loosening on fasteners in the 6–19 mm range and still comes apart with hand tools. Red high-strength grades are not appropriate here — they can need heat to break, and you want to be able to move house.
  • Add a lock washer or nyloc nut if you’d rather not use chemicals, particularly on bunk beds or anything a child sleeps in.

A re-torquing schedule that actually works

New or newly rebuilt frames settle. Check every bolt two weeks after assembly, again at three months, then every six months — pick the clock change or your mattress-rotation day so you remember. Five minutes twice a year prevents almost every “it started squeaking again” cycle.

If your frame is metal and the squeak keeps coming back at the same joints, the bracing is probably the weak point. Our guide to wood vs metal vs upholstered frames walks through which constructions stay tight and which loosen.

Box spring and mattress squeaks: what you can fix and what you can’t

Test the mattress on its own on the floor. If it still twangs when you shift, the noise is inside it.

Box springs and foundations are a wooden grid under fabric. They can sometimes be quieted: pull back the dust cover on the underside, look for a cracked slat or a loose staple line, and glue or screw the offending piece. A cracked corner block can be braced with a metal plate.

Innerspring mattress coil noise is a different story. Once the wire in a coil unit has fatigued or the helical wires that lace coils together have worn at the contact points, there’s nothing you can reach. Rotating the mattress head to foot sometimes moves the worn zone away from where you sleep and buys months, not years. Repair isn’t realistic; replacement is the honest answer.

Foam and latex mattresses don’t make noise on their own. If yours seems to, it’s the surface it sits on.

Who should skip DIY here: if the mattress or foundation is still in warranty, opening the dust cover or removing law tags can complicate a claim. Photograph everything and call the manufacturer first.

Headboard knocking and creaky floorboards under the bed

Headboard against the wall

Two causes, two fixes. If the headboard itself knocks the wall, stick clear rubber door bumpers on the back at the two contact points, or slide a strip of felt behind it. If the noise is the headboard moving on its brackets, that’s a loose bolt — tighten it, add a rubber washer under the bolt head, and check that the bracket hasn’t elongated its slot.

A bed pushed flush to a wall transmits every movement into the plasterboard. Pulling it out by even 1–2 inches (2.5–5 cm) can be the whole fix, and gives you room to make the bed properly.

Floor squeaks under the legs

Floor noise happens when a board or the subfloor moves against a joist or a nail shank. If you can reach the underside from a basement or crawl space, standard practice is to glue a thin wood shim and tap it gently into the gap between joist and subfloor — gently, because overdriving the shim lifts the floor above and creates a new problem. Construction adhesive run along the joist-to-subfloor seam works where you can’t pin down the exact spot.

No access underneath, or you rent? A dense rug pad under the bed’s footprint spreads the load and damps the movement, and it’s fully reversible. It won’t cure a badly nailed subfloor, but it usually takes the edge off. If ambient noise is a broader problem in your room, our notes on building a quieter sleep environment cover masking and blocking the sounds you can’t repair.

When a creaky bed frame is failing, not just noisy

A squeak is usually cosmetic. These signs are not, and they mean you should stop patching:

  • A rail, leg or slat with a crack that runs along the grain, or any split that reopens after gluing.
  • Bolt holes so enlarged that the bolt tilts, or metal brackets with elongated, torn slots.
  • Visible sag in the centre rail, or a mattress that dips along one line.
  • The frame racks — push a corner and the whole rectangle goes out of square and stays there.
  • Particleboard that has swelled, crumbled or gone soft at a fastener.
  • You’re routinely over the frame’s stated weight rating once you add two adults, a heavy hybrid mattress and a dog.

Check the label or manual for the load rating before you assume you’re fine. Ratings vary hugely between frames, so use the manufacturer’s own number rather than a general rule of thumb you read somewhere.

Quiet-by-design frames: what to look for on your next bed

If you’re replacing rather than repairing, these details predict a quiet frame better than price does:

  • Solid hardwood or heavy-gauge steel rails rather than veneered particleboard.
  • Bolted joints with metal-to-metal hardware — barrel nuts, cam locks with steel inserts — instead of screws driven straight into board.
  • Slats 0.75 in (19 mm) thick or more, spaced no more than 3 in (7.6 cm) apart, ideally sitting on felt or rubber from the factory.
  • Centre rail with floor legs on anything queen size or bigger.
  • Adjustable feet, so you can level the frame on an uneven floor without stacking cardboard under one corner.

Measure these five things before you buy

  1. Doorway width. Interior doors are commonly 28–32 in (71–81 cm). Measure yours, and measure the narrowest point of the stair turn too — that’s what actually stops deliveries.
  2. Headboard height and diagonal. A tall headboard has to pivot through the door corner; the diagonal is the number that matters.
  3. Walkway clearance. Aim for 24–30 in (61–76 cm) on the sides you use, so you can kneel to tighten bolts without dragging the bed out each time.
  4. Ceiling and window sill heights relative to the headboard, if the bed sits under a window.
  5. Total deck height. Frame deck plus mattress thickness sets how far you drop when you sit down.

Where the evidence is thin: there’s no independent testing standard for “quiet” bed frames, and no controlled research comparing felt pads against wax against threadlocker. Manufacturer claims of a noise-free frame are marketing, not measurement. What’s well established is the mechanical cause — friction and play at joints — and every fix above targets one or the other. If you’re weighing specific constructions, our king bed frame buying guide breaks down the joinery details worth paying for.

FAQ

Why does my bed creak when I move but not when I lie still?

Because creaking is friction, and friction needs movement. Static weight compresses the joints and holds them quiet; rolling over shifts load from one side of the frame to the other and lets the surfaces slide a fraction of a millimetre. That’s why rolling and sitting down are the two loudest moments, and why the slat ledges are so often the culprit.

Can I use WD-40 or another spray lubricant on a wooden bed frame?

Use wax on wood. Paraffin, beeswax or a candle stub rubbed into the joint is the standard fix for wood-on-wood creaks and won’t soak into the grain or stain the finish. Save spray lubricant and grease for metal-on-metal contact points, and wipe away the excess so it doesn’t transfer to your bedding.

Do bed slats need to be attached to the frame?

They don’t have to be bolted down, but they do need to be stopped from sliding. Slats that drift sideways wear a groove into the rail ledge and make more noise every month. Slat tape, a batten screwed across the underside, or notched slats that locate on the rail all solve it.

How often should I re-tighten the bolts on a squeaky bed frame?

Two weeks after assembly, again at three months, then every six months. Add a medium-strength blue threadlocker to any bolt that has loosened twice — it’s designed to resist vibration loosening yet still release with ordinary hand tools.

Will a new mattress stop my bed squeaking?

Only if the mattress is the source. Test it on the floor first. Worn innerspring coils genuinely can’t be repaired, so a replacement is the fix there — but if the mattress is silent on the floor, a new one changes nothing and you’ll be back with the same frame noise.

My bed only squeaks in winter. What changed?

Indoor heating dries the air out, wood loses moisture and shrinks slightly, and joints that were snug in summer develop a little play. Re-tightening the hardware at the start of the heating season usually settles it, and keeping indoor air from swinging between very dry and very damp helps the frame stay stable year-round.

Is a squeaky bed a safety problem?

Usually no — it’s friction noise. It becomes a safety issue when it’s paired with the failure signs above: cracked rails, torn bracket slots, a frame that racks out of square, or a bunk bed with any loose structural bolt. On bunk beds especially, don’t live with a loose fastener; tighten it and add a lock washer or nyloc nut.

Updated September 2026.

What Is Pillow Loft and How to Choose the Right Height

pillow loft hero alignment illustration for side and back sleepers - featuring pillow loft choose

What Is Pillow Loft

What Is Pillow Loft: A Practical Guide to the Right Height

If your pillow feels “off,” you’re not imagining it. what is pillow loft matters because the height your pillow holds under your head directly shapes neck alignment, muscle tension, and how you feel at sunrise. This guide gives you clear height targets by sleep position, easy tweaks for shoulder width and mattress firmness, a quick at-home fit test, and care tips so your perfect height actually lasts.

what is pillow loft — hero alignment illustration for side and back featuring pillow loft choose
Loft = the pillow’s working height under your head. Match it to how you sleep to keep your neck neutral.

Loft Defined: How Pillow Height Affects Alignment

Quick answer: What is pillow loft? It’s your pillow’s effective height once it compresses. The right height keeps your head, neck, and spine lined up—no tilting, no tucking.

Key takeaways:

  • “Effective” height is what you feel after the pillow settles.
  • Too low → head dips; too high → chin tucks; both strain your neck.
  • Foam/latex compress less; down/shredded fills compress more.
  • Match what is pillow loft to sleep position, shoulder width, and mattress firmness.

Think of loft as the height you actually experience, not what’s printed on the box. Two “5-inch” pillows can sleep totally differently—memory foam tends to hold height; down usually sinks lower.

Neutral alignment is the goal. Your face points at the ceiling, ears stack over shoulders, and your neck feels… quiet. If mornings hurt, start by checking pillow height.

Materials matter. Dense foam and latex keep more height under load. Down, feather, and shredded blends compress more, so you may need a taller pillow to land at the same effective height.

what is pillow loft — neutral spine alignment with correct pillow height - featuring pillow loft choose
Check the side profile: ears over shoulders, nose pointing straight up.

Low, Medium, High Loft: Pros & Cons

Quick answer: Low loft (2–3″) usually suits stomach sleepers, medium (3–5″) fits many back sleepers, and high (5–7″+) supports most side sleepers—then fine-tune for shoulders and mattress feel.

Key takeaways:

  • Low: great for stomach sleepers; some smaller-framed back sleepers.
  • Medium: a safe bet for most back sleepers and narrow-shouldered side sleepers.
  • High: best for side sleepers, especially with broader shoulders or firm beds.
  • At the same listed height, different materials “sleep” taller or flatter.

Low loft (2–3″): Helps keep stomach sleepers from cranking the neck. Compressible fills may need more fluffing and can flatten over time.

Medium loft (3–5″): A comfy middle ground for lots of back sleepers and some side sleepers with narrower shoulders. Broader shoulders or firm beds may still need more height.

High loft (5–7″+): Fills the ear-to-shoulder gap for side sleepers. Can be too tall for back or stomach sleeping, pushing the head forward.

Want a bigger decision framework? Peek at Choosing Pillows for Comfort: 7 Expert Tips.

what is pillow loft — low, medium, and high comparison - pillow loft featuring pillow loft choose
Loft tiers at a glance: match height to position and shoulder width.

Choosing Loft by Sleep Position & Shoulder Width

Quick answer: Side sleepers usually need high loft (≈4.5–6.5″ effective), back sleepers medium (≈3.5–5″), stomach sleepers low (≈2–3″). Go higher for broader shoulders and firmer mattresses; go lower for softer beds.

Key takeaways:

  • Side: ~4.5–6.5″ effective; adjust for shoulders and bed firmness.
  • Back: ~3.5–5″ effective; a gentle neck contour can help.
  • Stomach: ~2–3″ effective; some do best with no head pillow.
  • Firmer beds often need more loft; softer beds, a touch less.

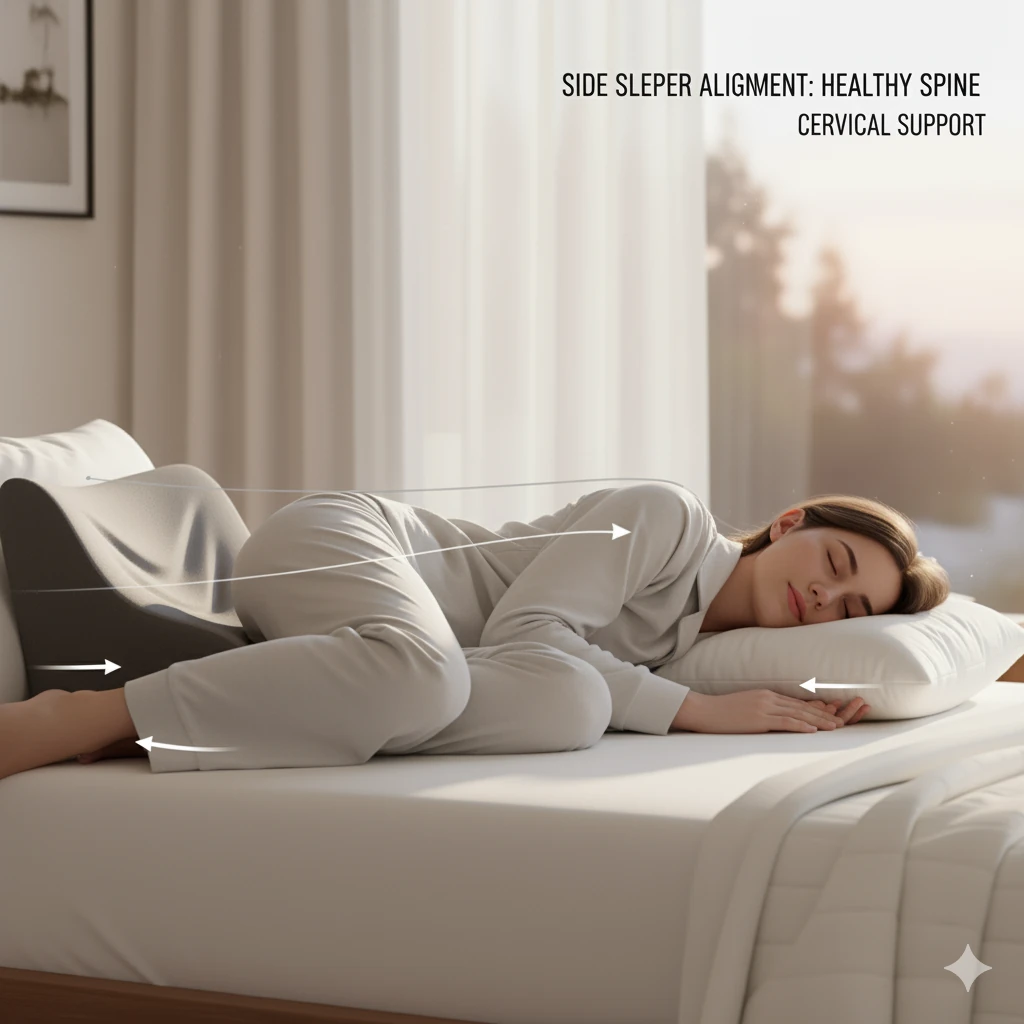
Side sleepers: Your pillow should fill the ear-to-shoulder space so your neck stays level. Narrow shoulders often land around 4.5–5.5″; broader shoulders, ~5.5–6.5″+. Firmer mattress? Add a little height. Softer mattress? You can subtract a bit.

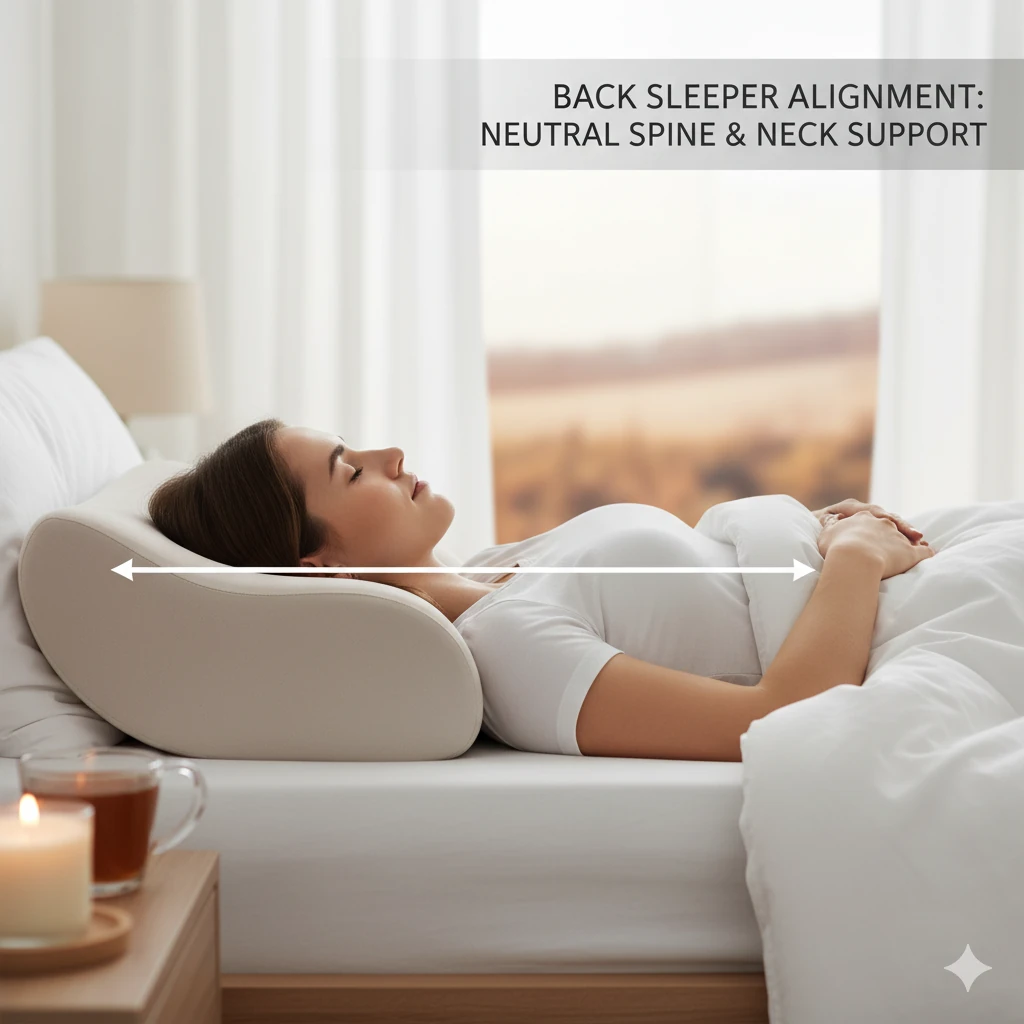
Back sleepers: Aim for 3.5–5″ effective loft so your head’s supported without nudging your chin toward your chest. A subtle contour under the neck can feel great.

Stomach sleepers: Keep it as low as possible (2–3″). Some people do best without a head pillow and use a thin pillow under the hips to ease the lower back.

Round out your setup with our primers: Cozy Bedding Materials and Thread Count Explained.

what is pillow loft — choosing the right height for side sleepers - pillow featuring pillow loft choose
Side sleepers: fill the ear-to-shoulder gap to keep the neck level.

Adjustable Fill & Customization Tips

Quick answer: Adjustable pillows make dialing in height simple. Start a bit tall, remove fill in small handfuls, test on your own bed, and save the extra for future top-ups.

Key takeaways:

  • Begin slightly taller than you think, then subtract slowly.
  • Measure height while lying down—it’s the only number that matters.
  • Keep spare fill in a labeled bag for later refreshes.
  • Record your final setting so you can recreate the same what is pillow loft result.

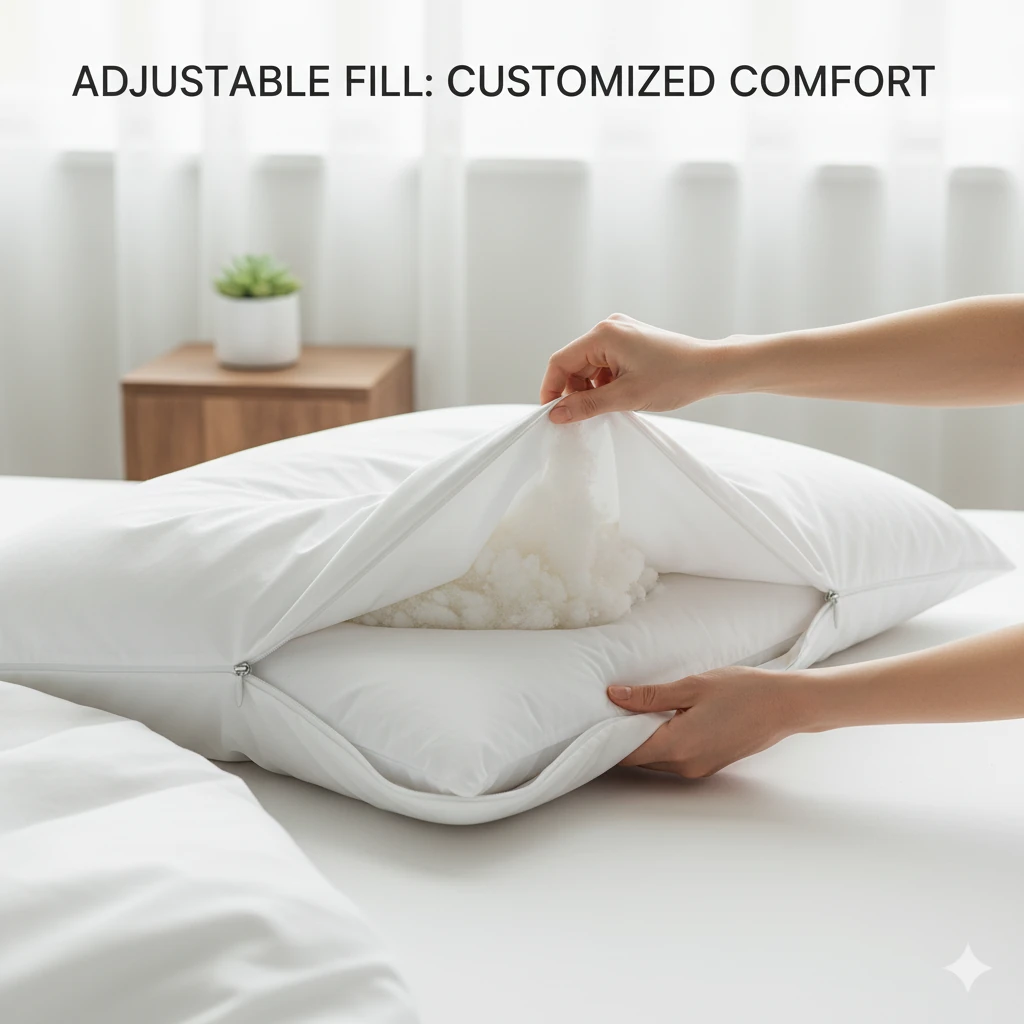
With shredded foam or down/feather, open the inner zipper and remove a handful at a time. After each tweak, lie down in your usual position on your actual mattress and reassess.

Judge with alignment, not just feel. Nose points up, no chin tuck, no head droop. If you switch positions, set loft for the way you sleep most of the night.

Over months, compressible fills settle. That saved bag of fill? It’s your easy refresh when support starts slipping.

what is pillow loft — adjustable-fill pillows to fine-tune height - pillow featuring pillow loft choose
Adjustable-fill pillows help you lock in your best height—and keep it there.

Try-At-Home Fit Test

Quick answer: Record a 10-second side profile at mattress height. Side/back sleepers: face parallel to the ceiling. Stomach sleepers: as flat as possible. Adjust until the line from neck to upper spine looks straight.

Key takeaways:

  • Phone at mattress level, filming your side profile.
  • Side: nose up, ears over shoulders.
  • Back: chin neutral—not tucked.
  • Stomach: keep the head as flat as you comfortably can.

Set the camera at bed height, relax onto your pillow, and hit record. Pause the video and mentally trace a line from the base of your skull down through your upper spine. Straight line? You’re there.

Small changes matter. A half-inch of fill can flip the result from “meh” to “perfect.” Re-test after each adjustment.

what is pillow loft — ear-to-shoulder measurement to estimate height - featuring pillow loft choose
Measure ear-to-shoulder gap as a quick starting estimate for side-sleeping loft.

Care & Replacement Intervals

Quick answer: Refresh pillows every few months (material-dependent), fluff weekly if they’re compressible, and replace most pillows every 1–3 years—or sooner if support won’t bounce back.

Key takeaways:

  • Down/feather & shredded fills: fluff and top up as needed.
  • Solid foam/latex: spot clean, air out—no typical machine wash.
  • Use a breathable protector to slow wear and odors.
  • Replace when your what is pillow loft target no longer holds and alignment drifts.

Follow the care tag. Down/feather often tolerates gentle washing and thorough drying with dryer balls. Shredded fills perk up with sunning and manual fluffing.

Solid foam and latex don’t love washers—spot clean and air them out. A good protector keeps oils and dust at bay without changing the feel.

Upgrading the whole setup? Try our Comprehensive Mattress Selection Guide to sync mattress firmness with pillow height.

Quick Size Guide (Ear-to-Shoulder Estimate)

Quick answer: Measure a straight line from your ear canal to the tip of your shoulder while standing relaxed. That number approximates a side-sleeping effective loft on a medium-firm mattress.

Key takeaways:

  • Firm bed? Add ~0.25–0.5″. Soft bed? Subtract ~0.25–0.5″.
  • Foam/latex compress less—start close to the raw number.
  • Down/shredded compress more—start ~0.5–1″ taller.
  • Use this as a starting point, then refine with the fit test.

Have someone measure ear to shoulder tip. That’s the gap your pillow must fill on your side. It’s a quick way to get in range before you fine-tune.

Remember: softer beds let your shoulder sink (need less loft). Firmer beds keep you higher (need more loft).

Eco-Friendly vs Conventional Pillow Materials

Quick answer: Natural latex, organic cotton, and responsibly sourced down can keep loft steady with a lighter footprint. Conventional foams can feel great too—just look for credible certifications.

Key takeaways:

  • Seek GOLS/GOTS and OEKO-TEX® where applicable.
  • Natural latex often holds height longer than many down blends.
  • Organic bedding and eco-conscious sheets round out a healthier setup.
  • Certifications help cut through greenwashing and protect your ideal height for what is pillow loft.

If sustainability is your priority, natural latex offers springy, long-lasting support. Prefer a softer sink? Try responsibly sourced down with an organic cotton shell.

Look for GOLS (latex), GOTS (organic fibers), and OEKO-TEX® (chemical safety). Pair your pick with organic bedding benefits and smart sheet choices for a cleaner sleep space.

what is pillow loft — eco-friendly materials and certifications overview - featuring pillow loft choose
Natural latex, organic cotton, and trusted certifications support lasting loft.

The Bottom Line

Quick answer: Start with position-based targets, adjust for shoulders and mattress feel, then confirm with the quick video test. The best pillow is the one that keeps your neck neutral—period.

Key takeaways:

  • Side ≈ 4.5–6.5″; Back ≈ 3.5–5″; Stomach ≈ 2–3″ (effective loft).
  • Firmer bed → add a bit; softer bed → subtract a bit.
  • Adjustable fill makes precision easy.
  • Re-check whenever your what is pillow loft setup or mattress changes.

When the pillow fits, sleep feels effortless. You fall asleep faster, wake up looser, and stop wrestling your bed. Re-measure if your body or mattress changes—great sleep is adjustable.

what is pillow loft — quick checklist for position, shoulders, mattres featuring pillow loft choose
Quick checklist: position target → adjust for shoulders/bed → confirm with fit test.

Key Takeaways: what is pillow loft

  • Match what is pillow loft guidance to your position: side (higher), back (medium), stomach (low).
  • Tweak for shoulder width and mattress firmness to hit true effective height.
  • Use the video fit test to double-check neutral alignment.
  • Maintain loft with smart care; replace when support won’t rebound.
  • Certified, sustainable materials can keep loft steady for longer.

FAQ

What’s the difference between pillow loft and firmness?
Loft is height under your head after compression. Firmness is how soft or hard it feels. You can have a soft high-loft pillow or a firm low-loft pillow—they’re separate dials.
How do I know if my pillow is too high?
Watch for a tucked chin, tight upper back, or morning stiffness. In a side-profile photo, your face points slightly down instead of straight up.
Can one pillow work for multiple positions?
Sometimes. Adjustable-fill pillows can hit a compromise, but strict side-plus-stomach sleepers often do best with two pillows.
How often should I replace a pillow?
About every 1–3 years for most types. Replace sooner if loft won’t rebound, odors hang on, or your alignment slips.
Do pillow protectors change loft?
Not much if they’re breathable and well-fitted. They actually help preserve loft by blocking oils and dust.

More resources from Cozy Bed Quarters:
Choosing Pillows for Comfort •
Bedding Accessories: Pillows & Toppers •
Comprehensive Mattress Selection Guide •
Bedding Materials Guide •
Organic Bedding Benefits

Trusted references:
Sleep Foundation •
Parachute Home •
Better Homes & Gardens

Final Thoughts

Dialing in what is pillow loft for your body and mattress pays off fast: fewer morning aches, easier sleep onset, and steadier comfort through the night. Re-test your setup whenever your mattress or routine changes to stay in the sweet spot.


Related Reading

Down vs. Memory Foam Pillows: The Ultimate Showdown

down vs memory foam pillow comparison chart - down vs. memory foam


Down vs. Memory Foam Pillows: The Ultimate Showdown

If you’ve ever found yourself standing in a bedding aisle wondering whether a down vs memory foam pillow will finally fix your neck pain, you’re not alone.

One feels like a soft hug; the other supports you like it was made just for your neck. This guide breaks down every difference — comfort, breathability, and maintenance — so you can choose the pillow that feels made for you.

What Is a Down Pillow vs. a Memory Foam Pillow?

Quick answer: Down pillows are filled with airy clusters from goose or duck down that feel cloud-soft, while memory foam pillows use viscoelastic foam that contours to your head and neck for precise support.

Key takeaways:

  • A down vs memory foam pillow choice is softness (down) versus structure (foam).
  • Down = plush loft, lightweight feel, and natural breathability.
  • Memory foam = firm contouring and consistent neck alignment.
  • Each type comes in multiple firmnesses, lofts, and price points.

Down gives you that luxury “hotel bed” feeling — the kind that gently molds to your head. Memory foam feels more personalized, adapting to your shape for steady support all night. One’s airy and romantic; the other’s engineered and dependable.

feather vs memory foam pillow fill materials - down vs. memory foamDown fill (left) offers natural loft; memory foam (right) sculpts to your neck’s curve.

Support, Feel & Responsiveness

Quick answer: Memory foam delivers consistent alignment for side and back sleepers; down gives a soft, adaptive cradle that moves with you through the night.

Key takeaways:

  • Memory foam = precise contouring, great for neck and shoulder relief.
  • Down = plush give, ideal for stomach or combination sleepers.
  • Foam holds its shape; down needs periodic fluffing to restore loft.
  • Choosing a down vs memory foam pillow often comes down to alignment vs. plushness.

If you’ve ever woken up with stiff shoulders, foam’s structured contour may be your hero. It keeps your neck level with your spine, reducing strain and pressure points. Down, meanwhile, has that “ahh” factor — airy, responsive, and incredibly comfortable if you like to move freely in your sleep.

Want broader tips while you decide? See our guide to choosing pillows for comfort for shape, loft, and fill pointers across brands.

Breathability, Temperature & Allergen Potential

Quick answer: Down stays cool thanks to natural airflow, while memory foam retains more heat unless engineered with ventilation, open-cell design, or gel infusions.

Key takeaways:

  • Down = naturally breathable, moisture-balancing, and airy.
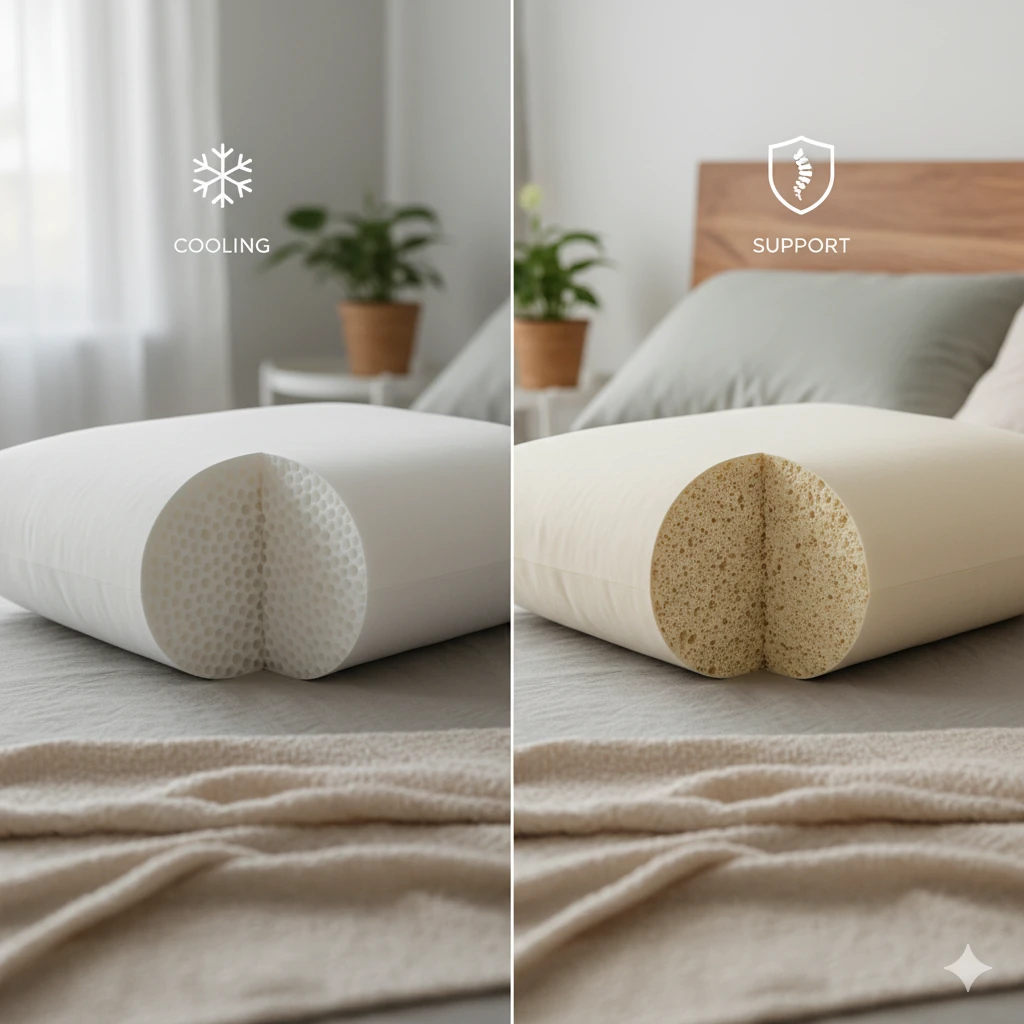
  • Foam = warmer; look for cooling gels, perforations, or open-cell foam.
  • Down can harbor allergens if not well cared for; many foams are hypoallergenic.
  • Hot sleepers often prefer down in the down vs memory foam pillow debate.

Hot sleeper? You’ll likely lean toward down. It allows airflow between clusters and tends to feel drier overnight. Memory foam’s density traps warmth, though modern cooling tech significantly narrows the gap. Down-alternative (poly) fills can be a middle ground if you avoid animal products but still crave breathability.

For whole-bed cooling strategies, explore our guides to temperature-regulating bedding and best bedding materials for hot sleepers.

Durability, Maintenance & Cost

Quick answer: Memory foam typically lasts longer with less work; down offers unmatched softness but needs fluffing and careful washing/drying to keep it perfect.

Key takeaways:

  • Memory foam: often 3–5 years of consistent support with low maintenance.
  • Down: can last up to ~10 years with gentle care and full drying.
  • Use pillow protectors to reduce oils, sweat, and dust infiltration.
  • Care routines may decide the down vs memory foam pillow winner for you.

If you’re not one for frequent fluffing, foam’s your friend. It holds form and usually needs only a washable cover and occasional spot cleaning. Down rewards attentive care — mild detergent, low heat, and extra time (or clean tennis balls) in the dryer to restore loft. Want an extra layer of defense for freshness? See our mattress protector guide for what to look for in breathable, easy-care protectors.

Prefer natural materials in the rest of your sleep setup? Check out organic bedding benefits to round out a breathable, eco-conscious bed.

Down vs. Memory Foam Pillows: The Ultimate ShowdownKeep your pillow fresh: use protectors, wash carefully, and dry fully for lasting loft.

Who Should Choose Down vs. Memory Foam?

Quick answer: Choose down if you love hotel-style softness; choose foam if you want dependable, ergonomic support for your neck and shoulders.

Key takeaways:

  • Down = plush comfort for stomach and combination sleepers.
  • Foam = structured support for side and back sleepers.
  • Allergies and warmth sensitivity can tip the balance.
  • Layering both can deliver a hybrid down vs memory foam pillow feel.

If you like sinking into a cool, breathable cushion, go down. If you crave that “supported yet soft” feel where your head stays perfectly level, go foam. Some sleepers even layer them — a foam core topped with a down or down-alternative cover for the best of both worlds.

Decision Checklist & Care Tips

Quick answer: Match your pillow to how you sleep, how you feel about upkeep, and how hot or cool you tend to run at night.

Key takeaways:

  • Feel: Soft & airy (Down) vs. firm & contouring (Foam).
  • Care: Down = regular fluffing; Foam = cover + spot clean.
  • Allergies: Hypoallergenic down or foam options exist.
  • Temperature: Down sleeps cooler; foam sleeps warmer.
  • Replacement: Expect 2–5 years depending on quality and care.
  • Use this to finalize your down vs memory foam pillow choice.
checklist for choosing a down vs memory foam pillow - down vs. memory foamNot sure where to start? Use this quick checklist to narrow your perfect match.
FAQ

Are down pillows better than memory foam?
Neither is universally “better.” Down is softer and more breathable; memory foam provides structured support. Your sleep position and temperature sensitivity should guide the choice.
Can memory foam pillows cause neck pain?
Only if the loft or firmness is mismatched. Side sleepers often need a higher-loft contour pillow; back sleepers a medium loft; stomach sleepers the lowest loft or a soft down option.
Do down pillows go flat?
They compress with use but can be revived by daily fluffing and thorough drying after washing to restore loft.
Which pillow lasts longer?
Quality memory foam usually offers 3–5 years of consistent support; well-cared-for down can last longer, though it requires more maintenance.
Is there a hypoallergenic option for down?
Yes. Look for “hypoallergenic” down that’s been washed to remove common irritants, or choose down-alternative or most memory foams, which are typically hypoallergenic.

Final Thoughts

At the end of the day, your pillow should feel like an exhale. If you crave that soft, cloudlike hug, go for down. If you prefer a pillow that has your back — and your neck — choose memory foam. Either way, the right choice makes every night feel like a deep sigh of relief. Explore more expert sleep guides at Cozy Bed Quarters.

Here’s to softer nights, cooler dreams, and waking up exactly how you like — refreshed.

Related Reading

Finding the Perfect Pillow for Neck Pain Sufferers

Best pillow for neck pain guide showing pillow types and alignment tips - featuring finding perfect pillow

Best Pillow for Neck Pain: How to Choose & What to Try Tonight

Finding the best pillow for neck pain can feel like trial and error — and a stiff neck every morning. But once you dial in the right shape, loft, and material, the difference is night and day. In this guide, we’ll break down how to get proper head and neck alignment, what to look for based on how you sleep, and share a few pillows we actually trust. No fluff — just straight answers for better sleep, starting tonight.

The right pillow aligns your head, neck, and spine for pain-free sleep.

Why Neck Alignment Matters for Sleep

Answer-first: Proper neck alignment reduces strain on muscles and joints so you don’t wake up stiff, sore, or tense.

We’ve all been there — you wake up with a crick in your neck, or your head’s been pushed too far forward all night. Most of the time, the culprit isn’t your mattress — it’s your pillow. If it’s too high, your chin tucks toward your chest. Too low, and your head dips back. Either way, your cervical spine gets stressed.

The goal is a gentle, neutral line from your ear to your shoulder. And yes, your mattress and posture play a role too (we explain how in this posture guide), but the pillow is often the easiest place to start.

Key Takeaways: Best Pillow for Neck Pain

  • The best pillow for neck pain supports a neutral head-to-shoulder line without strain.
  • Match loft and shape to your primary sleep position.
  • Memory foam and latex offer reliable support and pressure relief.
  • Do a quick 10-minute test to check alignment before committing.
  • Replace every 18–24 months and consider eco-friendly materials where possible.

Pillow Shapes & Loft: Which Fits You Best?

Answer-first: The best pillow for neck pain matches your sleep position — and fills the space between your neck and mattress without overdoing it.

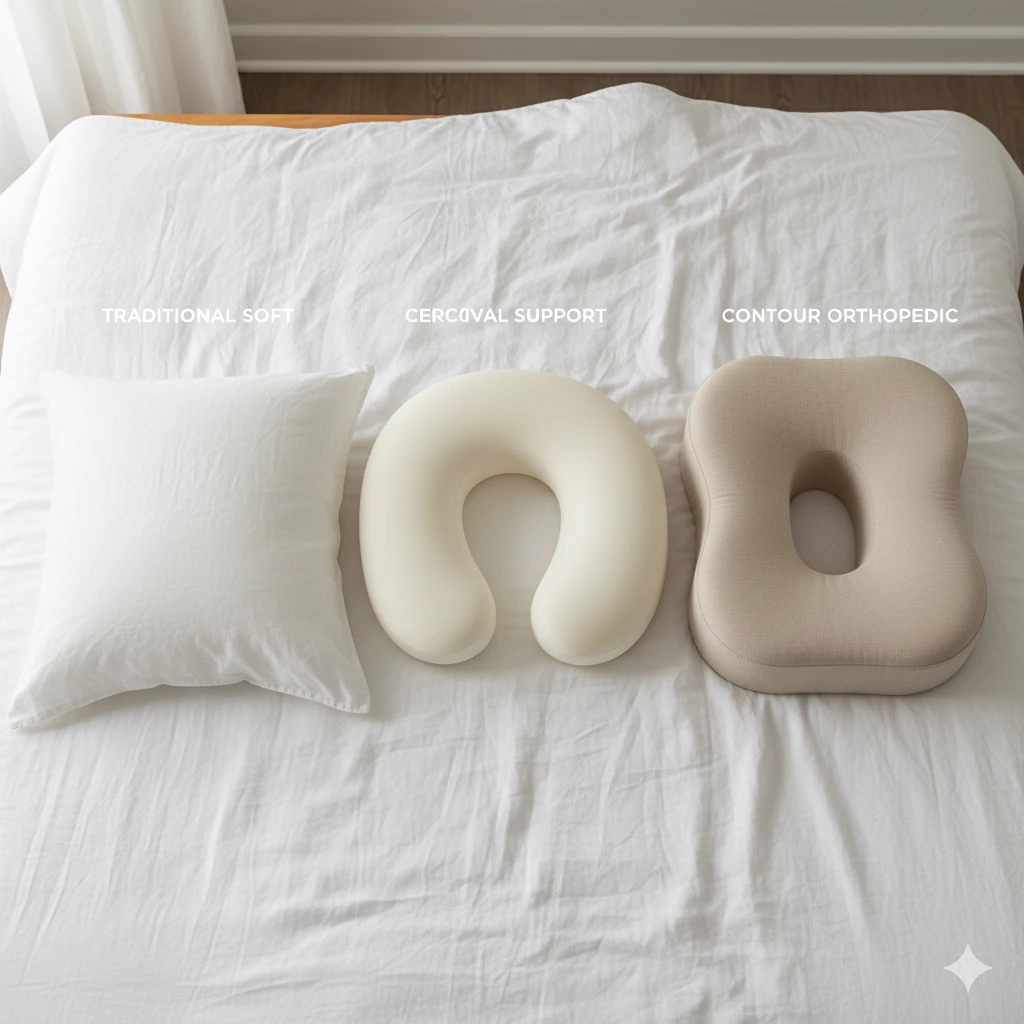
  • Contour / Cervical Pillows: Have a dip in the middle with raised sides to cradle the neck — great if you’re a side or back sleeper who needs consistent support.
  • Traditional Pillows: Soft, rectangular, and more flexible. Good if you toss and turn or don’t stick to one position.

Loft tips: Side sleepers typically need high loft, back sleepers do best with medium, and stomach sleepers should aim for low or flat to avoid neck twist. Your goal is simple: keep your head in line with your spine.

Cervical pillow types for the best pillow for neck pain and posture featuring finding perfect pillow
Different pillow shapes target key areas of neck support.

Best Materials for Neck Support

Answer-first: Choose a fill that holds its shape overnight — especially if you wake up feeling unsupported or sore.

  • Memory Foam: Contours to your head and neck, reducing pressure points. Ideal if you like a firmer, form-hugging feel.
  • Latex: Naturally responsive, slightly bouncy, and cooler than traditional foam. Great if you sleep hot or want something springier.
  • Shredded Foam: Lets you adjust the loft by adding or removing fill — perfect if you’re still figuring out your “just right” height.
  • Down / Down-Alternative: Soft and cozy, but not always supportive enough for ongoing neck pain.

For deeper dives, check out the guides from Sleep Foundation or Healthline.

Memory foam vs latex comparison for best pillow for neck pain relief a featuring finding perfect pillow
Memory foam and latex offer firm, breathable support for neck alignment.

Choosing by Sleep Position & Body Frame

Answer-first: A pillow that feels great to someone else might not work for you. Match it to your sleep style and body build for the best results.

Position Recommended Loft / Feel Why It Works
Side High loft, firm fill Fills the space between shoulder and head to keep spine level
Back Medium loft Supports the neck’s natural curve without forcing chin forward
Stomach Low loft or no pillow Minimizes neck twist and compression
Broad or heavier frames Dense foam or latex Prevents sinking or flattening overnight

How to Perform an At‑Home Pillow Fit Test

Answer-first: You don’t need special equipment — just 10 minutes and your normal sleep position.

  1. Lie down on the pillow in your usual sleep posture.
  2. Look for a straight line from your ear to shoulder. No tilt or twist.
  3. Feel your neck — it should feel gently supported, not lifted or hanging.
  4. Sleep on it for a night. Still waking up sore? Try adjusting loft or firmness.

Pillow fit test guide for best pillow for neck pain support and alignment featuring finding perfect pillow
Check ear-to-shoulder alignment for correct pillow height.

Care, Allergy & Longevity Tips

Answer-first: A worn-out or dusty pillow can trigger allergies and wreck your alignment — even if it once worked well.

  • Wash pillowcases and protectors weekly.
  • Use certified OEKO-TEX® or CertiPUR-US® materials to reduce irritants.
  • Replace your pillow every 18–24 months to avoid loss of shape and support.

Eco & Sustainable Considerations

Answer-first: You can get great neck support and be kind to the planet — no compromise required.

Natural latex, organic cotton, and wool pillows are not only biodegradable but tend to last longer and breathe better than synthetic counterparts. Look for certifications like GOLS and GOTS when shopping.

Eco-friendly best pillow for neck pain made with organic latex and cotton featuring finding perfect pillow
Eco-friendly pillows offer sustainable comfort and cervical support.

Editor’s Picks: Pillows to Try Now

These picks cover a range of shapes, fills, and budgets — all trusted for neck support.

Memory Foam vs. Hybrid Mattresses: Which Is Right for You?

memory foam vs hybrid comparison cutaway showing foam and hybrid coil layers - memory foam vs. hybrid

Memory foam gives you deeper contouring and the best motion isolation, while a hybrid adds a pocketed-coil core for more bounce, stronger edges and better airflow. If your priority is pressure relief on shoulders and hips, or a quiet bed you share with a restless partner, foam is the safer bet. If you sleep hot, change positions often, weigh more, or sit on the edge of the bed, a hybrid usually suits you better.

Key takeaways

  • Feel: Memory foam hugs and responds slowly; hybrids feel lifted and springy, so moving around is easier.
  • Cooling: Coil cores let air move under your body, so hybrids generally sleep cooler; foam needs ventilation, open-cell structure or cooling covers to keep up.
  • Motion and noise: All-foam beds absorb movement best and stay silent; good hybrids come close but rarely beat foam.
  • Edges and support: Hybrids usually have firmer perimeters and hold up better under heavier bodies.
  • Durability and price: Build quality matters far more than category. Foam typically starts cheaper; hybrids cost more because of the coil unit.

What each mattress type actually is

Memory foam

Memory foam is viscoelastic polyurethane foam: it softens with body heat and pressure, then slowly returns to shape. A typical all-foam mattress stacks a plush comfort layer over a firmer transition foam and a dense base foam, with no springs anywhere in the build. That layered foam stack is what produces the signature slow-sinking “hug” and the near-total absence of bounce.

Memory foam mattress cross-section showing deep contouring and body-hu featuring hybrid memory foam

Hybrid

A hybrid pairs a pocketed-coil support core with meaningful foam or latex comfort layers on top — usually a couple of inches or more, not just a thin quilted pad. Individually wrapped coils flex independently, which helps contouring and reduces motion spread compared with older connected-coil innerspring units. The gaps between coils also create open space for air to circulate, which is the main reason hybrids tend to run cooler.

Hybrid mattress cutaway showing pocket coils and foam comfort layers f featuring hybrid memory foam

If you want the wider landscape first — latex, innerspring, airbeds and more — start with our overview of mattress types explained, then come back to this head-to-head.

Memory foam vs hybrid at a glance

Category Memory foam Hybrid
Feel Deep, slow-sinking contour; “in the bed” Balanced cradle with coil lift; “on the bed”
Pressure relief Excellent at shoulders and hips Very good; depends on comfort-layer thickness
Motion isolation Best in class; silent Good to very good; slight bounce
Temperature Can trap heat unless engineered for airflow Usually cooler thanks to airflow through coils
Edge support Often softer, less stable to sit on Usually firmer via edge coils or foam encasement
Ease of moving Slower; combination sleepers may feel stuck Responsive; easy position changes
Weight and handling Heavy but simpler to move and compress Heaviest; awkward for one person
Typical price Lower entry point Higher for comparable quality
Best suited to Side sleepers, light sleepers, couples wanting stillness Hot sleepers, combination sleepers, heavier bodies, edge sitters

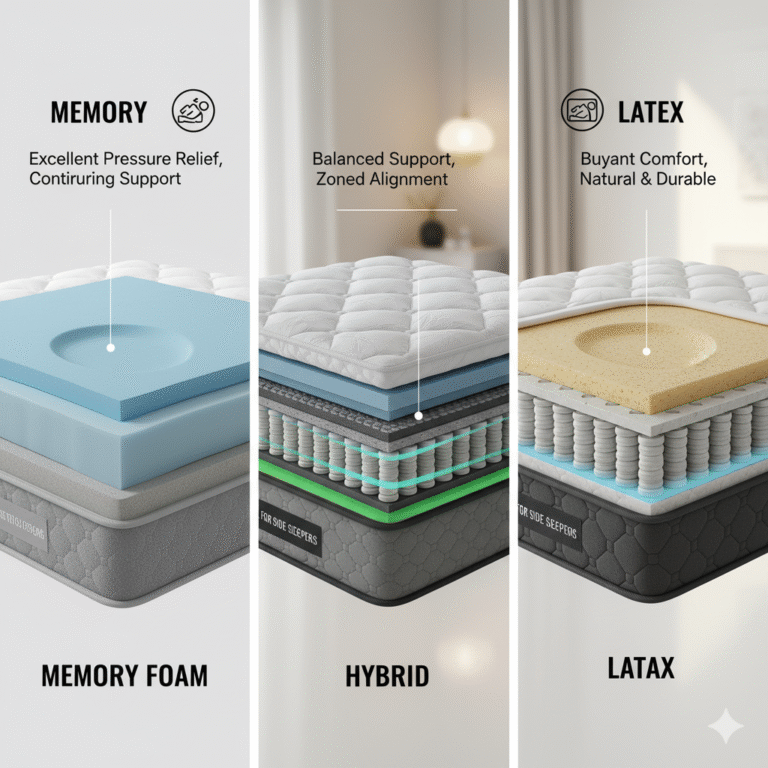
Cutaway comparison of memory foam, hybrid and latex mattress construction layers

Feel and pressure relief

Memory foam contours more deeply, so it fills the gap at your waist and takes load off the points that press hardest into the mattress. That is why side sleepers with sore shoulders or hips so often prefer it. The trade-off is response speed: foam releases slowly, and if you shift position a lot you may feel like you have to climb out of the impression you just made.

Hybrids cushion through their foam layers but push back from below, so you sit slightly more on top of the surface. Zoned coil units — firmer under the hips and lumbar area, softer under the shoulders — narrow the pressure-relief gap considerably. If your position varies night to night, our guide to the best mattresses for side, back and stomach sleepers covers how much cushioning each position realistically needs.

Cooling and airflow

This is the clearest practical difference. Solid foam is a closed environment: heat and moisture sit between your body and a material that responds to warmth by getting softer. A coil core, by contrast, is mostly air. Hybrids therefore tend to feel more temperature-neutral over a full night.

Modern foam has closed much of the gap with perforations, open-cell structures, gel or graphite infusions and phase-change covers. Sleep Foundation’s rundown on making a memory foam mattress sleep cooler is a useful reference if you already own one and want to fix the heat rather than replace the bed. Be sceptical of unquantified “cooling” marketing on either type — there is no standard consumer test behind those claims, so treat them as design intent, not proof. If heat is your main complaint, read our dedicated roundup of the best cooling mattresses for hot sleepers, which covers covers, toppers and bedding as well as the mattress itself.

Motion isolation and sharing a bed

All-foam mattresses absorb movement better than almost anything else and make no noise, which matters if one of you gets up early or works shifts. Hybrids transmit a little more movement because coils flex, though a thick foam comfort layer and well-isolated pockets reduce it to a level most couples never notice.

The other half of the equation is edge support. Hybrids generally hold the perimeter better, so two people can sleep closer to the sides without feeling like they are rolling off — genuinely useful on a queen. For more on balancing stillness against ease of movement, see our picks for couples who toss and turn.

Support, alignment and back pain

Neither category is automatically better for your back. What matters is whether the mattress keeps your spine in a neutral line while relieving pressure — and that depends on firmness, comfort-layer thickness and your body weight far more than on whether the core is foam or steel.

Independent evidence here is thinner than most buying guides admit. A randomised, double-blind trial published in The Lancet tested mattress firmness in adults with chronic non-specific low back pain, and orthopaedic researchers have since revisited the question in literature reviews, but the research looks at firmness and support rather than foam versus coil. Practical implication: do not buy a category hoping it cures pain. Match firmness to your weight and position, use the sleep trial, and speak to a clinician about persistent pain. If back comfort is the main driver, our guide to mattresses for back pain relief goes into support layers in more detail.

As a rough rule: lighter bodies and dedicated side sleepers usually do better on medium to medium-soft; average and heavier bodies, plus back and stomach sleepers, usually want medium-firm with a genuinely supportive core. Heavier sleepers on all-foam beds are the most likely to feel the comfort layers compress fully — “bottoming out” — which is a common reason people move to hybrids.

Durability, warranty and value

Category tells you less about lifespan than construction does. Coils resist permanent body impressions well, and a hybrid’s failure point is usually the foam above them; an all-foam bed’s failure point is usually a soft, low-density comfort layer. Either way, the comfort layer is what wears out first.

  • Foam density: spec sheets list comfort-foam density in lb/ft³, and higher density is widely treated as a durability signal. Independent long-term testing is scarce, so use density as one clue rather than a guarantee.
  • Coil quality: look for tempered steel, individually pocketed coils and zoning — and remember that a high coil count on its own means little.
  • Comfort-layer depth: a hybrid needs enough foam above the springs that you never feel them.
  • Warranty and trial: ten-year warranties are the industry norm rather than a tested service life, and they usually only cover defects such as sagging beyond a stated depth. Read what depth counts, and whether a valid foundation is required.

On price, memory foam generally starts lower because there is no coil unit to build, ship and reinforce. Comparable hybrids cost more, and very cheap hybrids often economise on the foam above the coils — which is exactly where you feel it. If budget is the constraint, compare options in our mattresses in a box under $1,000 guide before stretching for a category you do not need.

Who should choose which

Choose memory foam if…

  • You sleep mainly on your side and want pressure taken off shoulders and hips.
  • You or your partner wake easily to movement, and you want a silent bed.
  • You like the enveloping, slow-sinking feel and do not overheat easily.
  • You want the lowest entry price for a given level of comfort.

Choose a hybrid if…

  • You sleep hot or live somewhere warm without much cooling.
  • You change position frequently or find foam hard to move on.
  • You are a heavier sleeper, or you sit on the edge of the bed regularly.
  • You want a more traditional, buoyant feel with modern pressure relief.

Still torn between foam and springs generally? Our memory foam vs spring mattress comparison covers the classic innerspring option, which is a different animal from a hybrid.

Two mattresses side by side comparing memory foam and spring surfaces

Firmness, foundation and the things people forget

Firmness is your first impression; support is what you feel at 4 a.m. A soft mattress can still be supportive if the core holds your hips level, and a firm one can still cause pain if it leaves gaps under your lumbar curve.

Your base matters too. All-foam mattresses need a solid platform or slats spaced closely — widely spaced slats let foam sag between them and can void a warranty. Hybrids are more forgiving but still specify a maximum slat gap. Check the manufacturer’s requirement before ordering a frame, especially with storage or adjustable bases.

Pillow choice changes perceived firmness as well. A mattress that contours deeply drops your head further, so you may need a lower-loft pillow than you used on a firmer bed; the reverse applies when you switch to a hybrid.

Eco-friendly considerations

Neither type is inherently green, but you can shop more carefully.

  • Material transparency: prefer brands that publish foam densities, coil specs and cover fibres, and that list recognised third-party certifications for foam emissions and textiles.
  • Natural textiles: cotton and wool covers or quilting are alternatives to fully synthetic surfaces, and wool helps buffer moisture and temperature.
  • End of life: steel coils are readily recyclable, and hybrids can often be separated into components more easily than glued multi-foam stacks. Check whether your council or retailer offers mattress collection or recycling before disposal.
  • Longevity beats everything: the lowest-impact mattress is the one you keep. Use a breathable protector, rotate as the maker advises, and buy the feel you will still like in year five.

Stacked eco-friendly latex and foam mattress layers showing natural materials

Buying checklist

  1. Name your priority: deepest pressure relief and stillness (foam) or cooler, springier support with strong edges (hybrid)?
  2. Match firmness to body and position, not to reviews written by people built differently from you.
  3. Check the specs that predict wear: comfort-foam density, coil type and zoning, comfort-layer depth.
  4. Read the trial and warranty terms: length, return fees, sag depth covered, foundation requirements.
  5. Confirm your base and bedding: slat spacing, and a pillow loft that suits how far you now sink.
  6. Use the whole trial period. Most bodies need two to four weeks to adjust to a new surface before a fair verdict.

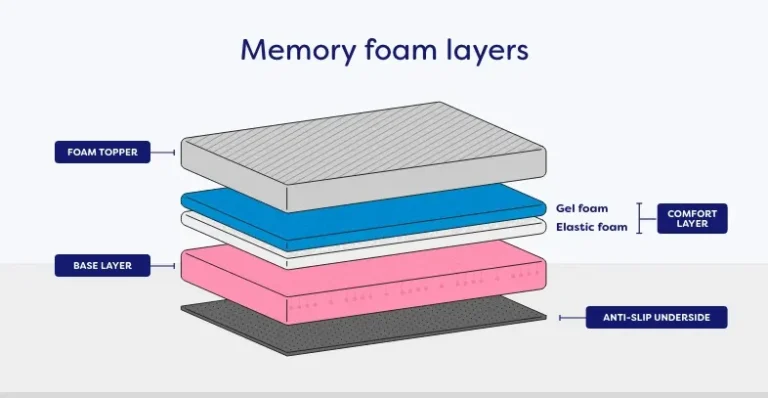
Diagram labeling memory foam mattress layers from foam topper to base

Frequently asked questions

Is memory foam or hybrid better for couples?

Memory foam wins on motion isolation and silence; hybrids win on edge support and temperature. If one partner sleeps hot and the other is a light sleeper, a hybrid with a thick foam comfort layer is the usual compromise.

Which lasts longer?

A well-built example of either type can serve for many years, and coils do resist impressions well — but the soft comfort layer fails first in both designs. Density, foam quality and warranty terms tell you more than the category label does.

Do hybrids really sleep cooler?

Generally, yes, because air moves through the coil layer. A well-ventilated foam mattress with a breathable cover can still sleep comfortably; a sealed, dense foam build is the most likely to feel warm.

Is a hybrid the same as an innerspring?

No. An innerspring has a thin comfort layer over coils, often interconnected. A hybrid uses pocketed coils plus substantial foam or latex on top, so it feels much closer to a foam bed.

Can I fix a foam mattress that sleeps hot instead of replacing it?

Often, partly. A breathable protector, cotton or linen sheets, a cooler room and a ventilated topper all help. They will not turn a heat-trapping build into a cool one, but they can make it liveable.

Which is better for heavier sleepers?

Usually a hybrid, or a foam bed with a high-density core and thicker comfort layers. Coils provide more pushback and reduce the chance of compressing straight through to the base.

The bottom line

Memory foam and hybrid mattresses are both good beds aimed at different problems. Buy foam for contouring, quiet and value; buy a hybrid for airflow, bounce, edges and support under more weight. Then let firmness, comfort-layer quality and a real sleep trial make the final call — those three decide whether you like the mattress far more than the category on the label does.

Updated September 2026.

The Mattress Firmness Scale Explained: From Plush to Rock-Solid

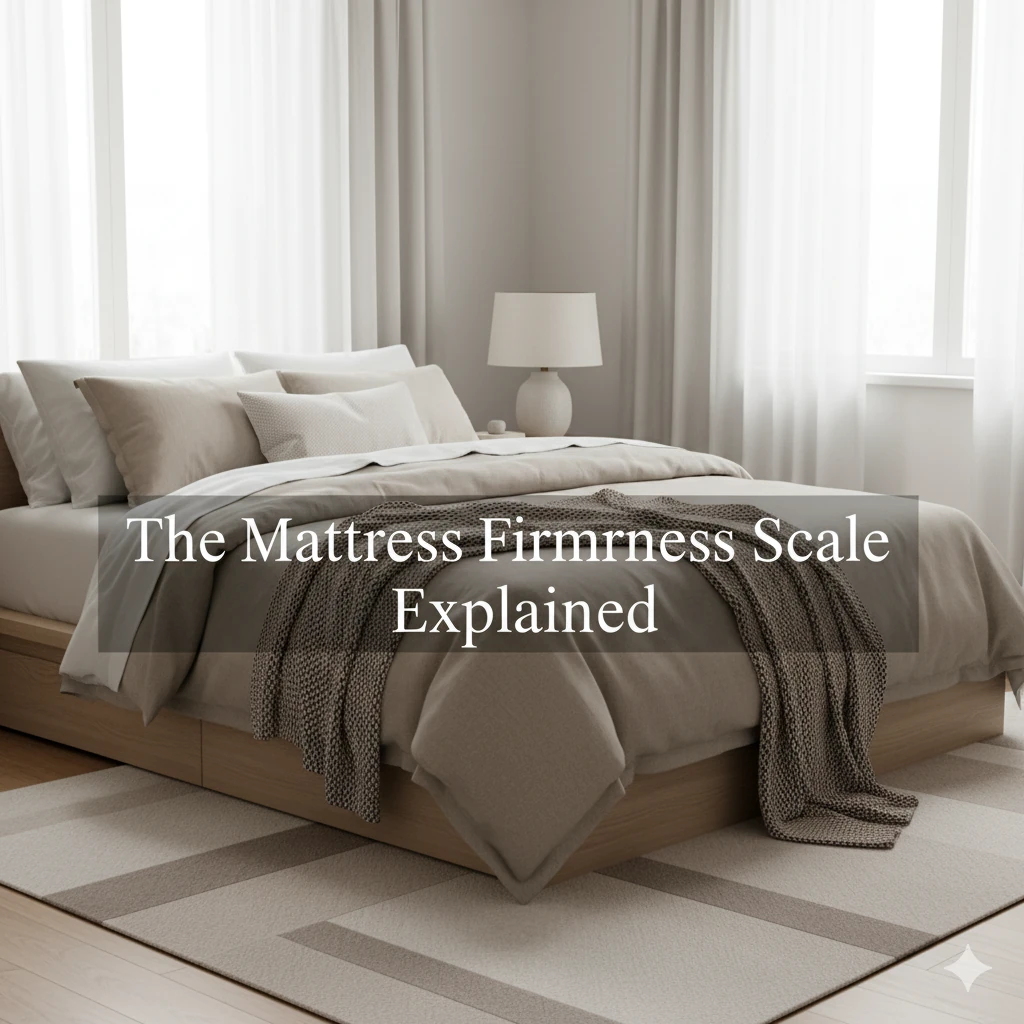
cozy modern bedroom illustrating the mattress firmness scale concept f featuring mattress firmness scale explained

The Mattress Firmness Scale Explained: From Plush to Rock-Solid

The right mattress firmness scale helps create a cozy and restful sleep space.

The mattress firmness scale is a universal guide that measures how soft or firm a mattress feels. Understanding where you fall on this scale can make the difference between tossing all night and waking up refreshed, supported, and ache-free.

When shopping for a mattress, many people focus on brand names or special cooling features but overlook firmness — the single biggest factor influencing comfort. Your mattress should support your spine while cushioning the body’s natural curves. If it’s too soft, you may sink and strain your lower back; if it’s too firm, your shoulders and hips may absorb too much pressure. Finding that “Goldilocks” balance of softness and support starts with decoding the mattress firmness scale.

This guide explains how firmness ratings work, how your sleep position and body weight affect feel, and what materials change perception. You’ll also learn expert-backed ways to test firmness in-store or during a home trial. By the end, you’ll know exactly which level of firmness creates your ideal comfort zone.

mattress firmness scale chart from plush to firm showing comfort level featuring mattress firmness scale explained
The mattress firmness scale ranges from ultra-plush to extra-firm — each offering unique comfort and support.

What the 1–10 Firmness Scale Really Means

The mattress firmness scale runs from 1 (the softest) to 10 (the firmest). While the numbers sound technical, they’re simply a way to compare how much a mattress compresses under weight. Most high-quality mattresses fall between 3 and 8 — a range that covers soft to extra-firm comfort levels.

Lower numbers (1–4) describe plush mattresses that let you sink in for deep contouring. These beds are gentle on pressure points but can feel less supportive for heavier sleepers. Mid-range levels (5–6) strike a comfortable balance between softness and structure, which is why they’re so popular among couples. Higher numbers (7–10) refer to firm and extra-firm surfaces that keep the spine aligned and prevent the hips from sinking.

Firmness Level Description Best For
1–2 Ultra Plush Side sleepers who like deep contouring and a “cloud-like” hug
3–4 Soft Lightweight sleepers or those with joint or shoulder pain
5–6 Medium Combination sleepers and couples seeking balance
7–8 Firm Back or stomach sleepers who need strong lumbar alignment
9–10 Extra Firm Heavier individuals or those preferring minimal sinkage

Keep in mind that numbers vary slightly between brands. One company’s “medium-firm” may feel softer than another’s due to differences in foam density or coil tension. That’s why physical testing or detailed online reviews are essential before buying.

Matching Firmness to Sleeping Position

How Your Sleep Style Impacts Comfort

Every sleeping position affects pressure points differently, which is why firmness choice should start with how you sleep most of the night. Matching firmness to posture not only improves comfort but also prevents chronic back or shoulder pain.

  • Side Sleepers: Soft to medium mattresses (3–5) cradle the shoulders and hips, helping reduce pressure buildup along the body’s curves.
  • Back Sleepers: Medium-firm options (5–7) maintain the spine’s natural “S” curve and prevent lower-back sagging.
  • Stomach Sleepers: Firmer beds (7–8) keep the hips from sinking, which protects the lumbar region from strain.
  • Combination Sleepers: A responsive medium mattress (5–6) offers adaptability and ease of movement throughout the night.

Unsure which category fits you? Spend a few nights tracking your dominant sleep position. Even if you start on your side but wake up on your stomach, a medium-firm mattress might still deliver balanced comfort across multiple positions.

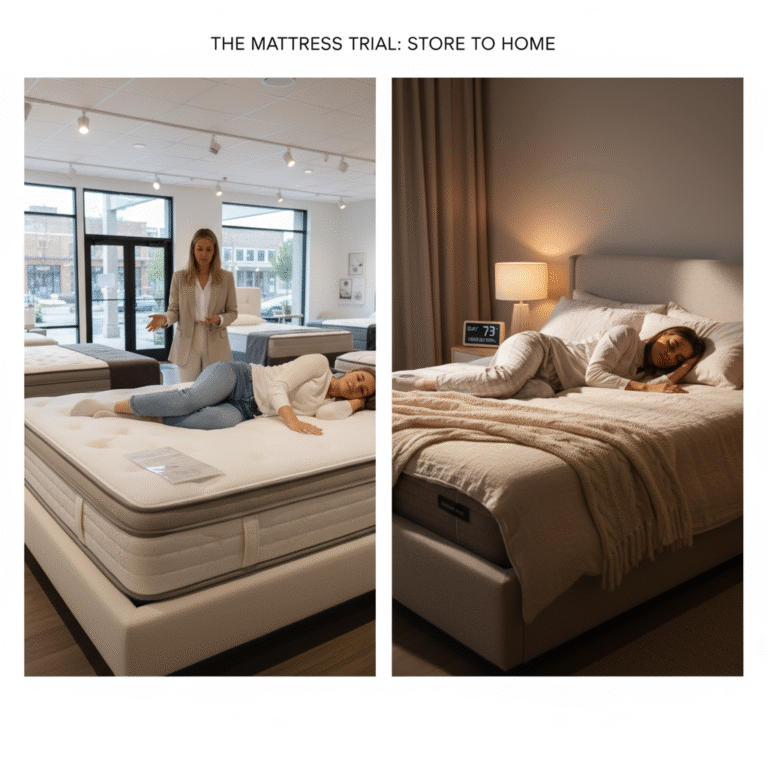
Split image comparing mattress trial in showroom and sleeper resting at home
Body weight changes how each level on the mattress firmness scale feels and supports your spine.

Body Weight & Materials: How Feel Changes

Weight Distribution Alters Firmness Perception

Two sleepers on the same mattress might describe completely different sensations. That’s because body weight directly affects how much a mattress compresses. Lighter sleepers (under 130 lbs) rest closer to the surface, making most mattresses feel firmer. Average-weight sleepers (130–230 lbs) usually experience the intended feel, while heavier individuals (230 lbs+) sink deeper, perceiving a softer comfort level.

Material matters just as much:

  • Memory Foam: Offers a slow, deep “hug” that conforms to curves and minimizes motion transfer. Ideal for pressure relief.
  • Latex: Naturally bouncy and breathable, giving a lifted, buoyant feel that prevents overheating.
  • Hybrid: Combines foam layers with innerspring coils for balanced contouring and support, suiting a wide range of sleepers.

The right combination of firmness and material ensures that your mattress adapts to you — not the other way around. If you share a bed, hybrid or zoned models often provide the best compromise between plush comfort and edge support.

Testing Firmness In-Store vs. At Home

Practical Steps for Finding the Perfect Feel

When testing in-store, don’t just press your hand into the surface — lie down in your typical sleep position for at least 10–15 minutes. Pay attention to whether your shoulders, hips, and lower back feel supported. If you notice numbness or tension, the firmness isn’t right for you.

At home, give yourself at least 30 nights to adapt. It’s normal for your body to need a few weeks to adjust to new support levels. Most reputable brands, including those sold at Cozy Bed Quarters, offer generous 100-night trials so you can exchange or return the mattress if it doesn’t feel ideal.

Common Myths About Soft vs. Firm

Separating Mattress Firmness Facts from Fiction

Myth: “A firmer mattress is always better for your back.”

Truth: Excess firmness can increase tension in the shoulders and hips. The ideal level supports your spine’s natural curve, not a rigid straight line.

Myth: “Soft mattresses don’t provide enough support.”

Truth: High-quality foams and hybrids can deliver plush comfort while still maintaining excellent spinal alignment. Support comes from internal structure, not just firmness.

Eco-Friendly vs. Conventional Mattress Materials

Why Sustainable Mattresses Feel Better

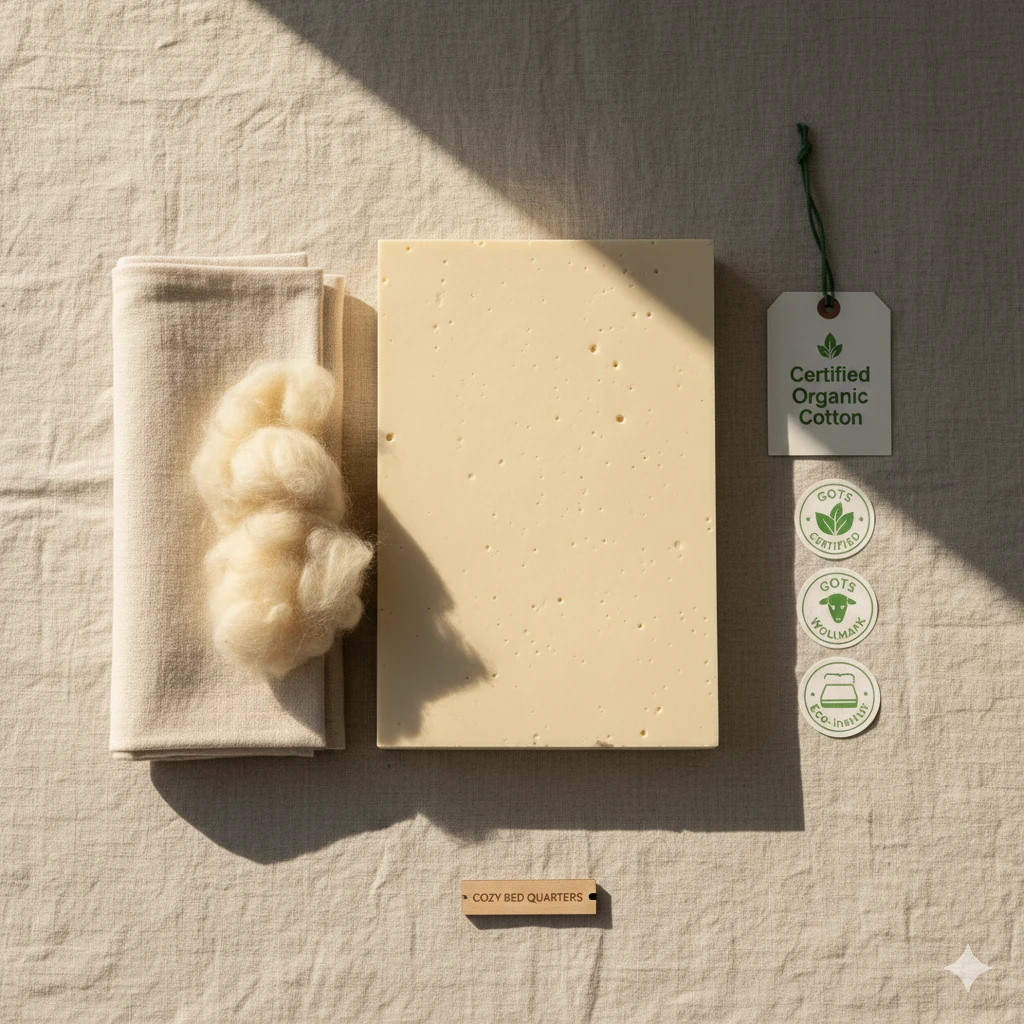
eco-friendly mattress materials organic latex and cotton shown in matt featuring mattress firmness scale explained
Eco-conscious materials align with comfort and sustainability on the mattress firmness scale spectrum.

Materials not only influence comfort but also your health and environmental impact. Organic latex, cotton, and wool provide breathable comfort and resist allergens without synthetic chemicals. Conventional foam mattresses, while affordable, can trap heat and release volatile organic compounds (VOCs) over time.

Look for trusted certifications like GOLS (Global Organic Latex Standard), GOTS (Global Organic Textile Standard), CertiPUR-US® for safe foams, and OEKO-TEX® for textile purity. These ensure your mattress meets strict standards for safety and sustainability.

For an in-depth guide to creating a healthier sleep sanctuary, explore our article on creating the ideal sleep environment.

Key Takeaways: Mattress Firmness Scale

Cutaway comparison of memory foam, hybrid and latex mattress layers showing firmness support
  • The mattress firmness scale runs from 1 (softest) to 10 (firmest).
  • Align firmness with your body type and preferred sleeping position.
  • Foam, latex, and hybrid materials each affect perceived comfort.
  • Test mattresses both in-store and through at-home trial periods.
  • Eco-friendly, certified materials promote healthier, longer-lasting comfort.

FAQ: Mattress Firmness Scale

How do I know which firmness level suits me best?
Consider your sleep position and weight. Side sleepers need soft to medium, back sleepers medium-firm, and stomach sleepers firm support for proper alignment.
Does a mattress get firmer or softer over time?
Yes. Foams may slightly soften with use, while latex and hybrid coils tend to maintain firmness longer.
What if my partner prefers a different firmness?
Choose a dual-firmness or split mattress design, or add a topper to one side for personalized comfort.

Final Thoughts

Understanding the mattress firmness scale empowers you to choose comfort with confidence. The right firmness not only supports restful sleep but also promotes spinal health and posture. Whether you prefer a plush, body-hugging feel or a firm, supportive surface, investing in the right mattress pays dividends in daily energy and long-term well-being.

Explore more expert sleep insights, eco-friendly bedding tips, and buyer’s guides at Cozy Bed Quarters.

Related Reading

Best Mattress for Side Sleepers: A Guide to Pressure Relief

The best mattress for side sleepers with shoulder and hip pressure rel featuring mattress side sleepers

Choosing a Mattress for Side Sleepers

If shoulder or hip pain keeps you up, this guide to the best mattress for side sleepers shows exactly how to get deep pressure relief, better spinal alignment, and cooler sleep—without guesswork. You’ll learn which materials work, how to test a mattress in minutes, and how to keep your bed performing like new.

Key Takeaways

  • The best mattress for side sleepers pairs plush surface contouring with stable support beneath to protect shoulders and hips.
  • Memory foam and plush hybrids typically deliver the most pressure relief; latex adds bounce and durability.
  • Target a medium to medium-soft feel (with zoning if possible) for alignment and comfort.
  • Prioritize breathable foams, coils, and covers for temperature control.
  • Use in-store or at-home tests to verify relief, then maintain the mattress to extend its life.

Why Side Sleepers Need Specialized Support

Answer first: Side sleeping concentrates weight at the shoulder and hip, so you need plush contouring on top with steadier support underneath to keep your spine neutral.

When you sleep on your side, your shoulders and hips become high-pressure zones. A mattress that’s too firm compresses these areas and can pinch nerves, while one that’s too soft lets your midsection sink and strain your lower back. The sweet spot is plush contouring at the surface with steadier support below so your spine stays neutral from neck to tailbone.

If you often wake up with sore shoulders, choosing a mattress for shoulder pain can make a major difference in keeping pressure off your joints.

What that feels like: your shoulder should sink just enough to keep your neck level on the pillow, your hip should be cradled without tilting your pelvis, and your waist should be gently supported to avoid side-bend sagging.

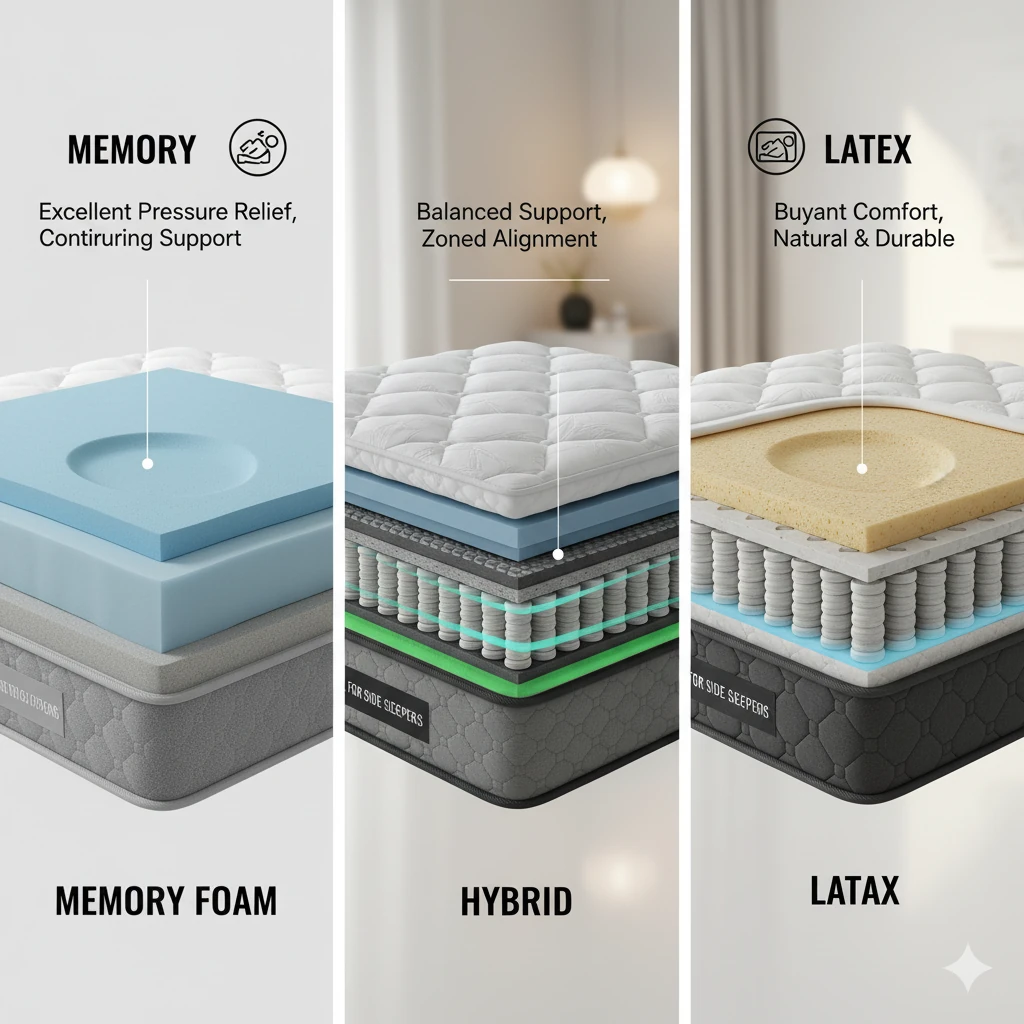
Cutaway of the best mattress for side sleepers comparing memory foam,  featuring mattress side sleepers

Best Mattress Types for Side Sleepers (Memory Foam, Hybrid, Latex)

Answer first: Memory foam offers the deepest contouring, hybrids blend relief with bounce and airflow, and latex provides responsive cushioning with standout durability.

Memory Foam

Foam’s slow-hug feel conforms closely to curves, reducing peak pressure at the shoulder and hip. Look for comfort foams in the 3–4 lb/ft³ range for plush relief, with denser transition foam beneath to prevent bottoming out. If you also sleep warm, consider open-cell foams or phase-change covers for better airflow.

Hybrid

A hybrid pairs foam comfort layers with a pocketed coil core. For side sleepers, this combo can be ideal: deep contouring on top with springy, zoned coils that keep your lumbar from sinking. Choose coils with edge reinforcement if you sit on the side of the bed frequently, and aim for a medium or medium-soft feel.

Latex

Latex has a buoyant, responsive cradle—great if you want pressure relief without the “stuck-in-foam” sensation. Talalay latex tends to feel plusher, while Dunlop feels denser and more supportive. Latex is naturally breathable and durable, making it a solid long-term investment.

Not sure which direction to go? This comparison of materials can help you decide between a plush foam hug and a bouncier, breathable feel found in coil-assisted designs—see our guide to hybrid mattress benefits for practical pros and cons.

Key Features: Pressure Relief, Zoned Support, Cooling

Answer first: Aim for 2–4 inches of plush comfort material, targeted zoning for shoulders and lumbar, and breathable construction to manage heat.

The best mattress for side sleepers with breathable covers and airflow-friendly coils, perforated latex, or ventilated foam channels will keep you more comfortable through the night. Moisture-wicking covers also help reduce clammy wake-ups. Learn more about temperature control in this Sleep Foundation guide on sleep temperature regulation.

Look for a pressure relief mattress that balances softness and structure, helping your body relax into alignment.

Cooling features in the best mattress for side sleepers, showing breat featuring mattress side sleepers

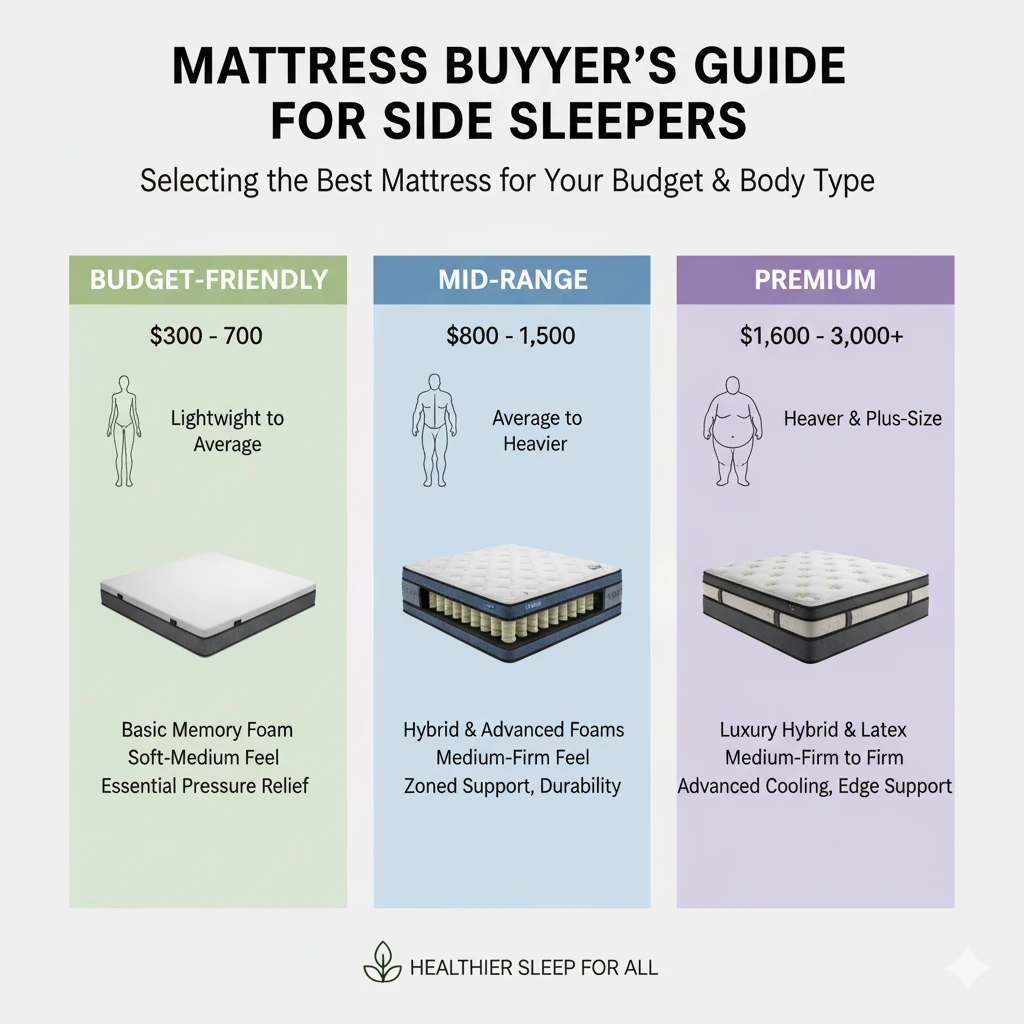
Top Picks by Budget and Body Type

Answer first: When comparing options, the best mattress for side sleepers should feel medium to medium-soft across budgets; lighter bodies benefit from plusher tops, while heavier bodies need thicker comfort layers and sturdier cores.

A slightly soft mattress for side sleepers allows natural shoulder and hip cushioning without losing support.

Budget-Friendly (Under $800–$1,000 for Queen)

Look for medium to medium-soft memory foam models with at least two comfort layers and a dense base foam. Prioritize reputable warranties and real trial periods to test pressure relief at home.

Mid-Range ($1,000–$1,700)

Plush hybrids shine here: zoned pocketed coils for alignment, plus gel-infused or open-cell foam for pressure relief. If you’re under 150 lbs, a slightly softer top helps you sink enough at the shoulder; 150–230 lbs. often prefer classic medium; above 230 lbs. may need a medium-firm with thicker comfort layers.

Premium ($1,700+)

Consider latex hybrids or advanced foams with targeted zoning and breathable covers. These options often last longer and keep support consistent across years of use. If you want something that still feels brand new five years from now, a latex hybrid could be your forever mattress.

If you experience both side sleeping and back issues, our strategies in the back pain mattress guide (king-size focus) can help you choose a feel that balances contouring with lumbar stability.

Budget tiers for selecting the best mattress for side sleepers with op featuring mattress side sleepers

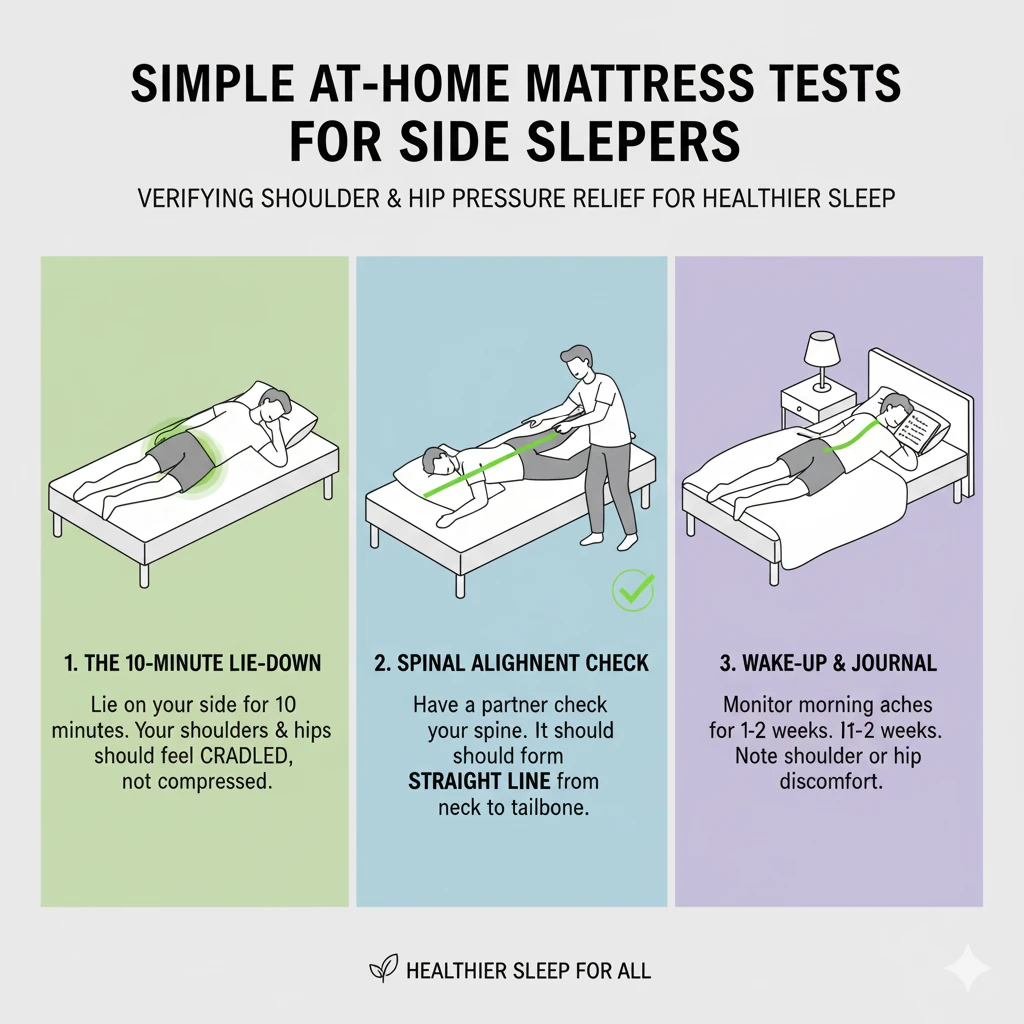
How to Test a Mattress for Shoulder & Hip Relief

Answer first: Run quick checks for shoulder nestling, pillow height, and hip support, then validate over the full trial period.

  1. Side-Hug Check (2–3 minutes): Lie on your regular side. Your shoulder should nestle without numbness; your waist should feel gently filled, not arched.
  2. Pillow Alignment: With your head on your usual pillow, your nose should align with your sternum. If not, adjust pillow height before blaming the mattress.
  3. Hip Sink Test: Place a hand at your low back; there should be light contact. A gap means too firm; a deep sag means too soft.
  4. Roll & Reset: Roll to your back and return to side. If you feel stuck, consider a bouncier hybrid or latex.
  5. At-Home Trial: Use the full trial window. Note pressure or soreness patterns in the morning—improvements should appear within 1–2 weeks. Don’t worry if it takes a few nights to adjust—your body often needs a short “break-in” period before the mattress truly supports you.

Simple at-home tests for the best mattress for side sleepers to verify featuring mattress side sleepers

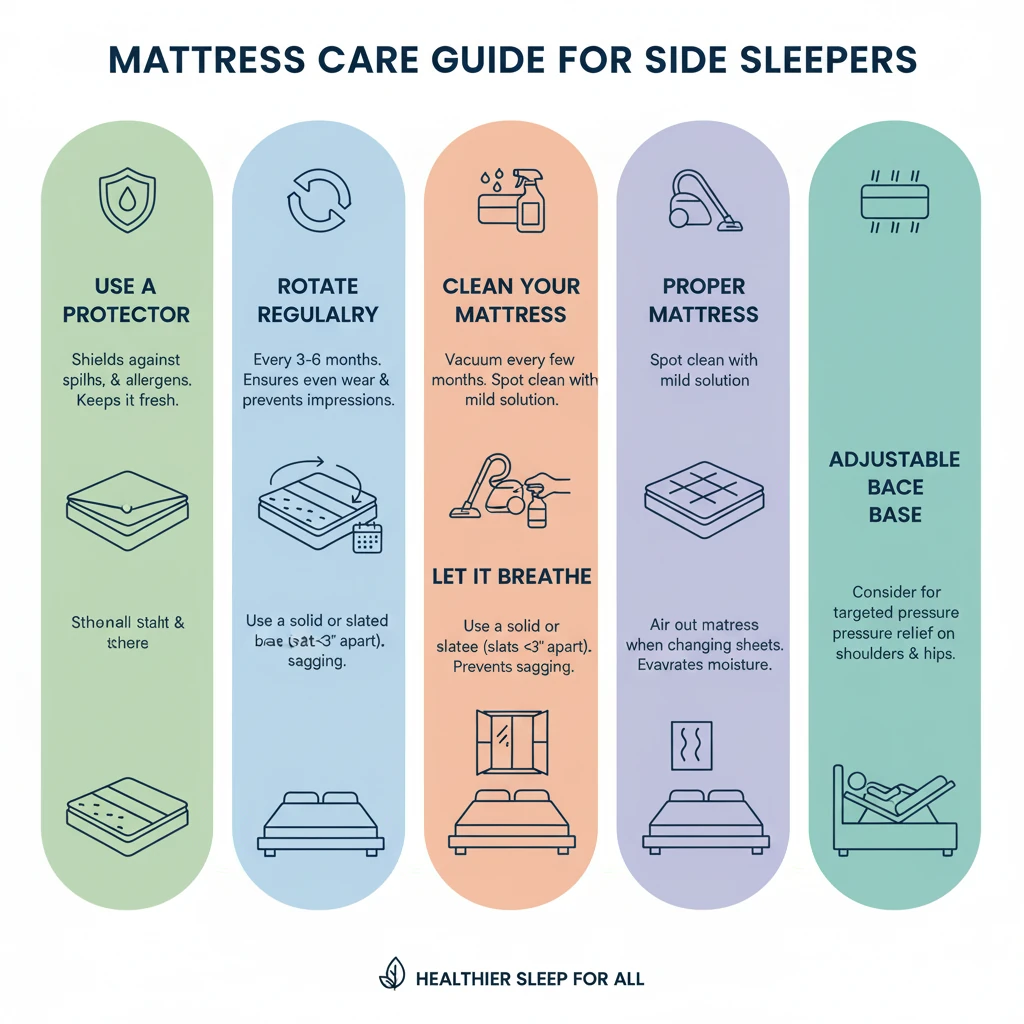
Care, Rotation & Longevity Tips

Answer first: Protect, rotate, and keep the surface clean to preserve support and comfort for years.

Protect your best mattress for side sleepers investment with a breathable protector and rotate it every 2–3 months for the first year (then seasonally). Keep the surface clean to prevent allergens and premature wear—our step-by-step guide on how to clean a mattress covers safe stain removal, deodorizing, and drying. Check your base: a solid foundation or correctly slatted platform preserves alignment and warranty coverage. For more eco-aligned tips, see mattress longevity advice from Ethical Bedding.

Care steps that help the best mattress for side sleepers last longer w featuring mattress side sleepers

Final Thoughts on Finding the Best Mattress for Side Sleepers

The best mattress for side sleepers balances deep pressure relief with stable support to keep your spine aligned and shoulders pain-free. Whether you lean toward plush foam or hybrid bounce, focus on breathable layers, consistent comfort, and durability. At Cozy Bed Quarters, we test and review every mattress type to help you rest easier, night after night. The best mattress for side sleepers isn’t just about pressure relief—it’s about waking up without pain and actually looking forward to bedtime again.

Related Reading

Hybrid Mattress Benefits: Cooling, Bounce, and Support
Best Memory Foam Mattresses 2024: Top Picks
Best Memory Foam Mattress for Side Sleepers (2024)
Expert-tested side sleeper mattresses (Sleep Foundation)
Pro mattress buying guide (Architectural Digest)

More Expert Insights

At Cozy Bed Quarters, we’ve helped hundreds of local side sleepers finally get the rest they deserve. This 2026 guide covers everything you need: key features, our top-tested recommendations, and practical tips tailored to hot, dry environments like ours.

Gel-infused foam, breathable covers, phase-change materials, or open coil systems help in Arizona’s warm nights.

Euro-top plushness with strong coil support. Great airflow for hot sleepers. Highly rated by NapLab.

Advanced zoned coils + cooling cover. Great for combination sleepers. Praised by Forbes Vetted.

Quick Buying Guide: Find Your Perfect Match

  • Budget under $1,000 → Nectar Premier
  • Hot sleeper in Phoenix → Leesa Sapira Chill or DreamCloud
  • Back or shoulder pain → Helix Midnight Luxe or Nolah Evolution
  • Eco-conscious → Birch Luxe Natural
  • Share the bed → Casper Dream Hybrid or WinkBed

Mattress Care Tips for Arizona’s Dry Climate

  • Rotate every 3–6 months
  • Use a breathable, waterproof protector
  • Keep bedroom well-ventilated
  • Spot clean spills immediately
  • Avoid constant edge sitting

Ready to wake up pain-free and refreshed?

Rather than focusing on brand names, it’s more important to understand the features that contribute to healthy spinal support when selecting the best mattress for back pain.

Many modern mattresses include firmer support through the lumbar area and softer zones near the shoulders. This helps maintain natural posture throughout the night, especially for side sleepers seeking the best mattress for back pain.

Overheating can increase discomfort and disrupt restorative sleep. Breathable covers, gel-infused foams, and coil systems help maintain a cooler sleep surface.

Often recommended for: Side sleepers and those seeking pressure relief around the hips and shoulders.

Often recommended for: Hot sleepers or those with mild to moderate back sensitivity.

These mattresses are designed with spinal support in mind and often feature firmer constructions with targeted reinforcement.

Even high-quality mattresses wear out over time. Signs it may be time for a replacement include:

According to the Sleep Foundation’s 2026 guide, maintaining neutral spinal alignment during sleep is one of the most important factors in reducing back strain. Recent expert testing highlights hybrids like the WinkBed, Helix Midnight Luxe with ErgoAlign, and others as top performers for the best mattress for back pain.

Medical guidance from the Mayo Clinic and the Cleveland Clinic also supports medium-firm sleep surfaces for many individuals experiencing back discomfort.

At Cozy Bed Quarters, we aim to provide clear, research-backed guidance so you can make confident decisions and enjoy more restful, comfortable sleep.

Many sleep specialists recommend medium to medium-firm surfaces for maintaining spinal alignment.

Why it helps: Individually wrapped coils provide targeted lift under the lumbar while allowing the shoulders and hips to settle. Foam on top eases pressure. Pros: great airflow, edge support, easy movement. Cons: quality varies; look for sturdy coil counts and meaningful zoning.

Why it helps: Deep contouring fills gaps under the lower back and distributes load evenly. Pros: excellent pressure relief, motion isolation. Cons: can sleep warmer and feel slow to respond; ventilated or open-cell designs improve comfort.

Why it helps: Naturally resilient and buoyant, latex keeps you “on” the bed, not “in” it, while still cushioning pressure points. Pros: durable, breathable, easy to move. Cons: typically pricier; feel is springier than memory foam.

Why it helps: Classic coil systems with a lumbar band or alternating-gauge rows resist midsection sag. Pros: responsive, cool. Cons: less contouring on top—pair with a quality pillow-top or foam layer to avoid pressure points.

Why it helps: Softer shoulder zones and firmer midsection zones guide the spine into alignment. Pros: precise fit for mixed sleepers. Cons: zoning must match your body; test for shoulder comfort and lumbar lift.

Foam: best pure contouring and pressure relief; choose denser bases to resist long-term sag. Hybrid: balanced feel with pushback from coils plus cushioned tops—often the most versatile for couples and combination sleepers. Innerspring: responsive and breathable; select models with true lumbar reinforcement and a substantial comfort layer to avoid pressure points.

Debating materials? Our deeper comparison of memory foam vs hybrid designs explains feel, cooling, motion isolation, and durability so you can pick with confidence.

Strong support today won’t matter if the mattress sags tomorrow. Rotate new beds every 2–3 months in year one (then seasonally), use a breathable protector, and ensure your foundation meets manufacturer specs to keep warranties valid. When spills or odors happen, follow our step-by-step guide on how to clean a mattress to refresh the surface without damaging foams or fibers. Most quality mattresses last 7–10 years; replace sooner if you notice dips, new pain, or if your body or sleep position has changed significantly.

10 Bedside Lighting Ideas That Are Better Than a Table Lamp

bedside lighting ideas - bedside lighting better table

Meta description: Discover bedside lighting ideas that truly improve sleep—warm dimmable bulbs, sconces, pendants, and smart controls to create a calm, clutter-free bedroom.

Bedside Lighting Ideas for Relaxed Evenings

(Updated 2025)

Bedside lighting ideas that actually support sleep start with warm, dimmable light and simple, space-saving fixtures. Swap harsh table lamps for sconces, pendants, or slim floor lamps you can aim precisely—then keep brightness and color consistent so your wind-down feels calm every night. These bedside lighting ideas are practical, renter-friendly, and easy to layer into any room.

Key Takeaways

  • Layer ambient, task, and accent light so the room feels balanced and relaxing.
  • Use dimmers and warm 2700K–3000K bulbs to support healthy sleep timing.
  • Sconces, pendants, and charging-shelf lights free up nightstand space.
  • Flush or semi-flush fixtures preserve headroom in small rooms.
  • For best results, bedside lighting ideas should let each sleeper control brightness independently.

Bedside lighting ideas that actually work

Start with a soft ambient layer so the room feels safe at night. Add focused task fixtures—like a swivel sconce or pendant—for reading or journaling. Then use one or two low-level accents for depth. Keep each layer on its own switch so you can shift from bright morning prep to a restful evening scene in seconds. For a whole-room plan, see our guide to bedroom lighting ideas.

According to the CDC, minimizing bright light in the hour before bed helps your brain prepare for sleep. The American Academy of Sleep Medicine also recommends keeping evening light warm and lower in intensity—great news for gentle bedside lighting ideas built around dimmers and warm bulbs.

bedside lighting ideas using pendants and slim floor lamps in small bedrooms - bedside lighting better table

A calm, layered scheme puts gentle light exactly where you need it while keeping glare low.

Sconces & adjustable reading lights

Wall sconces free your nightstand and put switches right where you need them. Mount near eye level when seated, and choose swing-arm or swivel heads so the beam lands on the page, not your partner. Opaque or directional shades keep spill light down and the room cozy—ideal bedside lighting ideas for couples.

  • Hardwired models look built-in; plug-ins are renter-friendly and easy to move.
  • Pick step-dimming or high/low controls to avoid dazzling a sleeping partner.
  • Coordinate finishes with nearby hardware for a clean, intentional look.

Want app control or voice dimming? Pair your sconces with simple tips in our smart lighting for bedroom guide.

Pendants & slim floor lamps as bedside alternatives

Hang a single pendant or a matched pair just in from the mattress edge to light your book, not your eyes. Adjustable drops fit both vaulted and standard ceilings, and linen or opal glass shades soften glare for a warm halo. These bedside lighting ideas also declutter small rooms.

  • Pendants clear surfaces and visually simplify small nightstands.
  • Arc and slim floor lamps reach over the shoulder like a pendant—no drilling required.
  • Use separate dimmers so each side of the bed sets a comfortable level.

bedside lighting ideas using pendants and slim floor lamps in small bedrooms - bedside lighting better table

Pendants and slim arc lamps free up your nightstand while focusing light where you need it.

Flush mounts & small-room solutions

In compact bedrooms, overhead fixtures should hug the ceiling and keep sightlines clear. Choose flush or semi-flush mounts with diffusers or fabric shades to reduce hotspots when you recline. Then add one focused bedside source per sleeper for reading comfort—simple, effective bedside lighting ideas that keep rooms feeling open.

  • Flush mounts maximize vertical clearance; semi-flush styles add a hint of drop without bulk.
  • Keep shades soft (linen, opal glass) to avoid glare near the bed.
  • Run overheads and bedsides on separate controls for fast scene changes.

bedside lighting ideas with warm flush mount ceiling light and diffuser - bedside lighting better table

Low-profile ceiling lights preserve headroom and set a calm base layer at night.

Bulbs, brightness & dimmers

Warm white lamps in the 2700K–3000K range keep evenings cozy and reduce blue tones that can delay sleep. Add a fabric or opal shade to diffuse the bulb, and keep color temperature consistent across your bedside pair so the room reads calm and unified. These bulb-forward bedside lighting ideas make a big difference with minimal cost.

  • Target about 400–800 lumens per bedside light; fine-tune with high/low or step-dimming.
  • Look for high CRI to flatter wood tones, fabrics, and wall color.
  • Group lights into simple routines: “Read,” “Unwind,” and “Lights Out.”

Refreshing bedding or mattresses nearby? Check CertiPUR-US® for foam safety guidance and the Non-Toxic Mattress Guide 2025 for material choices that complement your serene lighting plan.

Small upgrades that make a big difference

Sometimes the best bedside lighting ideas are tiny tweaks: a backlit rocker switch you can find in the dark, a charging-shelf light with built-in USB/USB-C, or a narrow shade that keeps fixtures from intruding into tight walkways. These details add convenience without clutter.

  • Place controls within easy reach of the pillow to avoid sitting up fully.
  • Use consistent finishes (matte black, brass, or wood tones) to tie pieces together.
  • Label dimmer presets—brighter for reading, lower for winding down.

bedside lighting ideas with charging shelf light and built-in USB - bedside lighting better table

A compact charging shelf light saves space and keeps cables off your nightstand.

FAQ

What Kelvin is best for bedside lighting at night?

Stick to warm 2700K–3000K. It feels relaxing and helps you wind down, aligning with guidance from sleep experts.

How bright should each bedside light be?

Aim for 400–800 lumens with a diffuser, then fine-tune using high/low or a dimmer so each side stays comfortable.

Are pendants a good replacement for table lamps?

Yes—hang them slightly in from the mattress edge so the beam hits your book, not your eyes. They also free up surface space.

What height should I mount bedroom sconces?

About eye level when seated in bed, with an adjustable arm to steer the beam onto the page and away from your partner.

Do I need smart controls?

No, but simple scenes make life easier. Start with a wall dimmer and add a smart plug or switch later if you want voice control.

Conclusion

Bedside lighting ideas that boost sleep are simple: warm bulbs, dimmers, and fixtures that put light exactly where you need it. Mix sconces, pendants, or a slim floor lamp with a glare-softening shade, and keep controls within reach so winding down feels effortless. For whole-room planning, explore our complete guide to bedroom lighting ideas on Cozy Bed Quarters.

Related Reading

How to Layer Rugs in a Bedroom for a Designer Look

layering rugs in bedroom - layer rugs bedroom designer

Layering Rugs in Bedrooms for Warmth and Style

Layering Rugs in Bedroom can make your space look professionally styled in minutes. A smart stack of textiles adds tone, texture, and depth so your room feels cozy and curated without a full remodel. For bed-by-bed sizing basics, start with our Bedroom Rug Size Guide (pillar).

Key Takeaways

  • Use a larger base to frame the top rug and keep a visible border.
  • Pair natural flatweave with a plush accent to add texture and warmth.
  • Map sizes with painter’s tape so placement feels right before you buy.
  • Let furniture front legs rest on the base for a polished, designer effect.
  • Layering Rugs in Bedroom refreshes what you already own and boosts visual interest.


Layering rugs in a bedroom with a neutral flatweave base under a smaller patterned accent rug

Why Layer Rugs in a Bedroom Space

Pairing a large neutral with a smaller colorful piece anchors zones, adds depth, and brings warm texture without a full redesign. Comfort underfoot also supports a calming wind-down routine, which helps set the stage for better rest.

According to the CDC, most adults benefit from a consistent, comfortable sleep environment—layered rugs can reduce echo and add quiet softness.

Above: a generous jute base lets the patterned top rug pop without overwhelming the room.

It’s budget-friendly: a smaller vintage or bold accent over a calm base gives a luxe look without paying for a massive area piece. You can hide wear on a favorite rug or make a too-small piece feel right-sized.

Pro tip: overlap slightly and let the bottom rug dominate; the contrast keeps the layout balanced and easy on the eye.

  • Use a dominant base with a character-rich accent to add color and interest.
  • Try a tactile mix so texture becomes part of the room’s story.
  • Rotate pieces seasonally to protect the base and refresh the space.
Benefit How it works Quick tip
Depth & warmth Neutral base + textured accent Keep base much larger than top
Budget boost Small statement over affordable area Choose vintage or washable accent
Flexibility Swap top piece seasonally Overlap slightly, not edge-to-edge

Build the Perfect Base: Size, Materials, and Color Foundations

Start with a clean canvas. A flat, durable base grounds the furniture so your accent rug can shine. Measure, mark with tape, and make sure the base reads clearly from all sides.

Get the size right

Measure your room and outline with painter’s tape before buying. An 8′×10′ often fits queen beds, but confirm against your tape map and furniture. For more sizing help, see our Bedroom Rug Size Guide.

Layering Rugs in Bedroom works best when the base rug is sized first u featuring layer rugs bedroom designer

Mapping with tape shows how far the base should extend around your bed and nightstands.

Choose durable, neutral materials

Pick tightly woven jute or sisal for stability under furniture. A neutral base lets your patterned or colorful top rug stand out without visual clutter.

Shopping eco-conscious? Look for recognized textile and bedding certifications to reduce unwanted odors in the bedroom. See this overview of bedding and materials certifications and this consumer-friendly non-toxic buying guide for context.

  • Place front bed legs and nightstands on the base for a stable, tailored look.
  • If unsure, size up—the extra border looks custom.
  • Slide furniture and recheck clearances before committing.
Tip Why it matters Quick action
Measure first Avoid returns and wrong rug size Use painter’s tape to map footprint
Choose jute/sisal Durable, neutral base with texture Pick flatweave for furniture stability
Hold furniture on base Creates a cohesive, designer feel Place front legs on the rug

Layering Rugs in Bedroom: Step-by-Step for a Cohesive, Safe Layout

Place the biggest rug first, then test a smaller accent for the most flattering overlap. Work in small moves and check sightlines from the doorway and bed.

Layering Rugs in Bedroom shown step-by-step with a base rug and top ru featuring layer rugs bedroom designer

A visible border all around the top rug keeps the composition crisp and intentional.

Placement options

Center the base under the bed so the front legs sit on it. Add a top rug under the lower third of the bed, place a small accent at the foot, or run wide side runners for symmetry.

Pairing pattern and texture

Pair a calm, flatweave base rug with a patterned or high-pile top rug to add depth and color. The contrast reads curated without clutter. For low-maintenance care, consider washable low-pile accents.

Proportions that work

Keep the base much larger so a clear border shows all around. Aim for modest overlap—avoid edge-to-edge alignment so the layout feels balanced.

Safety first

Use a quality rug pad under the base and a thin grip under the top rug to reduce slips. Avoid stacking very thick piles, and walk your paths to test stability. See our quick guide to pads in the Bedroom Rug Size Guide.

  • Place base first, then add the top rug.
  • Show a consistent border around the accent piece.
  • Rotate the top rug regularly to refresh the look with minimal lifting.
Step Action Result
Set base Place largest rug under bed; add pad Anchors the space and prevents slip
Add top Center or offset smaller rug Creates contrast and visual interest
Secure Use a thin grip under the top Safe, stable walkways

For an illustrated step-through, see this helpful how-to from The Spruce.

Designer-Approved Combos, Room Scenarios, and What Works Best

Use a tried-and-true pairing when you want instant polish. A generous neutral base with a bolder smaller top works in most bedrooms.

Common size pairings: an 8′×10′ base with a 5′×8′ or 6′×9′ top. If furniture is visually heavy, go with the larger top so the accent still reads intentional. Mark both sizes with painter’s tape and walk the space before you buy.

Want a quick visual demo? Architectural Digest often showcases layered looks that mirror these size rules.

  • 8′×10′ base + 5′×8′ or 6′×9′ top for balanced proportion.
  • Size the top up if the accent feels too delicate.
  • Use a neutral jute or flatweave base so the top’s pattern pops.
Combo Best use Quick tip
8′×10′ base + 5′×8′ top Bedroom anchor Place front furniture legs on the base
8′×10′ base + 6′×9′ top Heavier furniture Let top corners peek past the table or bench
Runner over base Foot-of-bed or narrow spaces Layered look without extra area purchase

Want fit-checks by bed size? Don’t miss our quick explainer: Best Rug Sizes Under a Queen Bed, plus layout notes in the How to Choose a Bedroom Rug guide. For style inspiration, browse real-home examples on Apartment Therapy.

FAQ

Can you layer rugs over carpet in a bedroom?

Yes. Use a low-pile or flatweave base rug over carpet to stabilize the surface, then add a lighter accent on top. A thin pad or grip helps prevent shifting.

What size top rug works on an 8′×10′ base?

A 5′×8′ keeps a generous border; a 6′×9′ feels bolder with heavier furniture. Tape both to see which reads best in your room.

How do you keep layered rugs from slipping?

Use a quality rug pad under the base and a low-profile grip under the top rug. Avoid stacking thick piles in walkways.

Do layered rugs make a small bedroom look smaller?

No, if the base is large enough. A clear border around the top rug actually clarifies the layout and can make the room feel more intentional.

Conclusion

Wrap up the look by setting a generous foundation and letting one smaller piece define the mood. Anchor the plan with a clear base so the top rug shows a visible border, mix one texture with one pattern or color, and secure both layers with pads for safety. With these checks, Layering Rugs in Bedroom becomes a simple designer move that protects pieces, improves traffic flow, and elevates your space. For more cozy bedroom wins, explore Cozy Bed Quarters.

Other reading we found popular

How to Place a Rug Under a Bed: Sizes, Reveals and the Layout Math

how to place a rug under a bed - place rug under bed

How to place a rug under a bed comes down to three layouts: the whole bed plus both nightstands sitting on the rug, the lower two-thirds of the bed on the rug, or two runners flanking the bed. Center the rug on the bed, not on the room, and aim for roughly 18–24 inches (46–61 cm) of rug showing along each side of the mattress so both feet land on something soft. In a typical 10 x 12 ft bedroom that usually means an 8 x 10 under a queen and a 9 x 12 under a king.

Everything below is the arithmetic behind those numbers: what fits, what to measure first, and where the usual advice falls apart.

How to place a rug under a bed: the three layouts and who each one suits

Pick the layout before you pick the rug. It decides the size, and the size decides the price.

1. Full coverage (bed, nightstands, bench all on the rug)

The rug starts a few inches off the headboard wall, runs past the foot of the bed and swallows the nightstands. Hotel look, warmest underfoot, hides scuffed floorboards.

Who it suits: rooms of about 12 x 14 ft (3.7 x 4.3 m) or larger, hard floors, cold climates, anyone who hates stepping onto bare wood in January.

Who should skip it: anyone on a budget. Going from 8 x 10 to 9 x 12 adds 28 sq ft of rug, and 10 x 14 adds 60 sq ft over the 8 x 10 — the cost curve is steep.

2. The two-thirds layout (the one most rooms should use)

Slide the rug under the bed so its top edge sits just past the nightstands — commonly 20–30 inches (51–76 cm) down from the headboard wall. About two-thirds of the bed sits on the rug, and the rest of the rug spreads out at the foot.

You get soft landings on both sides and at the foot, and you don’t pay for rug nobody sees. A 6 x 9 turned sideways under a queen is the classic version: the 9 ft (108 in / 274 cm) dimension runs across the bed, leaving about 24 inches (61 cm) of rug beyond each side of a 60-inch mattress.

Who it suits: most bedrooms between about 10 x 10 and 12 x 14 ft. If you only learn one way of how to place a rug under a bed, learn this one.

Who should skip it: anyone with a very low frame. Under 3 inches (7.6 cm) of clearance and sliding a padded rug underneath means lifting the frame, not shoving.

3. Two runners (or one runner plus a foot rug)

Two runners of about 2.5 x 8 ft (30 x 96 in / 76 x 244 cm) flank the bed, with an optional third across the foot. Nothing goes under the bed.

Who it suits: narrow rooms, beds against a side wall, rentals, and anyone opening under-bed drawers daily. It’s the cheapest warm floor beside a bed, and a small cotton runner goes in the washing machine.

Who should skip it: households where someone has balance problems. Three separate rug edges beside a bed mean three more things to catch a toe on at 3 a.m.

Rug size by bed size, with the exact reveal in inches and cm

Standard U.S. mattress sizes are Twin 38 x 75 in, Twin XL 38 x 80, Full 54 x 75, Queen 60 x 80, King 76 x 80 and California King 72 x 84. The reveal figures below are measured from the mattress edge on a centered rug. Most bed frames add about 2–4 inches (5–10 cm) per side, and upholstered frames can add 4–6 inches (10–15 cm), so subtract that from the reveal.

Bed Mattress (in / cm) Tight but workable Best all-round Rug showing each side (best all-round)
Twin 38 x 75 / 97 x 191 3 x 5 beside the bed 5 x 8 (60 x 96 in / 152 x 244 cm) 11 in / 28 cm
Full 54 x 75 / 137 x 191 5 x 8 turned sideways 6 x 9 sideways (108 in / 274 cm across) 27 in / 69 cm
Queen 60 x 80 / 152 x 203 6 x 9 sideways 8 x 10 (96 x 120 in / 244 x 305 cm) 18 in / 46 cm
King 76 x 80 / 193 x 203 8 x 10 9 x 12 (108 x 144 in / 274 x 366 cm) 16 in / 41 cm
California King 72 x 84 / 183 x 213 8 x 10 9 x 12 or 10 x 14 (120 x 168 in / 305 x 427 cm) 18 in / 46 cm (9 x 12), 24 in / 61 cm (10 x 14)

Do the reveal math yourself in ten seconds

Side reveal = (rug width − bed frame width) ÷ 2. A king frame 80 inches wide on a 9 x 12: (108 − 80) ÷ 2 = 14 inches (36 cm) per side. Enough for one foot; 18 inches is enough for both feet and a dropped phone.

Foot reveal = rug length − (bed frame length − how far down the rug starts). A queen frame 85 inches long with an 8 x 10 starting 24 inches off the headboard wall: 120 − (85 − 24) = 59 inches (150 cm) of rug past the foot. That’s a lot, and it’s why an 8 x 10 in a 12 ft deep room ends up as full coverage whether you planned it or not.

If you’re deciding between two specific sizes, we broke the queen and king cases down further in rug size for a queen bed and the right rug size for a king bed.

Diagram showing how to place a rug under a bed with 18 to 24 inches of rug showing on each side

How much floor should show around the edges?

Most advice on how to place a rug under a bed quotes a bare border of 10–20 inches (25–51 cm) between the rug edge and the baseboards, closer to 18 in larger rooms. Be honest about what that is: a design convention, not a tested standard. What matters functionally is walkway width.

Designers generally call for at least 24 inches (61 cm) of clear floor on each side of a bed, 30–36 inches (76–91 cm) for a queen, and 36 inches or more for a king or Cal King, with main traffic paths around 36 inches. Your rug sits inside that walkway — but the walkway has to exist first. Measure it with the bed where it actually lives.

Two hard minimums: leave at least 6 inches (15 cm) of bare floor at any wall, because a rug that dies into a baseboard reads like failed wall-to-wall carpet, and never let a rug edge land in a doorway threshold.

What to measure before you buy (do all nine)

  1. Bed frame footprint, not the mattress — outside width and length, including feet that splay.
  2. Room, wall to wall, at floor level. Baseboards eat an inch a side.
  3. Door swing. Tape the arc of the bedroom and closet doors.
  4. Door undercut. Interior doors commonly clear the floor by about 5/8–3/4 inch (16–19 mm). A 1/2-inch pile on a 1/4-inch pad is already 3/4 inch. Measure your own gap with a ruler before you buy anything plush.
  5. Floor vents and floor outlets. Covering a supply vent is a heating problem, not just an aesthetic one.
  6. Under-bed clearance, if you’re sliding a rug under a loaded frame.
  7. Drawer and dresser swing at the rug edge.
  8. Delivery path. Rugs ship rolled, and the tube is usually about as long as the rug’s short side — so a 9 x 12 arrives as a roll around 9 ft (2.7 m) long. Measure your tightest stairwell turn and doorway width. A 9-ft tube does not pivot on a landing that’s 3 ft square.
  9. Lift help. Big dense wool rugs are a two-person job. Check the shipping weight on the spec page rather than guessing; it varies hugely between a flatweave and a hand-knotted pile of the same size.

Then tape the outline. Painter’s tape on the floor for 24 hours teaches you more about how to place a rug under a bed than any guide will. Walk it barefoot in the dark.

Nightstands, benches and dressers: on the rug or off?

The rule people repeat is “front two legs on the rug.” That’s a living-room rule; in a bedroom it applies to benches and chairs, not the bed.

  • Nightstands: either all the way on or completely off. Half-on creates a rug edge under a lamp cord and a wobbling drawer, and it’s the single most common thing that makes a bedroom look accidental.
  • Bench at the foot: all four legs on, or the rug ends before it. A bench straddling a rug edge rocks.
  • Dresser against a wall: keep it off the rug entirely. Heavy dressers crush pile permanently, and a dresser half on a rug tilts forward slightly, which matters if you have anti-tip hardware or small children.
  • Beds with storage drawers: keep the rug off the drawer side, or use runners. Drawers that open over a pile rug scrape and eventually stick.

Materials: what each one is actually like to live with

Feel first, then care. A bedroom rug gets bare feet twice a day and little else, which is a gentler life than a hallway rug has. Feel should outrank toughness here.

Fiber Underfoot Holds up to Watch out for Best for
Wool Warm, springy, the best barefoot feel Crushing, years of use; naturally resilient Sheds for months when new; moths; higher cost Bedrooms with hard floors and a real budget
Polypropylene (olefin) Soft but slightly slick Stains and spills; cleans easily Crushes flat under furniture and doesn’t bounce back Kids’ rooms, rentals, pets, tight budgets
Nylon Plush, close to wool in higher grades Heavy traffic; good resilience Fades in direct sun; costs more than olefin Shared or high-use bedrooms
Jute / sisal Coarse and scratchy barefoot Dry wear; good texture as a base layer Water stains; sisal is bad near humidity The bottom layer in a layered setup, not the top
Cotton flatweave Thin, cool, no cushion Washing — the main reason to pick it Slides badly without a pad; wrinkles Small runners beside the bed, allergy households
Viscose / “art silk” Very soft, high sheen Very little Permanent water marks from one dropped glass Low-traffic accents only; avoid beside a bed

On indoor air: if off-gassing worries you, the Carpet and Rug Institute runs third-party emissions testing for carpet and cushion. Its Green Label Plus program tests for VOC emissions and is recognized in the EPA’s federal purchasing recommendations — one of the few labels here with a published protocol behind it.

Rug placement compared for twin, queen and king beds showing full coverage and two-thirds layouts

Rug pads, pile height and the door problem

A pad isn’t optional. It stops creep, adds cushion, keeps grit from grinding into the floor, and it’s the difference between a rug that lies flat and one you straighten weekly.

  • On hardwood, tile or vinyl: felt-and-rubber, 1/4 inch (6 mm) for comfort, 1/8 inch (3 mm) if door clearance is tight. Natural rubber grips best; cheap PVC mesh can mark finished floors over time.
  • Over carpet: use a pad rated carpet-on-carpet. Regular pads let the top rug ripple and walk. Keep the top rug low-pile over plush carpet; two thick layers is how you get a rolling edge.
  • Total stack height: pile plus pad, compared to your door gap. Over roughly 3/4 inch and you’re trimming a door.
  • Trim the pad about 1 inch (2.5 cm) smaller than the rug on all sides so it never peeks out.

Safety: the part most rug guides skip

Loose rugs are a recognized trip hazard. A CDC-authored analysis of U.S. emergency department data on rug- and carpet-related falls in adults 65 and over found most of these injuries happened at home, the bathroom was the most common room, and falls often occurred at the transition between rug and bare floor. The study is on the National Library of Medicine site.

Two caveats: that data covers older adults treated in emergency departments and doesn’t isolate bedroom rugs. Don’t read it as “rugs are dangerous” — read it as a reason to be deliberate about edges.

Practical version: gripping pad under every rug, thin or bound edges rather than thick rolled ones, rug edge kept out of the path between bed and bathroom door, and a light you can reach without standing up (several picks in our bedside lighting round-up are motion-activated for this reason). If someone uses a cane or walker, runners are the wrong call — one large rug with no interior edges is safer.

Small bedrooms, over-carpet, and other awkward cases

Room under 10 x 10 ft: one rug, as large as you can manage, beats three small ones — fewer edges makes a small room read bigger. More on that in choosing a rug for a small bedroom.

Bed against a side wall: forget symmetry. Run the rug out from the open side and let it disappear under the bed.

Over wall-to-wall carpet: fine, and often how renters get a floor color they chose. Low-pile rug, carpet-to-carpet pad, check the edges monthly for curl.

Round beds: a round rug about 2 ft (61 cm) wider than the bed all round. Half-coverage under a round bed looks intentional; under a rectangular bed it rarely does.

Layering: a patterned wool rug over a larger jute base, showing 6–12 inches (15–30 cm) of jute. Use a pad between the layers or the top rug travels.

On cost: prices move too fast and vary too much by fiber and construction for a number here to mean anything. What drives price is fiber, construction and square footage — and square footage is the one you control, by choosing the two-thirds layout over full coverage.

Wool, jute and flatweave rug samples with a felt rug pad for a bedroom floor

Five mistakes that make a good rug look wrong

  • Centering on the room instead of the bed. If the bed isn’t centered on its wall, a room-centered rug looks crooked forever.
  • Buying one size down to save money. A too-small rug is the most common error in how to place a rug under a bed, and styling won’t fix it. Size up.
  • Measuring to the comforter edge. A queen comforter hangs well past a 60-inch mattress. Measure to the frame.
  • Skipping the pad. Creeping, curling, flattening — usually the missing pad, not the rug.
  • Ignoring the door until delivery day. Check the undercut before you order, not after unrolling 80 sq ft of wool in a hallway.

Get those five right and the rest is taste. For style, pile and pattern, our bedroom rug guide covers what this page doesn’t.

FAQ

Should the rug go under the nightstands?

All the way under or fully clear — not half. Under gives the widest soft landing and the hotel look but needs a bigger rug; clear saves money and keeps cords reachable. Half-on is the one version of how to place a rug under a bed that always looks accidental.

What size rug do I need for a queen bed?

An 8 x 10 (96 x 120 in / 244 x 305 cm) is the safe answer: about 18 inches (46 cm) beyond each side of a 60-inch mattress when centered. A 6 x 9 turned sideways suits tighter rooms, giving about 24 inches (61 cm) per side with less rug under the bed.

Which direction should the rug run?

Long dimension in line with the bed’s length for full coverage; across the bed’s width for a two-thirds layout. Either way, keep the rug edges parallel to the walls — two degrees off reads as sloppy from the doorway.

Can I put an area rug over carpet in a bedroom?

Yes, with a carpet-to-carpet pad. Pick a low-pile top rug, especially over plush carpet, and check the corners for curling every few weeks. Bound or flatweave edges lie flatter over carpet than thick rolled edges do.

Do I need a rug at all if my bedroom is already carpeted?

Functionally, no. People add one for color, to define the bed area in a large room, or to protect rental carpet. If none of those apply, skip it and avoid the extra edges.

How do I stop the rug sliding out from under the bed?

The bed’s weight holds the section beneath it; the loose end moves. A felt-and-rubber pad trimmed 1 inch smaller than the rug fixes most of it, and rug tape on one stubborn corner handles the rest without gumming up the whole floor.

Updated September 2026.