Discover Sham Variations to Elevate Your Bedding Style

What is a standard sham in bedding?


Looking to add a touch of elegance to your bedding? Dive into the world of sham variations and discover how these decorative pillow covers can transform your bedroom into a cozy retreat. From standard to Euro shams, we’ll guide you through the styles, purposes, and tips to select the perfect sham for your space.

The Purpose and Function of a Sham

Shams aren’t just pretty covers—they serve as both decorative elements and practical protectors for your pillows. While pillowcases hide underneath, shams are made to be seen, adding color, texture, and style to your bed. Plus, they help keep your pillows dust-free and fresh! Think of them as jewelry for your bed: they bring sparkle and personality while offering a useful layer of defense for your linens.

Different Types of Sham Variations

Standard Sham

Designed to fit a 20×26 inch pillow, the standard sham is a classic choice for layering on your bed. Pair it with matching bedding or mix it up for a fun contrast. These are the most versatile shams, often used as the base layer in bedding setups.

Decorative Sham

Want to make a statement? Decorative shams come in various shapes and bold patterns, giving you endless options to showcase your style and creativity. Use them as accents on a chair or window seat too—they’re not limited to the bed!

Euro Sham

The Euro sham (26×26 inches) adds height and a touch of luxury to your bedding. Place them behind standard shams to create dimension and plush comfort. Euro shams are fantastic for creating a hotel-like, plush atmosphere right at home.

bedroom with sham variations on display

Choosing the Right Sham for Your Bedding

  • Design & Color: Match or contrast with your bedding for a cohesive or bold look. Think about whether you want harmony or an eye-catching pop.
  • Size & Shape: Ensure the sham fits your pillow for a polished finish. Nothing looks more pulled-together than perfectly sized bedding accessories.
  • Material: Opt for soft, durable fabrics like cotton or linen for comfort and longevity. Bonus tip: silk or velvet adds a touch of indulgence for special occasions!

Also, consider the season. Lightweight fabrics work well in summer, while heavier, textured shams add warmth during the colder months.

Sham Variations Across Different Decor Styles

Traditional

Think ornate patterns, rich fabrics, and timeless elegance. Damask, floral, and embroidered shams are perfect here, paired with classic bedspreads and ruffled accents.

Modern

Clean lines, solid colors, and minimalist textures shine in modern spaces. Consider monochromatic or geometric sham designs to keep things sleek and understated.

Bohemian

Mix patterns, bold colors, and eclectic textures. Velvet, macrame, or vibrant prints bring the free-spirited boho vibe to life. Don’t be afraid to experiment with layering different materials for a unique touch.

How to Care for Your Shams

  1. Check the care label for specific instructions.
  2. Use a delicate cycle & cold water to prevent damage.
  3. Turn inside out to protect embroidery or embellishments.
  4. Spot clean small stains for quicker refreshes.
  5. Store in a cool, dry place away from sunlight to avoid fading.

Regular care not only preserves the look but also extends the life of your shams, keeping your bedroom looking fresh and inviting year-round.

bedroom showcasing decorative sham variations

FAQ

  • What is a standard sham? A decorative cover for a 20×26 inch pillow, adding style and protection.
  • How do I choose the right sham? Match your bedding’s color scheme, ensure proper fit, and pick a comfy material.
  • Can shams be used beyond the bedroom? Absolutely! Use them on sofas, chairs, or as floor cushions. They’re great for outdoor patios too—just choose weather-resistant fabrics.
  • How many shams should I use? It depends on the bed size. For queen beds, two standard or Euro shams work well; for king beds, try three Euro shams for full coverage.

Additional Resources


Standard Sham Bedding: 5 Must-Have Benefits for a More Stylish, Comfortable Bed

standard sham bedding explained with neutral bedroom setup

Standard Sham Bedding

Curious about standard sham bedding? These decorative pillow covers do more than look pretty—they enhance comfort, protect pillows, and polish your bedroom design.

Key Takeaways

  • Standard sham bedding refers to decorative pillow covers for standard-sized pillows.
  • They enhance your bed’s appearance and protect your pillows from dust and stains.
  • Shams are versatile and easy to style with any bedding setup.

Why Standard Sham Bedding Matters

Think of standard sham bedding as the finishing touch to your bed’s outfit. These covers offer more than a decorative boost—they protect, support, and help bring harmony to your bedroom style. Whether you’re staging your space for guests or creating a personal sanctuary, shams bring a layer of intentionality and elegance that standard pillowcases just can’t deliver.

Here are a few benefits of incorporating standard sham bedding into your setup:

  • Protects pillows from dust and daily wear: Especially useful if your sleeping pillows double as backrests.
  • Extra support when sitting up: Prop them up behind your back while you read or scroll in bed.
  • Unifies your bed design: Coordinated shams tie the whole look together for a calm, styled finish.

In essence, standard sham bedding does the quiet work of transforming your room from “slept in” to “intentionally styled.” It’s that finishing touch that makes your bed feel complete.

standard sham bedding explained with neutral bedroom setup

What Is a Standard Sham?

A standard sham is a fabric cover designed to fit over a standard-sized pillow—typically 20 by 26 inches. What makes it different from a pillowcase is its design: shams are meant to be seen, not just used. They often come with a decorative flange border, piped edges, textured fabric, and hidden closures like zippers or envelope-style backs.

These design features give your bedding a high-end look. And unlike pillowcases that are typically part of your basic sheet set, shams are sold separately or as part of a decorative bedding collection. They can be smooth and minimalist or bursting with embroidery, buttons, fringe, or tassels.

And yes—they’re comfy too. If you’re using soft, natural fabrics like cotton or bamboo, you can absolutely sleep on a sham in a pinch. Just keep in mind that many are slightly stiffer or more structured than your everyday pillowcase, so they’re best suited for layering and styling.

To see how shams fit into a complete bedding setup, check out our Ultimate Guide to Bedding Essentials or visit Better Homes & Gardens for more visual inspiration.

Styling Tips for Standard Sham Bedding

Styling with standard shams is a simple way to refresh your space without replacing your entire bedding set. Start with the basics by matching your shams to your comforter, quilt, or duvet for a cohesive feel. Or contrast with complementary tones and textures for a bold look.

Here’s how many standard shams you typically need based on bed size:

  • Twin: 1 standard sham (centered or offset for asymmetrical balance)
  • Full/Queen: 2 standard shams side by side
  • King: 2–3 standard shams (or opt for king-sized shams for proportional coverage)

To style like a pro, layer your shams between your sleeping pillows and decorative throw pillows. Prop them upright for a clean, hotel-inspired look, or stack them for a modern, relaxed vibe. Don’t be afraid to mix textures—pairing a sleek cotton sham with a cozy knit throw or velvet accent pillow can add depth and interest.

Need help with styling ideas? Explore our popular guide on layering bedding like a designer or check out House Beautiful’s bedroom styling tips.

Are Standard Shams Allergy-Friendly?

Absolutely. In fact, standard shams can help create a healthier sleep environment when made from hypoallergenic fabrics. If you have allergies or sensitive skin, opt for shams made from natural materials like organic cotton or bamboo, which are breathable, moisture-wicking, and gentle on the skin.

Here’s how to maintain allergy-friendly shams:

  • Wash frequently: Every 1–2 weeks to eliminate allergens and dust mites
  • Skip harsh chemicals: Use mild, fragrance-free detergents and avoid dry cleaning if possible
  • Choose breathable fabrics: Cotton and bamboo help regulate temperature and reduce irritation

For those interested in sustainable options that are also skin-friendly, we recommend reading our guide on eco-friendly bedding materials or visiting Sleep Foundation’s hypoallergenic bedding roundup.

With the right fabric and care routine, your standard shams can be as clean and calming as they are beautiful.

standard sham bedding explained visual pillow comparison

Clearing Up the Sham Confusion

Let’s clear this up: a standard sham is not just a pillowcase with flair. While both cover your pillows, their purposes are completely different. Pillowcases are designed for daily use—soft, practical, and meant for sleeping. Shams, on the other hand, are all about looks. They’re the runway model of your bedding setup.

Think of it this way: if your pillow was going to a gala, the sham would be its evening gown. It adds structure, presence, and polish to the bed. Plus, shams tend to have additional detailing like embroidery, quilting, and decorative flanges that you wouldn’t find on your average pillowcase.

Confused by bedding jargon? Visit our bed linen terms glossary for a breakdown of everything from duvet covers to Euro shams or refer to Architectural Digest’s comparison of pillowcases and shams.

In short, if you want your bedroom to look styled and feel finished, a sham does what a pillowcase can’t.

Choosing the Right Standard Shams

When choosing the perfect standard shams, it helps to consider both aesthetics and function. Do you prefer a clean, minimalist look? Or do you love bold patterns and textures? Either way, there’s a sham out there to match your style and needs.

  • Style: Pair floral prints with neutral linens for a charming cottagecore vibe, or go monochromatic for a serene minimalist effect.
  • Material: Cotton is breathable and soft. Linen adds a breezy, lived-in look. Velvet delivers luxe comfort in cooler months.
  • Ease of care: Machine-washable shams save time—skip anything labeled “dry clean only” if you want low-maintenance bedding.

Don’t forget the small details—piping, ties, buttons, or embroidery can add personality to your bedding setup. Need more help? Our article on choosing the right bed pillows also covers sham compatibility and layering ideas. Or explore Apartment Therapy’s best pillow sham picks for 2024.

With the right standard sham bedding, your bed can feel like the centerpiece it was meant to be—comfortable, stylish, and uniquely yours.

Standard sham bedding may seem like a small detail, but it can dramatically elevate your bed’s style and comfort. Whether you’re refreshing your look for the season or building your dream bedscape, these decorative covers bring a blend of function and flair that’s hard to beat. Try one out—you might be surprised how much difference it makes!

FAQ

Can you sleep on standard shams?
Yes, especially if they’re made from soft, washable fabric. But many people use them primarily for decoration.
How often should you wash standard shams?
Every 1–2 weeks, just like pillowcases, especially if used regularly.
What’s the difference between a sham and a pillowcase?
Shams are decorative and structured with back closures; pillowcases are softer and designed for sleeping comfort.

Easy Guide: How to Clean a Soiled Mattress Effectively

How to clean a soiled mattress and keep it protected, with pet napping on fresh bedding.

Ever woken up and realized your mattress is, well, not looking its best? Whether it’s an accidental spill, a pet mishap, or just life happening, knowing how to clean a soiled mattress can be a total game-changer for keeping your bed fresh and your sleep sweet. Cleaning a soiled mattress regularly is essential to a healthy sleep space.

Why It’s So Important to Clean Your Mattress

Your mattress is basically your nightly retreat—a cozy spot that should feel safe and clean. But over time, it collects sweat, dead skin cells, dust mites, and the occasional stain. Gross, right? Learning how to clean a soiled mattress ensures it stays hygienic and comfy. Regular cleaning also helps extend its lifespan and improve your sleep quality. (Need a deep dive into mattress hygiene? This guide from Cozy Bed Quarters breaks it down.)

How to Clean a Soiled Mattress: The Must-Have Supplies

Before you get started on how to clean a soiled mattress, gather these essentials:

  • Wet vacuum cleaner: Essential for soaking up moisture and cleaning messes.
  • Gloves: Keep your hands safe while cleaning a soiled mattress.
  • Spray bottle: Perfect for applying stain-fighting solutions.
  • Stain remover: White vinegar, hydrogen peroxide, baking soda, or dish soap.
  • Upholstery shampoo or laundry detergent: For breaking down grime on a soiled mattress.
  • Clean cloth or sponge: Helps blot and scrub effectively.
  • Scrub brush: Useful for deeper stains.
  • Steam cleaner (optional): Offers a deep clean for a soiled mattress.

Psst—this Cozy Bed Quarters post on freshening up your bedding is worth bookmarking, too!

Step-by-Step: How to Clean Common Mattress Stains

Urine Stains (Yep, It Happens!)

Wondering how to clean a soiled mattress after a pet accident or bedwetting? Hydrogen peroxide is your best friend. Spray it on, let it bubble, and blot. For stubborn spots, mix it with baking soda.

Pro Tip: Always patch test first. (More stain tips here.)

Neutralizing Odors with Vinegar

To clean a soiled mattress and banish odors, mist a vinegar-water mix. Let dry fully. For extra freshness, sprinkle baking soda afterward and vacuum.

We love Luce Home’s deep-cleaning advice if you want even more ideas!

Steam Cleaning for a Deep Clean

A steam cleaner works wonders when tackling how to clean a soiled mattress thoroughly. Always let the mattress dry completely after steam cleaning.

Get more how-to from Real Simple’s steam cleaning guide.

Fresh Spills? Grab the Baking Soda

Cleaning a soiled mattress quickly after a spill is key. Cover the wet spot with baking soda, let it sit, then vacuum it up.

Keep It Clean: Preventing Future Stains

Once you’ve mastered how to clean a soiled mattress, keep it protected! A waterproof mattress protector is your secret weapon. Learn more over on Cozy Bed Quarters.

When to Call in the Pros

Even if you know how to clean a soiled mattress, pros can help with:

  • Deep-set stains.
  • Allergen issues.
  • Busy schedules.

For expert help, Sleep Foundation’s mattress guide is great.

FAQ: Quick Answers

How often should I clean my mattress? Twice a year or after any spills.

Can I use bleach? Nope—harsh and damaging.

How long to dry? A few hours to a full day.

Wash my mattress cover? Most are machine washable—check the label.

Cozy Wrap-Up

Learning how to clean a soiled mattress is one of the best ways to keep your sleep space fresh and inviting. With the right tools and a little effort, you’ll enjoy clean, comfy nights in no time. For more cozy ideas, visit Cozy Bed Quarters!

7 Powerful Ways to Clean Pee Mattress No Baking Soda

How to Clean a Mattress from Pee

Clean Pee Mattress No Baking Soda

Need to clean pee from a mattress without baking soda? Discover safe, powerful alternatives that work quickly and protect your mattress.

Key Takeaways

  • Clean pee mattress no baking soda using effective alternatives like vinegar and enzymatic cleaners.
  • Act fast to prevent odors, bacteria, and mold growth.
  • Match cleaning methods to mattress type for best results.

Why Skip Baking Soda?

Baking soda is a popular cleaning agent due to its deodorizing properties, but it doesn’t suit every situation. Some people may be sensitive to the fine particles, or dislike the residue it can leave behind. In addition, baking soda might not be the most effective option for deeply embedded urine stains, especially on certain foam mattresses. Plus, if you’re out of baking soda in a pinch, knowing other methods can be a lifesaver.

For those with allergies or who prefer more liquid-based cleaning methods, skipping the powdery mess of baking soda offers a cleaner experience. Liquid solutions tend to penetrate better and can work faster for immediate results.

So if you’re looking for a way to clean a mattress without common powders, these methods have your back.

In short, avoiding baking soda is totally feasible and may even offer better results in certain cleaning scenarios.

 methods to clean pee mattress no baking soda without leaving residue

Best Alternatives to Baking Soda

Vinegar and Water Solution

Vinegar is a natural disinfectant and odor neutralizer. When mixed with water in equal parts and sprayed generously onto a fresh urine stain, it can help break down the acids and eliminate smells. After spraying, let the solution soak in for 5–10 minutes, then blot with a clean cloth until the area is as dry as possible. Allow the mattress to air dry completely before remaking your bed.

For added freshness, you can add a few drops of essential oils like lavender or tea tree oil. These not only help mask any remaining vinegar scent but also offer natural antibacterial benefits.

This method is ideal for light or fresh stains and is safe on most mattress types, especially foam and memory foam.

Hydrogen Peroxide Mix

Hydrogen peroxide is a powerful oxidizer that works well on older, dried urine stains. Mix one cup of 3% hydrogen peroxide with a teaspoon of dish soap and a tablespoon of salt. Apply this mix with a soft cloth or spray bottle. Be cautious though—hydrogen peroxide can bleach fabrics and damage memory foam, so test a small area first.

This solution is best for innerspring or hybrid mattresses with a top layer that’s not overly absorbent. Once dry, vacuum any remaining residue to prevent build-up.

Use this when you’re dealing with a lingering yellow stain or smell that won’t go away with mild cleaners.

Enzymatic Cleaners

Enzymatic cleaners are formulated specifically to break down organic stains, including urine. They’re often used by pet owners and parents alike. Spray liberally onto the stain, let sit for 10–15 minutes, and blot dry. Always follow the manufacturer’s instructions for the best results.

Unlike other cleaners, enzymatic solutions actually consume the bacteria causing the smell, leaving your mattress truly clean. Brands like Nature’s Miracle or Rocco & Roxie are popular options.

Great for persistent odor or multiple incidents, these are your best bet when a simple cleaning isn’t enough.

In conclusion, these three alternatives offer safe, effective ways to clean pee from a mattress without using baking soda—and each one has unique strengths depending on the situation.

Cleaning by Mattress Type

Different mattress materials react differently to moisture and cleaners. Using the wrong method can cause damage or void your warranty. Here’s a quick breakdown:

  • Memory Foam: Avoid hydrogen peroxide. Use vinegar-based or enzymatic cleaners to prevent breaking down the foam’s integrity.
  • Innerspring: These are more forgiving. You can use hydrogen peroxide or vinegar methods safely here.
  • Latex: Stick to gentle solutions like diluted vinegar to avoid breaking down the natural latex structure.
  • Poly Foam: Enzymatic cleaners work best here for removing both stains and smells without compromising the material.

When in doubt, check the manufacturer’s cleaning recommendations or look for cleaning tips on our bedding care guide.

Matching the right cleaner to your mattress type ensures effective cleaning without damage.

Prevent Future Accidents

Protecting your mattress can save time, money, and stress. Here are some smart strategies to keep your bed accident-free:

  • Waterproof Mattress Protector: This is a must-have. It forms a barrier against spills, sweat, and accidents, keeping your mattress clean and dry.
  • Frequent Bedding Washes: Wash your sheets, pillowcases, and protector weekly to prevent build-up of allergens and bacteria.
  • Prompt Response: Clean any accidents right away to stop urine from soaking deeper and causing lasting stains or smells.

For households with pets or young children, consider a second mattress cover as backup. Some are even designed with cooling tech or hypoallergenic fabrics.

Staying prepared with protective bedding and fast cleanup routines makes managing accidents a breeze.


Clean cat pee mattress

Professional Cleaning Options

If DIY efforts don’t cut it—or if you’re dealing with a particularly large or old stain—professional mattress cleaning is worth considering. These services use high-grade equipment to deep clean without harming your mattress.

Typical offerings include:

  • Deep steam cleaning for thorough sanitization
  • Specialized urine odor treatments
  • Stain-resistant protective coatings

Prices typically range from $150 to $300 depending on the service, size of the mattress, and your location. Always ask if their service complies with your mattress warranty.

Visit our article on choosing a mattress cleaning service for more tips.

In summary, professional cleaning is an excellent fallback if DIY methods don’t solve the issue or you want to preserve your mattress investment.

You don’t need baking soda to clean pee from a mattress effectively. With options like vinegar, enzymatic cleaners, and hydrogen peroxide (on non-foam), you can tackle urine stains confidently. Keep your sleeping space clean by acting fast, using the right method, and protecting your bed with the right accessories.

FAQ

Can I clean a mattress without baking soda?
Yes. Use vinegar, hydrogen peroxide (except on foam), or enzymatic cleaners instead. These alternatives can often perform better and are easier to apply and clean up.
What’s the best cleaner for old urine stains?
Hydrogen peroxide mixed with dish soap is excellent for old stains—just avoid it on foam beds. Enzymatic cleaners are also effective and safer for delicate materials.
Are enzymatic cleaners safe for all mattresses?
Yes, they are generally safe and highly effective across most materials. Always follow label directions and test in a hidden area first.
How do I keep my mattress from smelling?
Use a mattress protector, clean promptly after spills, and freshen your bed regularly with sprays or light airing. Explore our deodorizing guide for more tips.

Check out our related guides like How to Clean a Memory Foam Mattress or explore tips on choosing the best bedding materials.

Learn more from expert sources like Amerisleep’s cleaning guide.


How to Spot Clean a Mattress: 7 Expert Tips for a Fresher Bed

how to spot clean a mattress


Spot Clean a Mattress

Spot clean a mattress the right way to keep your sleep sanctuary fresh, hygienic, and supportive—no harsh chemicals needed.

Key Takeaways

  • Vacuuming removes dust and debris before stain treatment
  • DIY solutions like baking soda and vinegar work wonders naturally
  • Proper drying and airing out are essential to prevent mold
  • Regular spot cleaning extends mattress lifespan and comfort

How to Spot Clean a Mattress by Vacuuming First

Before applying any cleaner, spot clean a mattress by giving it a thorough vacuum. Use a brush attachment and slowly work across the top, seams, sides, and corners. This removes crumbs, pet hair, and dust that might otherwise smear when wet.

how to spot clean a mattress

Best Vacuums to Spot Clean a Mattress

BrandFeaturesPrice
Brand AHandheld, lightweight, strong suction, HEPA filter$99
Brand BUpright, multi-surface cleaning, pet hair tool$149
Brand CCordless, portable, long battery life$199

How to Spot Clean a Mattress by Treating Stains

Spot clean a mattress with homemade solutions for common stains. For protein-based stains like sweat or urine, mix 1/4 cup hydrogen peroxide, 1 tbsp dish soap, and 1 tbsp baking soda. Apply gently and blot after 30 minutes.

DIY Paste to Spot Clean a Mattress

IngredientsMeasurement
Hydrogen Peroxide1/4 cup
Dish Soap1 tablespoon
Baking Soda1 tablespoon

Treating stains to spot clean a mattress

How to Spot Clean a Mattress Using Baking Soda

To refresh your mattress naturally, spot clean a mattress with baking soda. Sprinkle it generously across the surface, let sit for several hours, then vacuum it off. It absorbs odor, moisture, and leaves your bed fresh.

  1. Remove all bedding
  2. Sprinkle baking soda over the mattress
  3. Rub in gently with hands or brush
  4. Let it sit 4+ hours or overnight
  5. Vacuum thoroughly

Using baking soda to spot clean a mattress

Why Baking Soda Helps Spot Clean a Mattress

  • Safe and gentle: Great for allergies and sensitive skin
  • Odor neutralizer: Removes sweat and musty smells
  • Moisture reducer: Helps prevent mold
  • Eco-friendly: No toxins or chemicals

How to Spot Clean a Mattress by Airing It Out

After cleaning, always air out your mattress. This speeds up drying, eliminates hidden moisture, and kills bacteria. If possible, move the mattress outside into the sun—nature’s best disinfectant. Indoors, open windows and use fans.

“Airing out your mattress not only helps eliminate odors, but it also contributes to a healthier sleep environment.” – Sleep Experts

Extra Tips to Spot Clean a Mattress by Airing It Out

  • Pick a sunny, dry day
  • Use a fan for airflow indoors
  • Rotate the mattress
  • Keep pets off while airing
  • Ensure mattress dries completely before use

Airing out to spot clean a mattress

How to Spot Clean a Mattress and Keep It Protected

Once you spot clean a mattress, extend its freshness by rotating or flipping it every 3–6 months. Always use a waterproof mattress protector—it defends against spills, allergens, and dust.

#Why It Matters
1Prevents uneven wear
2Minimizes sagging
3Keeps mattress cleaner longer
4Protects from dirt and spills
5Preserves the warranty

How to Spot Clean a Mattress Made of Memory Foam

If you own a memory foam bed, it’s essential to spot clean a mattress with care. Memory foam absorbs moisture easily, so always blot gently and avoid soaking.

How to spot clean a mattress made of memory foam

Why You Should Spot Clean a Mattress Regularly

Regular spot cleaning helps reduce allergens, eliminate odors, and preserve the integrity of your mattress over time. It also enhances the hygiene and comfort of your sleep environment.

Signs You Need to Spot Clean a Mattress or Replace It

Even with routine care, mattresses have a lifespan. If you notice sagging, odors, or persistent allergy symptoms, it may be time for a replacement instead of another spot clean.


Final Thoughts: Why You Should Spot Clean a Mattress

Spot cleaning a mattress keeps your sleep environment cleaner, healthier, and more comfortable. From vacuuming and baking soda to gentle blotting and flipping, small habits add up to big benefits for your rest and wellness.

FAQ

How often should I spot clean a mattress?

Clean stains as soon as they happen. General spot cleaning every 2–3 months is a great habit.

Can I use regular cleaners?

Avoid harsh chemicals. Use natural or enzyme-based cleaners for best results.

Learn more in our deep-cleaning guide, explore memory foam care tips, see how to remove mattress stains, and discover ways to freshen your mattress.

External resources:
Sleep Foundation |
Good Housekeeping |
Martha Stewart

Discover How to Clean a Mattress with Baking Soda Easily

how to clean a mattress with baking soda

Welcome to our guide on how to clean a mattress with baking soda! Your mattress plays a crucial role in ensuring a good night’s sleep, but over time it can accumulate dirt, stains, and odors. With the help of baking soda, you can easily freshen up your mattress and create a clean and healthy sleep environment. Follow our mattress cleaning tips below to learn how to effectively use baking soda to clean your mattress.

Key Takeaways:

  • Regularly cleaning your mattress with baking soda helps remove odors, stains, and moisture.
  • Strip the bed of sheets and bedding before cleaning and wash them in the washing machine with detergent.
  • Use a vacuum or handheld vacuum to remove dirt and debris from the surface of the mattress.
  • Spot clean any stains on the mattress with an upholstery cleaner or a DIY spot cleaner made with mild dish detergent.
  • Sprinkle baking soda all over the mattress to absorb odors and moisture, and let it sit for 24 hours.

Vacuum Away Dirt and Debris

To effectively clean your mattress and remove dirt and debris, you’ll need to give it a thorough vacuuming. Start by using the upholstery attachment on your vacuum cleaner or a powerful handheld vacuum. This will help you reach all the nooks and crannies of your mattress and ensure a deep clean.

Begin by vacuuming the surface of the mattress, making sure to go over each area several times to remove as much dirt and dust as possible. Pay special attention to the seams, crevices, and folds in the mattress, as these areas tend to accumulate more debris. Don’t forget to vacuum the sides of the mattress as well, as they can also harbor dust and dirt.

Removing dirt and dust from your mattress:

  • Use the upholstery attachment or a handheld vacuum
  • Vacuum the surface, seams, and crevices of the mattress
  • Don’t forget to vacuum the sides of the mattress

By thoroughly vacuuming your mattress, you’ll be able to remove dirt, dust, and allergens, creating a cleaner and healthier sleep environment.

Spot Clean Stains

To effectively remove stains from your mattress, you’ll need a reliable spot cleaner. Whether you opt for a store-bought upholstery cleaner or prefer a DIY solution, spot cleaning is an essential step in achieving a clean and fresh mattress.

If you choose to make your own spot cleaner, mix mild dish detergent with water in a spray bottle. This gentle solution is effective at tackling most protein-based stains like sweat, urine, and blood. Simply spray the spot cleaner directly onto the affected area and use a clean, damp cloth to gently dab the stain. Repeat as necessary until the stain is removed.

For tougher stains like red wine or coffee, you may need a stronger spot cleaner. There are various commercial stain removers available that are specifically designed to tackle these stubborn stains. Follow the instructions on the product packaging for best results.

Remember, it’s important to act quickly when dealing with mattress stains. The longer a stain sits, the more difficult it can be to remove. Regular spot cleaning will help keep your mattress looking and smelling its best.

Sprinkle Baking Soda on the Mattress

To freshen and deep clean your mattress, the next step is to sprinkle baking soda all over the surface. Baking soda is a natural and effective cleaning agent that helps absorb odors, moisture, and stains from the mattress. It’s a simple yet powerful solution to remove any lingering smells and leave your mattress feeling fresh and clean.

Start by sprinkling 1-3 cups of baking soda evenly across the entire mattress. Pay extra attention to areas with strong smells or visible stains. Baking soda is safe to use on all types of mattresses, including memory foam, latex, and spring mattresses. Its fine particles work their way into the fabric, allowing it to penetrate and absorb any odors or moisture trapped within.

Once you’ve sprinkled the baking soda, gently rub it into the mattress using a soft brush or your hands. This will help the baking soda penetrate deeper into the fabric and ensure that it covers the entire surface. Leave the baking soda on the mattress for at least 24 hours to allow it enough time to work its magic and absorb any unwanted elements.

Benefits of using baking soda on your mattress:

  • Removes odors caused by sweat, spills, and body oils
  • Absorbs moisture and prevents the growth of mold and mildew
  • Neutralizes and eliminates pet odors
  • Helps break down and lift stains for easier removal
  • Leaves your mattress smelling fresh and clean

After the 24-hour period, it’s time to move on to the next step and get your mattress ready for a thorough cleaning.

Cleaning Your Mattress in Sunlight

Exposing your mattress to sunlight is an effective way to enhance the cleaning process and eliminate any lingering odors. Sunlight has natural antibacterial properties and helps to dry out moisture, making it an ideal step to follow after using baking soda.

When exposing your mattress to sunlight, find a location near a window that receives direct sunlight. You can also choose to move your mattress outside if weather permits. Just make sure to monitor the weather forecast to avoid any chances of rain or moisture.

Place your mattress near the window or outside for a few hours, allowing the sunlight to penetrate the fabric and kill any remaining bacteria or germs. The heat from the sun will also activate the baking soda, enhancing its odor-absorbing properties.

Benefits of Sunlight for Mattress Cleaning

  • Sunlight helps to naturally eliminate odors by killing bacteria and germs.
  • The heat from the sun activates baking soda, enhancing its ability to absorb moisture and odors.
  • Exposing your mattress to sunlight helps to dry out any remaining moisture, preventing the growth of mold or mildew.
  • It’s a cost-effective and eco-friendly method to keep your mattress clean and fresh.

Remember, sunlight is not only beneficial for your mood, but it also plays a crucial role in maintaining a clean and healthy sleep environment. After exposing your mattress to sunlight, you can proceed to the next step of vacuuming the baking soda for a thoroughly cleaned and refreshed mattress.

clean mattress in sunlight

Vacuum the Baking Soda

After letting the baking soda sit for 24 hours, it’s time to remove it from the mattress. Use the upholstery attachment on your vacuum or a handheld vacuum to thoroughly vacuum the surface of the mattress. Remember to pay attention to the seams, crevices, and corners to ensure that all the baking soda is removed.

In addition to vacuuming the surface, make sure to run the vacuum over the entire mattress, including the sides. This will help eliminate any remaining baking soda particles and ensure that your mattress is clean and fresh.

Vacuuming the baking soda not only removes any residue, but it also helps fluff up the mattress and restore its shape. After vacuuming, take a moment to admire the clean and refreshed mattress.

Table: Steps to Vacuum the Baking Soda

StepDescription
Step 1Attach the upholstery attachment to your vacuum or use a handheld vacuum.
Step 2Start from the top of the mattress and work your way down, ensuring that you cover the entire surface.
Step 3Pay special attention to the seams, crevices, and corners of the mattress.
Step 4Vacuum the sides of the mattress as well, removing any remaining baking soda.
Step 5Take a moment to appreciate the clean and fresh mattress.

Flip and Repeat

Now that you’ve thoroughly cleaned and freshened one side of your mattress, it’s time to flip it over and repeat the process on the other side. This step ensures that both sides of the mattress receive the same level of cleaning and attention. By flipping and repeating the process, you can maintain a clean and hygienic sleep environment.

To begin, strip the bed of any bedding and flip the mattress over so that the side you just cleaned is now facing downwards. Next, sprinkle another 1-3 cups of baking soda all over the mattress, paying extra attention to areas with strong odors or stains. Allow the baking soda to sit on the mattress for another 24 hours to maximize its cleaning power.

After the 24-hour period, it’s time to vacuum the baking soda from the mattress. Use the upholstery attachment on your vacuum or a handheld vacuum to thoroughly remove all traces of baking soda. Be sure to vacuum the seams, crevices, and folds of the mattress to ensure a complete clean.

Once you’ve finished vacuuming, you can make the bed with fresh sheets and bedding on the newly cleaned side of the mattress. The other side can now be used for another night’s sleep while you follow the same cleaning process on the previously used side. This flipping and repeating method helps to evenly distribute wear and tear on the mattress, prolonging its lifespan.

flip mattress

Table: Summary of Flip and Repeat Process

StepDescription
1Strip the bed and flip the mattress over
2Sprinkle 1-3 cups of baking soda on the mattress
3Let the baking soda sit for 24 hours
4Vacuum the baking soda from the mattress
5Make the bed with fresh sheets and bedding

Protect Your Clean Mattress

After investing the time and effort into cleaning your mattress with baking soda, it’s important to take steps to protect it and ensure its longevity. A mattress protector is an essential accessory that creates a barrier against spills, dirt, and other unwanted elements. By using a mattress protector, you can keep your mattress fresh, clean, and free from potential damage.

A mattress protector acts as a shield, guarding your mattress from liquid stains, allergens, and dust mites. It is designed to be breathable, allowing air to flow freely while effectively protecting your mattress. The protector creates a healthy sleeping environment by preventing the buildup of bacteria and dust, which can lead to allergies and respiratory issues.

When choosing a mattress protector, opt for one that is waterproof and hypoallergenic for full protection. Look for features like a secure fit, easy installation, and machine washable materials for hassle-free maintenance. Investing in a high-quality mattress protector not only safeguards your mattress but also enhances your sleep experience by providing an additional layer of comfort and softness.

In addition to using a mattress protector, it’s also important to follow a regular cleaning schedule to maintain the cleanliness of your mattress. By cleaning your mattress with baking soda 1-2 times a year and using a mattress protector, you can ensure that your mattress remains fresh, odor-free, and in excellent condition for years to come.

BenefitsProtectionComfortHygiene
Prevents liquid stains
Blocks allergens and dust mites
Breathable fabric
Easy to install and remove
Machine washable

Using a mattress protector not only safeguards your investment but also enhances your sleep experience. It keeps your mattress fresh, clean, and free from potential damage, ensuring a healthier and more comfortable sleep environment.

Cleaning Schedule

Keeping your mattress clean is essential for a good night’s sleep and overall hygiene. Establishing a regular cleaning schedule will help you maintain a fresh and odor-free sleeping surface. By following these guidelines, you can ensure that your mattress stays in top condition for years to come.

Frequency

It is recommended to clean your mattress with baking soda at least once every six months. This frequency allows you to remove dirt, allergens, and odors that accumulate over time. Additionally, if you suffer from allergies or have pets, you may want to consider cleaning your mattress more often, such as every three months, to prevent allergen buildup.

Spring and Fall Cleaning

As the seasons change, it’s a good time to give your mattress a deep clean. Use the baking soda cleaning method outlined in this article during the spring and fall to refresh your mattress. By doing so, you can eliminate any accumulated odors or stains that may have developed over the previous months.

Pro Tip: If you have young children or pets that frequent your bed, spot cleaning may be necessary more frequently. Accidents happen, but by promptly addressing stains and spills, you can prevent them from becoming permanent.

Additional Considerations

In addition to regular cleaning, it’s important to maintain good mattress hygiene. Here are a few tips to keep in mind:

  • Use a mattress protector to safeguard against spills, stains, and dust mites.
  • Rotate your mattress every three to six months to distribute wear and tear evenly.
  • Vacuum your mattress regularly to remove surface dirt and allergens.

By implementing a cleaning schedule and following these additional steps, you can ensure that your mattress remains clean, fresh, and comfortable for years to come.

Conclusion

Cleaning your mattress with baking soda is a simple and effective way to achieve a deep clean. The homemade mattress cleaner, made of baking soda, helps eliminate odors, stains, and moisture, ensuring your mattress stays fresh and odor-free.

Regular maintenance and cleaning using baking soda can extend the lifespan of your mattress and provide a comfortable and healthy sleep environment. By following the step-by-step guide outlined in this article, you can easily deep clean your mattress and enjoy a rejuvenated sleeping surface.

Remember, incorporating a cleaning schedule that suits your needs and makes use of the homemade mattress cleaner can help keep your mattress in its best condition. With a little effort and the power of baking soda, you can enjoy a clean, fresh, and revitalized mattress for years to come.

FAQ

How often should I clean my mattress with baking soda?

It is recommended to clean your mattress with baking soda 1-2 times a year to keep it fresh and odor-free.

Can I use baking powder instead of baking soda to clean my mattress?

No, baking powder and baking soda are not the same. Baking soda is specifically designed for cleaning and deodorizing purposes.

How long should I leave the baking soda on the mattress?

It is best to leave the baking soda on the mattress for 24 hours to allow it to absorb odors and moisture.

Can I use a regular vacuum cleaner to remove the baking soda?

Yes, you can use a regular vacuum cleaner with the upholstery attachment or a handheld vacuum to remove the baking soda from the mattress.

Do I need to vacuum both sides of the mattress?

Yes, it is recommended to flip the mattress over and repeat the process on the other side to ensure both sides are thoroughly cleaned and freshened.

How does sunlight help in the cleaning process?

Sunlight can activate the baking soda and speed up the cleaning process. It helps to place the mattress next to a window or outside in direct sunlight, if possible.

How do I protect my clean mattress?

You can use a mattress protector to create a barrier against spills, dirt, and other unwanted elements. This makes future cleaning easier and helps extend the life of your mattress.

Can I use a different spot cleaner for tough stains?

Yes, if the regular spot cleaner doesn’t remove tough stains like red wine or coffee, you may need a stronger spot cleaner specifically designed for those types of stains.

Can I skip the spot cleaner and just use baking soda to clean stains?

While baking soda is great for absorbing odors and moisture, it may not be as effective in removing tough stains. It is recommended to use a spot cleaner for best results.

Can I use this method to clean a memory foam mattress?

Yes, you can use baking soda to clean a memory foam mattress. Just make sure to be gentle when vacuuming and avoid using excess moisture.

>7 Powerful Ways to Master Natural Mattress Cleaning for a Fresher Bed

Natural Mattress Cleaning

Natural Mattress Cleaning: Eco-Friendly Tips for a Fresh Bed

Maintaining a clean mattress is essential for a healthy sleep environment. Discover eco-friendly methods using baking soda and vinegar to naturally refresh your bed.

Key Takeaways

  • Baking soda and vinegar offer a natural, cost-effective way to clean and deodorize mattresses.
  • Regular cleaning extends mattress lifespan and promotes better sleep hygiene.
  • Using a mattress protector can prevent stains and simplify maintenance.

Understanding Your Mattress Type

Before cleaning, identify your mattress type to ensure compatibility with natural cleaning methods. Different materials react differently to moisture and may require specific precautions.

  • Foam Mattress: These are sensitive to moisture. If not dried properly, foam can harbor mold and mildew. Use minimal liquid and ensure ample ventilation.
  • Latex Mattress: Naturally hypoallergenic and resistant to dust mites, but can absorb moisture. Spot-clean instead of full saturation.
  • Hybrid Mattress: These combine foam and innerspring layers. Check manufacturer cleaning guidelines, especially for foam content.
  • Innerspring Mattress: Durable and more tolerant of moisture. Ideal for baking soda and vinegar cleaning.

Understanding your mattress ensures safe and effective cleaning. When in doubt, refer to care labels or the manufacturer’s website. Read more from Sleep Foundation’s guide on mattress types.

Understanding your mattress type is essential for natural mattress cleaning

Step-by-Step Natural Cleaning Guide

Cleaning your mattress naturally isn’t complicated. With a few simple ingredients, you can revitalize your bed without resorting to harsh chemicals.

  1. Strip the Bed: Remove all bedding including pillows, sheets, and covers. Wash them in hot water to kill bacteria and dust mites.
  2. Vacuum: Use a vacuum with an upholstery tool to lift dirt, dust, and hair from the mattress surface and sides.
  3. Apply Vinegar Solution: Mix equal parts distilled white vinegar and water in a spray bottle. Lightly mist the mattress, focusing on stained areas.
  4. Sprinkle Baking Soda: After spraying, dust the mattress with baking soda using a sifter. It helps neutralize odors and absorb residual moisture.
  5. Let it Sit: Leave the mixture on the mattress for at least 4–6 hours, or overnight for deeper cleaning. This gives baking soda time to absorb odors and vinegar time to disinfect.
  6. Vacuum Again: Once dry, vacuum thoroughly to remove all baking soda residue.
  7. Air Dry: Place the mattress in a well-ventilated room. Use a fan or open windows to speed up drying.

This natural approach is safe, effective, and easy to do every few months to keep your mattress fresh. For more info, check out this Good Housekeeping guide.

A thorough process with baking soda and vinegar supports natural mattress cleaning

Cleaning Under the Bed

The space under your bed can collect surprising amounts of debris, including dust bunnies, pet dander, and lost socks. Neglecting this area can impact your air quality and attract pests.

  • Vacuum Weekly: Especially if you have pets or allergies. Use a slim nozzle attachment to reach all corners.
  • Dust Bed Slats: Wipe down wood or metal slats with a damp cloth to prevent dust build-up.
  • Organize Storage: Use sealed containers instead of open boxes to reduce dust accumulation.

Don’t forget, a clean sleeping area includes the space below it. A tidy under-bed promotes better air quality and minimizes allergens. Learn more from Better Homes & Gardens.

Regularly cleaning under the bed is vital for natural mattress cleaning results

Benefits of Using a Mattress Protector

Mattress protectors are essential in keeping your mattress in pristine condition. They guard against spills, sweat, allergens, and everyday wear and tear.

  • Barrier Against Stains: Whether it’s coffee spills or night sweats, protectors keep moisture from reaching your mattress core.
  • Improved Hygiene: Blocks dust mites and bacteria, great for allergy sufferers.
  • Easy Maintenance: Most are machine-washable, making cleanup a breeze.

Some protectors also come with cooling features or added cushioning. Choose one based on your needs. Read more in our Mattress Protector Buying Guide. For more on allergy-friendly options, visit Asthma and Allergy Foundation of America.

Investing in a mattress protector is a smart, low-cost way to extend your mattress’s life and simplify cleaning routines.

Assessing Mattress Age and Maintenance

Knowing when to replace or rejuvenate your mattress is key to sleep quality. An aging mattress can contribute to poor sleep posture, joint pain, and allergies.

  • Check for Visible Wear: Sagging, lumps, or indentations signal the end of a mattress’s life.
  • Consider Sleep Quality: Waking up sore or tired can indicate diminished support.
  • 6–8 Year Lifespan: This is a typical range, though high-quality models may last longer with care.

Routine cleaning, rotating, and using a protector can stretch your mattress’s usability. Learn more about longevity in our article on How Long Do Mattresses Last?. Or check Sleep Advisor’s mattress replacement guide.

Evaluate your mattress annually to decide whether it needs cleaning, rotating, or replacing.

Professional Cleaning Services

If DIY cleaning feels overwhelming or your mattress has deep stains, hiring a professional can be worthwhile. Many offer eco-friendly options too.

  • Deep Cleaning: Professionals use steam or dry cleaning to eliminate dust mites, mold, and tough stains.
  • Convenience: Schedule a visit and let experts handle the rest—perfect for busy lifestyles.
  • Eco-Safe Options: Ask about non-toxic, green cleaning solutions that are safe for kids and pets.

Compare local providers and read reviews. For a detailed breakdown, see our Best Mattress Cleaning Services article. You can also browse Angi’s mattress cleaner listings.

Professional cleaning can revitalize your mattress and extend its life—especially when DIY isn’t enough.

Embracing natural mattress cleaning methods not only promotes a healthier sleep environment but also contributes to eco-friendly living. Regular maintenance, combined with the use of baking soda and vinegar, can keep your bed fresh and inviting.

FAQ

How often should I clean my mattress naturally?
It’s recommended to clean your mattress every six months. Spot cleaning can be done more frequently as needed.
Can I use baking soda and vinegar on all mattress types?
While generally safe, always check the manufacturer’s care instructions, especially for memory foam and latex mattresses.
What if my mattress has a strong odor?
Sprinkling baking soda and letting it sit overnight can help neutralize even strong odors. Ensure good airflow during the process.
Is it necessary to use a mattress protector?
Yes, it significantly reduces wear, prevents stains, and improves hygiene, making your mattress last longer.
When should I consider replacing my mattress?
If you notice sagging, discomfort, or sleep disruption and your mattress is over 8 years old, it may be time to upgrade.

Expert Tips on How to Clean Pissy Mattress – Easy Guide

Clean Pissy Mattress

How to Clean Pissy Mattress: A Step-by-Step Guide

Cleaning a pissy mattress can feel like a daunting task, but with the right methods, it doesn’t have to be. Acting promptly and using household ingredients like baking soda, vinegar, and detergent ensures effective stain and odor removal. This comprehensive guide will walk you through how to clean  pissy mattress—whether dealing with fresh stains, dried ones, or pet accidents—so you can restore freshness and enjoy a good night’s sleep.


Key Takeaways

  • Act quickly to clean pissy mattress to prevent odors and staining.
  • Household ingredients like baking soda, vinegar, and detergent are effective cleaners.
  • Specific techniques are required for fresh urine, dried urine, and pet accidents.
  • Preventive measures, such as mattress protectors, can minimize future messes.

How to Clean Pissy Mattress: 6 Proven Steps

When dealing with a fresh urine stain, acting quickly is essential to prevent odors from setting in. Here is the step-by-step process to clean pissy mattress effectively:

  1. Strip the Bedding
    • Remove all bedding, including sheets, pillowcases, and protectors. This prevents the stain from spreading further.
  2. Blot the Stain
    • Use a clean, dry cloth or paper towels to gently blot the stain. Avoid rubbing, as it can push the urine deeper into the mattress fibers.
  3. Prepare a Cleaning Solution
    • Mix equal parts water, white vinegar, and laundry detergent. Transfer the solution to a spray bottle for easy application.
  4. Spray and Soak
    • Spray the solution generously over the stain. Allow it to sit for 10-15 minutes to break down the urine and neutralize odors.
  5. Apply Baking Soda
    • Cover the treated area with baking soda. This natural deodorizer helps absorb any remaining moisture and odors.
  6. Vacuum Thoroughly
    • After allowing the baking soda to sit for several hours (or overnight), use a vacuum cleaner with a brush attachment to remove the powder and any lingering particles.

Quick Tip: To keep your bedding and mattress in pristine condition, visit Choosing the Right Bedding: Mattress and Hygiene.


How to Remove Dried Urine Stains from a Pissy Mattress

If the stain has already dried, don’t worry. Follow these steps to tackle it effectively:

  1. Strip the Mattress
    • Remove all bedding to expose the stained area.
  2. Create a Solution
    • Mix vinegar and water in equal parts, adding a small amount of detergent. This solution breaks down the dried urine while neutralizing odors.
  3. Blot the Stain
    • Dampen a clean cloth with the solution and gently blot the stain. Avoid oversaturating the mattress.
  4. Seal with Plastic Wrap
    • Cover the treated area with plastic wrap to prevent evaporation and allow the solution to penetrate deeper.
  5. Air Dry
    • Leave the plastic wrap on for several hours or overnight. Then, remove it and let the mattress air dry completely.
  6. Repeat if Necessary
    • For stubborn stains, repeat the process as needed until the stain and odor are fully eliminated.

Learn more about removing stains at How to Get Pee Out of a Mattress.

Learn more about maintaining mattress hygiene by visiting Mattress Hygiene and Cleaning.


How to Clean Pet Urine from a Pissy Mattress

Pet accidents require a slightly different approach due to the proteins in pet urine. Here’s how to clean pissy mattress after your furry friends have had an accident:

  1. Blot the Area
    • Remove as much liquid as possible using a clean cloth or paper towels. Avoid rubbing the stain.
  2. Use an Enzyme Cleaner
    • Enzyme cleaners are specifically designed to break down pet urine. Saturate the affected area and let the solution sit for 15-20 minutes.
  3. Blot Excess Moisture
    • After allowing the cleaner to work, blot the area with a dry cloth to remove excess liquid.
  4. Sprinkle Baking Soda
    • Cover the cleaned area with baking soda to neutralize any lingering odor.
  5. Vacuum Thoroughly
    • Once the baking soda has absorbed odors (after a few hours or overnight), vacuum the area completely.

Tip: Consider using pet-friendly repellents around your mattress to prevent future accidents.


How Long Does Urine Take to Dry on a Pissy Mattress?

Urine can dry on a mattress within 2-4 hours depending on:

  • Quantity: Larger spills take longer to dry.
  • Material: Different mattress types absorb liquid at varying rates.
  • Environment: Humidity and temperature affect drying times.

To ensure your pissy mattress dries thoroughly, allow 8-10 hours after cleaning before reusing.


Using Vinegar to Clean Pissy Mattress

Vinegar is a versatile and effective cleaning agent for urine stains. Its acetic acid content helps break down urine while neutralizing odors.

Steps to Use Vinegar:

  1. Mix equal parts vinegar and water in a spray bottle.
  2. Spray the solution over the stain and let it sit for 10-15 minutes.
  3. Blot with a clean cloth until the stain is gone.
  4. Sprinkle baking soda and vacuum once dry.

Alternative Solution: Combine baking soda, hydrogen peroxide, and detergent for tough stains. This mixture can be especially effective for stubborn odors.


Preventive Measures to Avoid a Pissy Mattress

Preventing stains and odors is just as important as cleaning them. Here are some tips to protect your mattress:

  • Use a Waterproof Mattress Protector: Create a barrier to prevent spills from soaking into the mattress.
  • Regular Bathroom Breaks for Pets: Ensure your pets have ample opportunities to relieve themselves outside.
  • Invest in Enzyme Cleaners: Keep these on hand for quick and effective pet stain removal.
  • Apply Pet-Friendly Repellents: These deter pets from urinating on your bed.

Conclusion

Cleaning a pissy mattress doesn’t have to be overwhelming. By acting quickly and using household ingredients like baking soda and vinegar, you can effectively remove stains and odors. Whether you’re dealing with fresh urine, dried stains, or pet accidents, the step-by-step methods in this guide will help you restore freshness to your mattress.

For long-term protection, invest in a waterproof mattress protector and prioritize regular cleaning. With these tips, you’ll enjoy a clean, comfortable, and odor-free sleeping surface.


FAQ

Q: How can I effectively clean pissy mattress? A: Act quickly by blotting the stain, applying a vinegar-based solution, and using baking soda to absorb odors. Vacuum thoroughly after drying.

Q: What should I do if the urine stain has dried? A: Use a vinegar and detergent solution, blot the area, and allow it to sit under plastic wrap before air drying. Repeat if necessary.

Q: How do I clean pet urine from a pissy mattress? A: Use an enzyme cleaner specifically designed for pet urine. Follow with baking soda to neutralize lingering odors.

Q: Can vinegar remove urine smell from a pissy mattress? A: Yes, vinegar breaks down urine and neutralizes odors effectively. Combine with baking soda for the best results.

Q: How can I prevent urine stains on my pissy mattress? A: Use a waterproof mattress protector and consider applying pet-friendly repellents to deter accidents.


DoFollow Links


Coverlet Bedding Guide: Lightweight Layers for Stylish, Year-Round Comfort

What is a coverlet bedding?

Coverlet Bedding: Lightweight, Stylish, and Cozy Options

Looking for a simple way to refresh your bedroom without heavy layers? Coverlet bedding is a lightweight, stylish, and versatile choice that’s perfect for warmer nights or as a decorative top layer. This guide will help you understand what coverlets are, how they compare to other bedding, and how to choose the perfect one for your sleep needs.

Key Takeaways:

  • Coverlet bedding offers a lightweight, decorative layer perfect for warmer climates or as an accent piece.
  • Coverlets are thinner and less insulating than quilts, duvets, or comforters.
  • They come in diverse materials, textures, and colors to match any bedroom decor.
  • Choosing the right coverlet depends on your sleep needs, climate, and aesthetic style.

What is Coverlet Bedding?

A coverlet is a lightweight, versatile bed covering used as an extra layer or main blanket in warm weather. Unlike quilts or comforters, it’s less bulky, making it ideal for hot sleepers or minimalist bedding styles. Made from cotton, wool, linen, or microfiber, coverlets add visual appeal and are easy to maintain — machine wash on gentle with mild detergent, but avoid high heat when drying.

Want to elevate your bedroom look without sacrificing comfort? Coverlet bedding might be just what you need to create a sleep sanctuary that’s both practical and chic. Learn more about layering techniques in our guide for hot sleepers.

Table: Coverlet vs. Other Types of Bedding

Bedding TypeWarmthConstructionUsage
CoverletLightweightSingle layer of fabricMain blanket or extra layer
QuiltModerate to WarmMultiple layersTop layer of bedding
DuvetWarm to Very WarmRemovable cover + fillWith or without a cover
ComforterWarmOne-piece constructionMain blanket

Coverlet Bedding vs. Other Types of Bedding

Coverlets: Lightweight and Versatile

Coverlet bedding is thin and single-layered, ideal for adding light warmth and decorative style. Available in a range of patterns and colors, coverlets work beautifully in warmer climates or layered under heavier blankets.

Coverlet bedding example 3

Quilts: Warm and Cozy

Quilts offer more warmth with their stitched multi-layer design, often filled with cotton or synthetic fibers. They’re excellent for colder weather or anyone who loves a cozy, tucked-in feel.

Duvets and Comforters: Heavy-Duty Warmth

Duvets, with removable covers and thick down or synthetic fill, provide excellent insulation. Comforters offer similar warmth but come as a one-piece, making both better for cold sleepers or winter bedding. Curious how a duvet compares? Visit our Ultimate Guide to Duvets.

Coverlet bedding example 4

Table: Coverlet Washing Instructions

MaterialWashing MethodDrying
CottonMachine wash coldLow heat tumble dry
WoolHand wash or dry cleanAir dry
LinenMachine wash lukewarmLow heat or air dry
MicrofiberMachine wash coldLow heat tumble dry

See our bedding care guide for fabric-specific tips.

Are You a Good Match for Coverlet Bedding?

If you’re a hot sleeper, live in a warm climate, or love adding texture and color to your bed, coverlet bedding is a perfect fit. Want extra warmth? Simply layer it under a duvet or quilt.

Coverlet bedding lifestyle image

Recommended Read: What is a Coverlet? – Sleep Foundation

How to Choose the Perfect Coverlet Size

For decor inspiration, check our best bedroom decor tips.

Measure your mattress carefully — length, width, and depth — to ensure your coverlet offers the right drape and coverage. Here’s a handy guide:

Coverlet SizeMattress Dimensions
Twin39″ x 75″
Full54″ x 75″
Queen60″ x 80″
King76″ x 80″

FAQ

Can I use a coverlet as my main blanket?
Yes, especially in warmer climates or seasons. Coverlets provide lightweight coverage and can serve as the primary blanket during spring or summer.
Is coverlet bedding machine-washable?
Most coverlets are machine-washable on a gentle cycle. Always check the care label, especially for materials like wool or linen, which may require special handling.
Can I layer a coverlet with other bedding?
Absolutely! Coverlets are ideal for layering with duvets, quilts, or blankets. They add style and a touch of warmth without bulk.
What size coverlet should I buy?
Match your coverlet to your mattress size—Twin, Full, Queen, or King—for proper drape and coverage. Refer to the sizing table above for detailed measurements.
Do coverlets go under or over duvets?
Coverlets are typically used on top of sheets and can go either over or under a duvet depending on your layering preference and style.

Conclusion

Choosing the right coverlet bedding solution depends on your comfort needs, climate, and style. Whether you want a breathable top layer or a decorative statement, coverlets offer year-round versatility and easy care. They work wonderfully for layering, refreshing your bedroom’s look, or adding a cozy, textured touch without overwhelming the space.

Ready to explore even more cozy bedding options? Visit our Ultimate Guide to Duvets or check out expert tips from Designer Living’s Coverlet Buying Guide!

Source Links

Enhance Your Space with Mirrors and Wall Decor Today!

Mirrors and Wall Decor

Creative Mirrors and Wall Decor Ideas to Enhance Your Space

Mirrors and Wall Decor


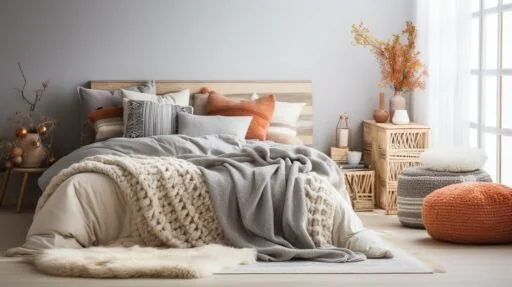
Mirrors and wall decor have the transformative power to enhance any living space. Adding these decorative elements can breathe life into a room and make it uniquely yours. Discover the endless possibilities and creative ideas to elevate your home decor with mirrors and wall decor. With a wide range of options available, you can find the perfect pieces to suit your style and preferences. Let’s explore the numerous ways in which mirrors and wall decor can enhance every room in your home.

Key Takeaways:

  • Mirrors and wall decor can transform and enhance any living space.
  • They add a unique touch and personalization to your home decor.
  • There are countless creative ideas and options available to suit your style.
  • Mirrors and wall decor can breathe life into a room and make it more inviting.
  • Explore the various ways to incorporate mirrors and wall decor in every room of your home.

Mirrors as Decorative Elements that Bring Function and Beauty

Mirrors are not just practical objects for checking your appearance; they also have the power to enhance the beauty and functionality of a room. Their decorative appeal goes beyond aesthetics, as they can lighten and brighten any space, creating a more inviting and open atmosphere. By strategically placing mirrors in a room, you can also create the illusion of a larger space, making it appear more spacious and airy.

One of the key functions of mirrors is their ability to mimic architecture. They can be used to reflect and amplify architectural details, making the room feel more grand and sophisticated. Additionally, mirrors can be strategically positioned to fake a view of the outdoors, bringing a sense of nature and tranquility inside. This is particularly useful in urban areas where natural scenery may be limited.

When it comes to incorporating mirrors into your home decor, the possibilities are endless. You can choose from a variety of shapes, sizes, and styles to suit your personal taste and the overall design of your space. Whether you opt for a statement mirror that becomes the focal point of the room or use multiple mirrors to create an interesting gallery wall, mirrors can truly transform the look and feel of any space in your home.

“Mirrors are not just practical objects for checking your appearance; they also have the power to enhance the beauty and functionality of a room.”

Using Mirrors to Lighten and Brighten

One of the primary functions of mirrors in home decor is their ability to lighten and brighten a space. Mirrors reflect natural and artificial light, spreading it across the room and creating a more luminous atmosphere. This is especially useful in rooms with limited natural light or in spaces that feel dark and closed off.

By strategically placing mirrors near windows or opposite light sources, you can maximize the amount of light in the room. This not only creates a more welcoming environment but also makes the space appear larger and more open. Mirrors can also be used to bounce light around corners or into alcoves, effectively brightening up every corner of the room.

In addition to their practical function, mirrors also have a decorative appeal when used to lighten and brighten a room. They add a touch of elegance and style, making the space feel more sophisticated and visually pleasing. Whether you choose a large statement mirror or a collection of smaller mirrors, incorporating mirrors into your home decor is a surefire way to enhance the overall look and feel of any room.

Benefits of Mirrors as Decorative ElementsExamples
Lighten and brighten any spacePlacing a large mirror opposite a window in a small living room to reflect natural light and create the illusion of a larger space.
Increase the sense of spaceUsing a floor-to-ceiling mirror in a narrow hallway to visually widen the space.
Mimic architectural detailsPositioning a mirror to reflect a beautiful chandelier and create a sense of grandeur in a dining room.
Create the illusion of a view of the outdoorsPlacing a mirror on a wall opposite a window with scenic views to bring a sense of nature and tranquility inside.

The combination of their decorative appeal and functional benefits makes mirrors an essential element in home decor. By strategically incorporating mirrors into your space, you can enhance the beauty and functionality of every room, creating a more inviting, visually appealing, and spacious environment.

mirrored wall decor

Mirror Decor IdeasDescription
Vintage MirrorsCreate a unique gallery wall using vintage mirrors of different shapes and sizes.
Statement WallpaperUse a large mirror to reflect and enhance bold statement wallpaper in the room.
Art Deco-Inspired MirrorAdd glamour and sophistication with an Art Deco-inspired mirror as a focal point.
Mirror Wall InstallationCreate a stunning visual effect by covering a wall with mirrors of various sizes and shapes.
Mirror and Design Element CombinationCombine mirrors with other design elements to create unique and captivating displays.

Choosing the Ideal Mirror for Your Wall Decor

When it comes to selecting the ideal mirror for your wall decor, several factors should be taken into consideration. The mirror’s form, size, and design style play an important role in determining how well it will complement your overall decor scheme. Whether you have a small apartment or a spacious home, there are mirror options that can enhance your space effectively.

If you’re going for a timeless and elegant look, consider opting for Art Deco-style mirrors. These mirrors have a luxurious appeal that can elevate the aesthetic of any room. On the other hand, if you prefer a more retro and classic vibe, Mid-Century-style mirrors are a great choice. These mirrors often feature sleek lines and unique designs that can be paired with iconic furniture pieces.

When it comes to the shape of the mirror, round wall mirrors are commonly used in bathrooms, washbasins, and bedrooms. They add a soft and organic touch to the space. On the other hand, rectangular wall mirrors have a more traditional and minimalist appeal. They are versatile and can be used in various rooms throughout the home.

If you’re looking to add a bold statement to your wall decor, consider abstract wall mirrors. These mirrors come in a variety of shapes and designs, allowing you to express your personal style and add authenticity to your space. Whether you choose small, medium, or full-size mirrors, each one serves its purpose and can enhance the overall aesthetic of your wall decor.

Mirror TypeDesign Style
Round Wall MirrorsSoft and Organic
Rectangular Wall MirrorsTraditional and Minimalist
Abstract Wall MirrorsBold and Unique

By considering the mirror’s form, size, and design style, you can choose the perfect mirror to enhance your wall decor and create a visually appealing and cohesive space.

Practical Tips for Decorating with Wall Mirrors

Decorating with wall mirrors can add a touch of elegance and sophistication to any space in your home. Whether you’re looking to create the illusion of more space, add depth and dimension, or simply enhance the overall aesthetic, here are some practical tips to help you decorate with wall mirrors:

  1. Treat mirrors as pieces of art: Mirrors can be beautiful decorative elements in their own right. Choose mirrors with interesting shapes, frames, or designs that complement your style and the overall decor of the room.
  2. Consider the design era: Mirrors come in various design styles, from antique to modern. Consider the design era of your space and select mirrors that align with the overall style. For example, an Art Deco mirror can add a touch of glamour and elegance to a vintage-inspired room.
  3. Use mirrors as focal points: Position mirrors strategically to create focal points in the room. Place a large mirror above a fireplace or lean a statement mirror against a wall to draw attention and add visual interest.
  4. Opt for large mirrors: Large mirrors can not only reflect more light and create the illusion of more space, but they can also add depth and dimension to a room. Consider placing a large mirror on a feature wall or opposite a window to maximize its impact.
  5. Pay attention to height and positioning: The height and positioning of mirrors are crucial for achieving the desired effect. Hang mirrors at eye level or slightly higher to create balance and visual harmony. Avoid placing mirrors too high or too low, as they may seem out of place.
  6. Consider proportion in mirror sizes: When choosing multiple mirrors for a space, consider the proportion and size of each mirror in relation to the overall room size. In larger rooms, opt for larger mirrors, while smaller mirrors work well in smaller spaces or as part of a gallery wall.
  7. Complement mirror decor with furniture: To create a cohesive and visually appealing look, consider the placement of furniture in relation to your mirror decor. Position mirrors above console tables, dressers, or mantels to enhance the overall aesthetic and create a complete design composition.

By following these practical tips, you can effectively decorate with wall mirrors and transform your space into a beautifully curated haven.

Practical Tips for Decorating with Wall Mirrors

Table: Mirror Styles and Design Eras

Mirror StyleDesign EraDescription
Antique18th and 19th centuriesOrnate frames, intricate carvings, and vintage charm
Art Deco1920s and 1930sGeometric shapes, sleek lines, and luxurious materials
Mid-Century Modern1940s to 1960sClean lines, organic forms, and minimalist design
ContemporaryPresent daySleek, minimalist frames or bold, unconventional designs

Using Mirrors for Various Rooms in Your Home

Mirrors can be strategically used in different rooms throughout your home, adding both functionality and aesthetic appeal. Here are some practical tips on how to incorporate mirrors in specific areas:

Mirrors for Entrance Halls:

In entrance halls, mirrors can create a lasting impression on guests and provide a sense of comfort when returning home. Placing a mirror above a console table or closer to the floor can create an incredible effect. A well-lit and prominent mirror in the entrance hall can enhance the overall ambiance of your home.

Mirrors for Corridors:

Corridors often benefit from mirrors by making small and narrow spaces appear larger. Horizontal models with decorative accents can work well in corridors, adding a touch of style and elegance.

Mirrors in Living Rooms:

In living rooms, mirrors can be placed strategically to enhance the overall design and layout. They can be used to create the illusion of a window, positioned above fireplaces, or placed alongside stylish cabinets. Mirrors in living rooms can add depth and dimension to the space, making it feel more expansive and inviting.

Mirrors in Bathrooms:

Bathrooms can benefit from mirrors by reflecting natural light and bringing coziness to small or dark spaces. Multiple mirrors can be used to create a glamorous and visually appealing look. Mirrors in bathrooms not only serve a functional purpose but also contribute to the overall aesthetic of the room.

Mirrors in Dining Rooms:

Dining rooms can be enhanced with the addition of mirrors, adding a pop of luxury and brightening up the space. Mirrors can be painted to create stunning frames that complete the overall decor of the room. Choosing the right mirror for your dining room can create a visually appealing and inviting atmosphere for you and your guests.

By strategically using mirrors in different rooms, you can transform your home into a more visually appealing and functional space. Mirrors not only serve as decorative elements but also bring practical benefits such as creating the illusion of space and reflecting natural light. Embrace the power of mirrors to enhance the ambiance and style of your home.

The Benefits of Mirrored Wall Decor

Mirrored wall decor offers a multitude of benefits for your home. One of the primary advantages is the reflection of light. Mirrors have the unique ability to bounce light around a space, brightening it up and creating a more open and inviting atmosphere. This can be particularly beneficial in rooms that lack natural light or feel small and cramped. By strategically placing mirrors, you can maximize the amount of light in the room and create a sense of spaciousness.

In addition to their light-reflecting properties, mirrored wall decor is also a versatile decorative element. With a wide range of styles and designs available, you can find mirrors that complement your existing decor and enhance the overall aesthetic of your space. Whether you prefer sleek and modern mirrors or ornate and vintage-inspired designs, there are endless style options to choose from. Mirrors can add a touch of elegance, glamour, or even playfulness to any room, allowing you to personalize your space and make a statement.

Another benefit of mirrored wall decor is its ability to boost natural light. If you have a room that receives limited sunlight or lacks windows, strategically placing mirrors can help capture and reflect any available natural light, making the space feel brighter and more vibrant. This is especially beneficial during darker seasons or in rooms that are naturally dimly lit. By harnessing the power of mirrors, you can create a warm and inviting atmosphere in any room of your home.

Benefits of Mirrored Wall Decor
Reflection of light
Creating the illusion of space
Versatile decorative element
Style options
Boosting natural light

With all these benefits, it’s no wonder that mirrored wall decor has become such a popular choice for homeowners. Whether you want to make a small room feel more spacious, add a decorative focal point to a larger space, or simply brighten up a dimly lit area, mirrors are a versatile and effective solution. So why not explore the possibilities of mirrored wall decor and transform your home into a visually stunning and welcoming sanctuary?

How Mirrored Wall Decor Works

Mirrored wall decor works by utilizing the reflective properties of mirrors to enhance the overall aesthetic and functionality of a space. Mirrors have the unique ability to reflect light, which helps brighten up rooms and create a more open and spacious atmosphere. By strategically placing mirrors on walls, you can effectively increase the amount of natural light in a room and make it appear larger than it actually is. The reflection of light also adds depth and dimension to a space, making it more visually interesting and engaging.

In addition to reflecting light, mirrors can also be used to create the illusion of space. By strategically positioning mirrors in areas where they can reflect the room or other decorative elements, you can give the impression of a larger and more expansive area. This is especially useful in smaller rooms or areas with limited natural light. Mirrors can also be used to add depth and dimension to a space by creating visual interest and drawing the eye to specific focal points. By using different types of mirrors, such as those with unique shapes or designs, you can further enhance the visual appeal of your wall decor.

Overall, mirrored wall decor is a versatile and effective way to enhance your home’s aesthetics. Whether you are looking to reflect light, create the illusion of space, or add depth and dimension to a room, mirrors can help you achieve your desired effect. By understanding how mirrored wall decor works and strategically incorporating mirrors into your design scheme, you can transform your living space into a visually stunning and inviting environment.

Using Mirrors to Add Depth and Dimension

One of the key benefits of mirrored wall decor is its ability to add depth and dimension to a space. Mirrors have the unique ability to reflect and amplify the surrounding environment, creating a visually dynamic experience. By strategically placing mirrors in areas where they can reflect other objects or architectural features, you can create the illusion of a larger and more expansive space. This is particularly useful in smaller rooms or areas with limited natural light. By using mirrors to add depth and dimension, you can create a visually engaging and captivating environment that is sure to impress.

Choosing the Right Mirror Wall Decor for Your Home

When it comes to choosing mirror wall decor for your home, there are several important factors to consider. The size and proportions of the mirror should be appropriate for the wall space available to ensure it fits seamlessly within the room. You don’t want a mirror that is too small and gets lost in the surroundings, nor do you want one that is too large and overwhelms the space. It’s all about finding the right balance.

Another crucial factor to keep in mind is the lighting conditions in the room. Consider the natural light sources and the placement of artificial lighting fixtures. Mirrors have the ability to reflect light and enhance the overall brightness of a space, so it’s important to select a mirror that will make the most of the available light.

In addition to size and lighting, it’s essential to choose mirrors that complement the overall decor of the room. Consider the colors, textures, and styles of your existing furniture and accessories, and select mirrors that will harmonize with these elements. Whether you’re going for a sleek and modern look or a more traditional aesthetic, there are mirrors available in various designs and finishes to suit your taste.

Lastly, consider the specific area where you plan to hang the mirror. Different rooms have different functions and design considerations. For example, a bathroom mirror may need to be fog-resistant and durable, while a hallway mirror could benefit from decorative accents that add visual interest. By choosing mirrors appropriate for the area, you can ensure that they not only enhance the overall decor but also serve their practical purpose.

Factors to Consider when Choosing Mirror Wall Decor
Size and Proportions
Lighting Conditions
Selecting Mirrors that Complement the Decor
Using Mirrors Appropriate for the Area

Conclusion

Enhancing your home decor with mirrors and wall decor is a creative and transformative way to add style and personality to every room. These versatile decorative elements offer endless possibilities to create the illusion of space and brighten up your living space. Mirrors can be strategically placed to reflect light and make your rooms appear larger and more open. They can also be used to mimic architectural elements and fake a view of the outdoors, bringing a touch of nature and tranquility inside.

By incorporating mirrors and wall decor, you can elevate the overall aesthetic of your home. Whether you choose vintage mirrors, unique-shaped mirrors, or minimalist designs, there are countless creative ideas to explore. From entrance halls to living rooms, bathrooms to dining rooms, mirrors can be used in various rooms to enhance their design and create a visually appealing atmosphere.

So why wait? Take advantage of the endless possibilities offered by mirrors and wall decor. Enhance your home decor today and let your creativity shine through. With their ability to create the illusion of space, add style and personality, mirrors and wall decor are the perfect addition to any home.

FAQ

What are the benefits of using mirrors and wall decor in home decor?

Mirrors and wall decor have the transformative power to enhance any living space. They can lighten and brighten a room, increase its decorative appeal, mimic architecture, create the illusion of a larger space, and even fake a view of the outdoors. Wall decor, on the other hand, adds personality and style to your home.

How can mirrors be incorporated into home decor?

Mirrors can be used strategically in various ways. They can be used as a focal point, placed above furniture or closer to the floor, and even combined with other design elements. Mirrors can be used in entrance halls, corridors, living rooms, bathrooms, and dining rooms to enhance the overall design and create a visually appealing space.

What factors should be considered when choosing a mirror for wall decor?

When choosing a mirror for your wall decor, you should consider the form, size, and design style of the mirror. The mirror should complement your overall decor scheme and be appropriate for the available wall space. Factors such as lighting conditions and the colors and textures of the rest of the decor should also be taken into account.

How should mirrors be fixed to the wall?

Mirrors should be fixed using quality materials that can support their weight. It’s also important to consider the height and positioning of the mirrors to ensure they enhance the overall aesthetic of the room. Proportion is key, as a small mirror may look out of place in a large room, and a large mirror can overwhelm a small piece of furniture.

How can mirrored wall decor create the illusion of space?

Mirrored wall decor works by reflecting light and creating a sense of openness. Mirrors can make a room appear larger and brighter by reflecting light and creating the illusion of more space. They can also add depth and dimension to a space, making it more visually interesting.

What are the benefits of mirrored wall decor?

Mirrored wall decor has several benefits for your home. It can reflect light, brighten up spaces, create the illusion of a larger room, and boost natural light. Mirrored wall decor is also versatile in terms of style options, allowing you to find the perfect mirror that fits your personal taste and complements your overall decor.

How do I choose the right mirror wall decor for my home?

When choosing mirror wall decor, you should consider factors such as size and proportions to ensure they are appropriate for the available wall space. Lighting conditions should also be taken into account, as well as selecting mirrors that complement the colors and textures of the rest of the decor. Using mirrors that are appropriate for the area and fit within the overall design scheme will ensure a perfect fit for your home.

Source Links